Table of Contents
Ever looked at a stylish bob and wondered how to get that effortlessly chic ponytail look? You're not alone! The "3 ponytail bob haircut" is not just a trend; it's a versatile technique that's taking the hair world by storm. Forget complicated salon visits; this method lets you achieve a perfectly layered bob right at home, using a simple trick involving three ponytails. This article will guide you through exactly how to nail this look. First, we'll break down the core technique of creating a layered bob with, you guessed it, three ponytails. Then, we’ll explore all the hottest ways to style this cut, from sleek and sophisticated to playfully textured, ensuring you're always on point. Finally, we'll equip you with all the essential tips and tricks to keep your 3 ponytail bob haircut looking fresh and fantastic. So, ready to transform your hair game? Let's jump in and get snipping!
Mastering the 3 Ponytail Bob Haircut Technique
Mastering the 3 Ponytail Bob Haircut Technique
The Basic 3 Ponytail Setup
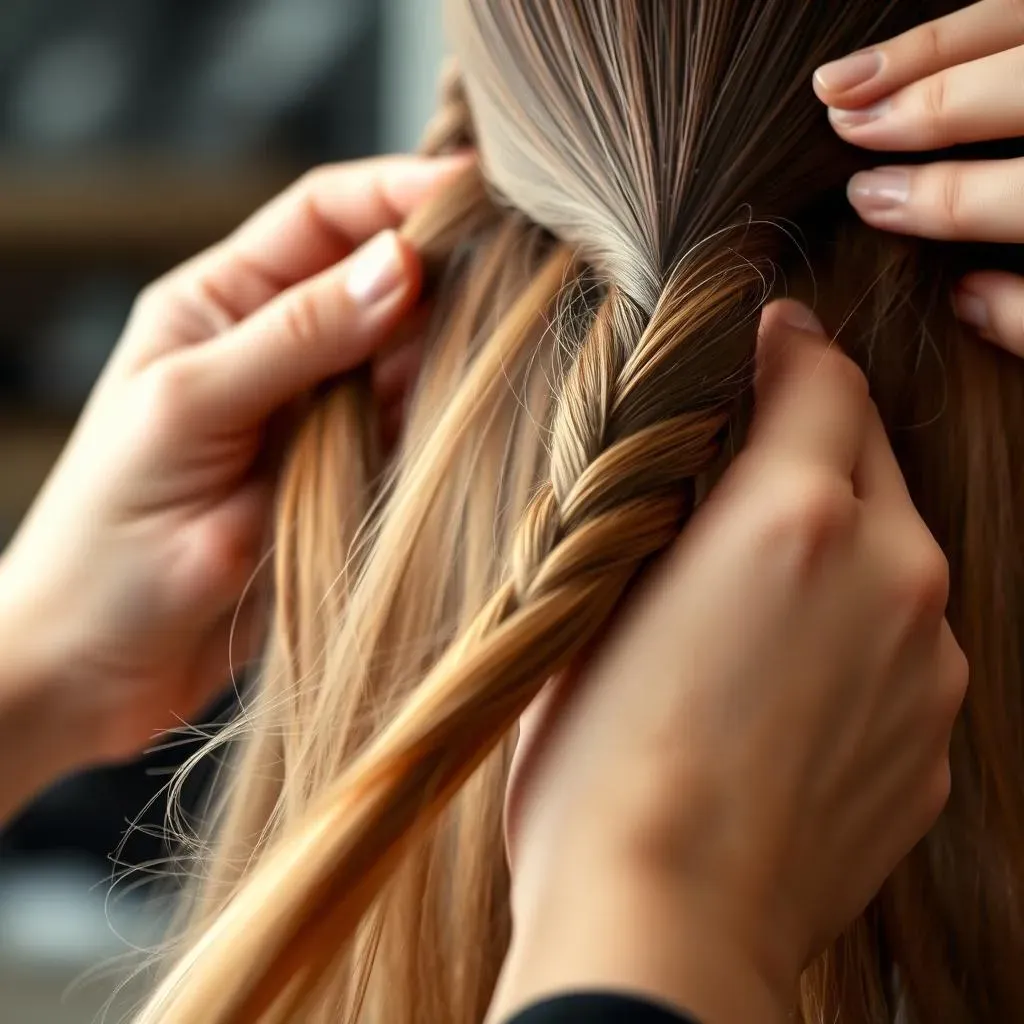
so you're thinking about a DIY bob, right? The magic starts with sectioning your hair into three ponytails. Yes, three! Imagine you're creating a mohawk, but instead of spiky, it's going to be chic. Start by parting your hair right down the middle. Then, create a ponytail at the very top of your head, like you're about to do a high pony, but don't pull all the hair through. Next, gather the hair on each side of your head, directly above your ears, and secure them into two more ponytails. These three ponytails are your guide – they're going to help you get that gorgeous layered bob.
It’s super important to make sure your ponytails are even and positioned correctly. Think of it like building a house; the foundation needs to be solid. If your ponytails are wonky, your bob will be too. Use a mirror to check the placement. You want the top pony to be centered and the side ponies to be symmetrical. It doesn't need to be perfect, but the closer you get, the better your haircut will look. This initial step is crucial and makes all the difference.
The Cutting Process
Now for the fun part, the actual cutting! Grab your scissors and get ready. Start with the top ponytail. Pull the ponytail away from your head, and decide how much length you want to chop off. Remember, you can always cut more, but you can't glue it back on! Once you've made your cut, move on to the side ponytails. You’ll want to cut these at the same length as your top ponytail. The key here is to make sure you are cutting straight across. This is what creates the layered bob effect.
Once you've cut all three ponytails, remove the elastics and shake your hair out. This is where you can see the magic happen. You’ll notice the layers blending together to create a natural-looking bob. If you see any uneven bits, now is the time to fix them. You can go back and refine the edges, but generally, that's all there is to it. It's like a magic trick, but you're the magician.
Step | Action | Tips |
|---|---|---|
1 | Section hair into three ponytails | Ensure ponytails are even and symmetrical |
2 | Cut the top ponytail | Cut straight across, start with less length |
3 | Cut the side ponytails | Match the length of the top ponytail |
4 | Remove elastics and blend | Check for uneven bits and refine |
Fine-Tuning and Finishing Touches
After the initial cut, it's all about the details. This is the time to check for any rogue strands that didn't quite make the cut. Look in the mirror, tilt your head, and see if anything looks out of place. Use your scissors to carefully trim any uneven ends. If you're feeling brave, you can add some texture by point-cutting into the ends. This means holding your scissors vertically and making small snips into the ends, which will soften the overall look.
Finally, style your new bob as you normally would. Whether you prefer it straight, wavy, or with some curl, you can now rock your fresh, self-styled bob. The best part about this method is that it’s forgiving. Even if it’s not perfect, it’ll still look like a really good bob because of the layers. Plus, you can always tweak it as you go. So, embrace the 3 ponytail bob haircut, and enjoy your new look!.
Latest Trends in 3 Ponytail Bob Hairstyles
Latest Trends in 3 Ponytail Bob Hairstyles
Textured and Tousled Bobs
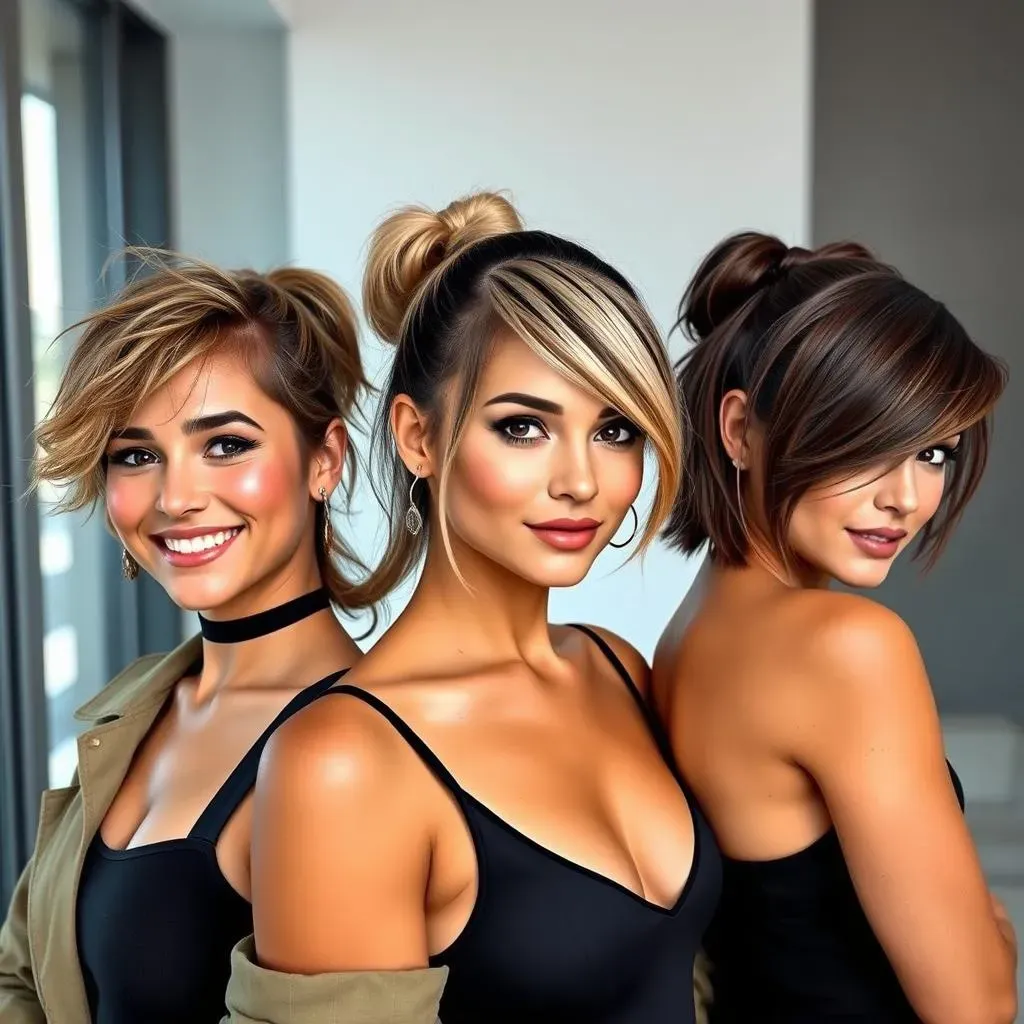
Alright, so you've nailed the basic 3 ponytail cut – now let’s talk trends! Right now, it’s all about texture. Think messy, effortless, and totally cool. The days of perfectly sleek bobs are taking a backseat to bobs with a bit of a 'lived-in' feel. Imagine you've just come from a beach day, even if you've been stuck inside. This look is super easy to achieve, especially with a 3 ponytail cut, because the layers naturally add volume and movement. You can use some texturizing spray or a bit of sea salt spray to enhance that messy, tousled look. Don't be afraid to embrace the frizz; it’s all part of the charm!
This textured trend is fantastic because it’s so low maintenance. You can literally wake up, shake your hair out, add a bit of product, and you’re good to go. It’s perfect for those of us who don’t want to spend hours in front of the mirror each morning. Plus, the texture adds a playful vibe to the classic bob, making it feel modern and fresh. It's like the bob got a cool upgrade. You know, like when your favorite band releases a remix and it’s even better than the original.
The Asymmetrical and Angled Bob
Another huge trend is the asymmetrical bob. This is where one side of your bob is longer than the other, and it’s a total style statement. The 3 ponytail method works great for this, you just need to be a little more intentional with your cutting. When you're cutting the side ponytails, cut one slightly shorter than the other. It’s all about that intentional unevenness. It might feel a bit scary at first, but trust me, it looks amazing and brings a whole new dimension to your bob. It adds a touch of edginess and makes your look stand out.
And then there's the angled bob, which is a cousin of the asymmetrical cut, but instead of being uneven, it's all about the angle. The hair is shorter in the back and gradually gets longer towards the front. This gives a really nice, sleek silhouette and is super flattering for most face shapes. It’s a fantastic way to add some drama to your look without going too crazy. Both the asymmetrical and angled bobs are stylish, bold, and can be tailored to your personal style, making them a perfect choice if you want something a bit more adventurous than the classic bob.
Trend | Description | How to Achieve |
|---|---|---|
Textured Bob | Messy, effortless, and voluminous | Use texturizing or sea salt spray |
Asymmetrical Bob | One side longer than the other | Cut side ponytails unevenly |
Angled Bob | Shorter in the back, longer in the front | Cut with a gradual angle |
3 Ponytail Bob Haircut: Tips and Tricks
3 Ponytail Bob Haircut: Tips and Tricks
Essential Tools and Preparation
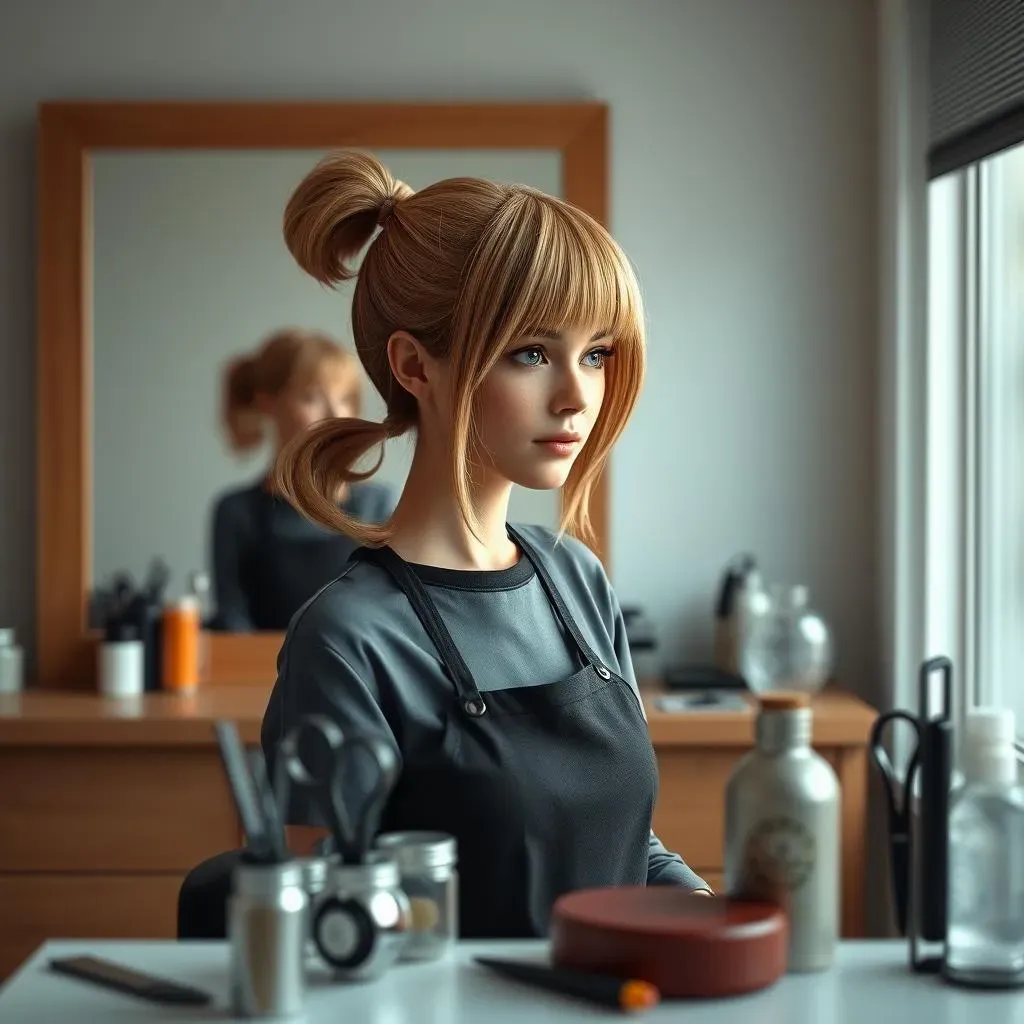
so you're ready to rock this 3 ponytail bob haircut? Awesome! Before you even think about grabbing those scissors, let's talk tools. You'll need a good pair of sharp hair scissors – kitchen scissors are a big no-no unless you’re going for a really rugged look. Invest in some decent hair shears; they'll make all the difference. You’ll also need some hair elastics, a comb for precise parting, and a mirror, ideally one where you can see the back of your head (a handheld one works great). Proper preparation is key. Make sure your hair is clean and dry; wet hair can be tricky to cut evenly. Brush it out, removing all tangles. This way, your cuts will be clean and you'll get a much better result. Think of it like baking; you wouldn't start without measuring ingredients first, right?
Also, consider where you’re doing this. The bathroom is great because it’s easy to clean up, and the lighting is usually decent. Lay down some newspaper or a towel to catch the hair, so you don’t have tiny hairs all over your floor. I once tried cutting my hair in my bedroom, and it took me days to get rid of all the stray hairs. It was like a tiny hair invasion, not fun! Before you start, take a deep breath, relax, and remember it's just hair. If you mess up, it'll grow back, it always does. But with the right tools and preparation, you'll totally nail this!
Dealing with Different Hair Types
Now, let's get real – not everyone has the same hair texture. If you've got super thick hair, you might find the 3 ponytail method a bit more challenging. It might be a good idea to section your hair into more ponytails, maybe four or five, to make it more manageable. This will prevent your hair from bunching up and help you achieve a more even cut. On the flip side, if you have very fine hair, you might not get as much volume as you would with thicker hair. Don't worry, there are ways around it. You can add some volumizing mousse or spray before cutting to give your hair a little extra oomph. Also, when you’re cutting, try not to pull your hair too tight. The tension can affect the final length. Let the hair fall naturally and you’ll get a better result.
Curly hair? Oh, that’s a whole different ball game! If you've got curly hair, you'll want to cut it when it’s dry. This is because curls spring up when they dry, and you don't want to end up with a bob that’s way shorter than you intended. Cut your curls little by little, and don’t worry if it’s not perfectly even. Curly hair is all about embracing the natural texture, so a bit of unevenness can actually add to its charm. The key is to work with your hair's natural tendencies, not against them. Remember, you're not trying to tame your curls, you're just shaping them. So, whether you have straight, thick, fine, or curly hair, the 3 ponytail method can work for you. You just need to make a few adjustments to your technique.
Hair Type | Tips |
|---|---|
Thick Hair | Use more ponytails for better control |
Fine Hair | Add volumizing product, avoid tight tension |
Curly Hair | Cut dry, work with natural texture |
Maintenance and Styling Tips
So, you’ve got your amazing 3 ponytail bob, now what? Maintenance is key to keeping it looking fresh. Regular trims are a must, even if you're doing them yourself. Aim for a trim every 4-6 weeks to prevent split ends and maintain the shape. If you're not confident in trimming your own bob, a quick visit to your stylist will do the trick. When it comes to styling, the sky's the limit. The great thing about the 3 ponytail cut is that it’s super versatile. You can wear it sleek and straight, wavy and tousled, or even add some curls for a more glamorous look. Experiment with different products to see what works best for your hair type. A little bit of hair wax can add definition, while a shine serum can make your hair look glossy and healthy. The 3 ponytail bob is your canvas, so feel free to get creative.
And don’t forget about accessories! Headbands, clips, and even scarves can transform your bob in seconds. A sleek headband can make your bob look polished, while a fun clip can add a playful touch. Don’t be afraid to try new things and find what makes you feel confident and fabulous. This whole process should be fun, not stressful. So, take some pictures, try different looks, and embrace your newly styled bob. Remember, the best accessory you can wear is confidence, so rock that 3 ponytail bob like the star that you are!
“The best way to predict the future is to create it.” - Abraham Lincoln
Wrapping Up Your 3 Ponytail Bob Haircut Journey
So, there you have it! The 3 ponytail bob haircut is more than just a snip; it's a gateway to a versatile and stylish look that you can achieve right at home. From mastering the basic technique to exploring the latest trends and tricks, you're now equipped to rock this cut with confidence. Whether you're aiming for a sleek, professional vibe or a fun, textured look, this method gives you the freedom to experiment and find what suits you best. Remember, the key is to have fun and embrace the process. So go ahead, grab your scissors, and transform your hair into a stunning 3 ponytail bob! You've got this!