Thinking about a fresh new look but dreading the salon price tag? You're not alone. More and more people are taking matters into their own hands, and that includes mastering the art of the bob haircut yourself. It might sound intimidating, but with the right tools, a little patience, and our comprehensive guide, you can achieve a stylish bob right in your own bathroom. This article is your ultimate resource, breaking down the process into easy-to-follow steps, whether you're aiming for a classic blunt bob, a chic angled bob, or a trendy A-line style. We'll cover everything from gathering your essential tools to mastering advanced cutting techniques. Plus, we'll address common mistakes and provide expert tips on styling and maintaining your new 'do. So, grab your scissors, a comb, and a mirror, and let's dive into the world of DIY bob haircuts. Get ready to unleash your inner stylist and achieve a fabulous new look without breaking the bank!
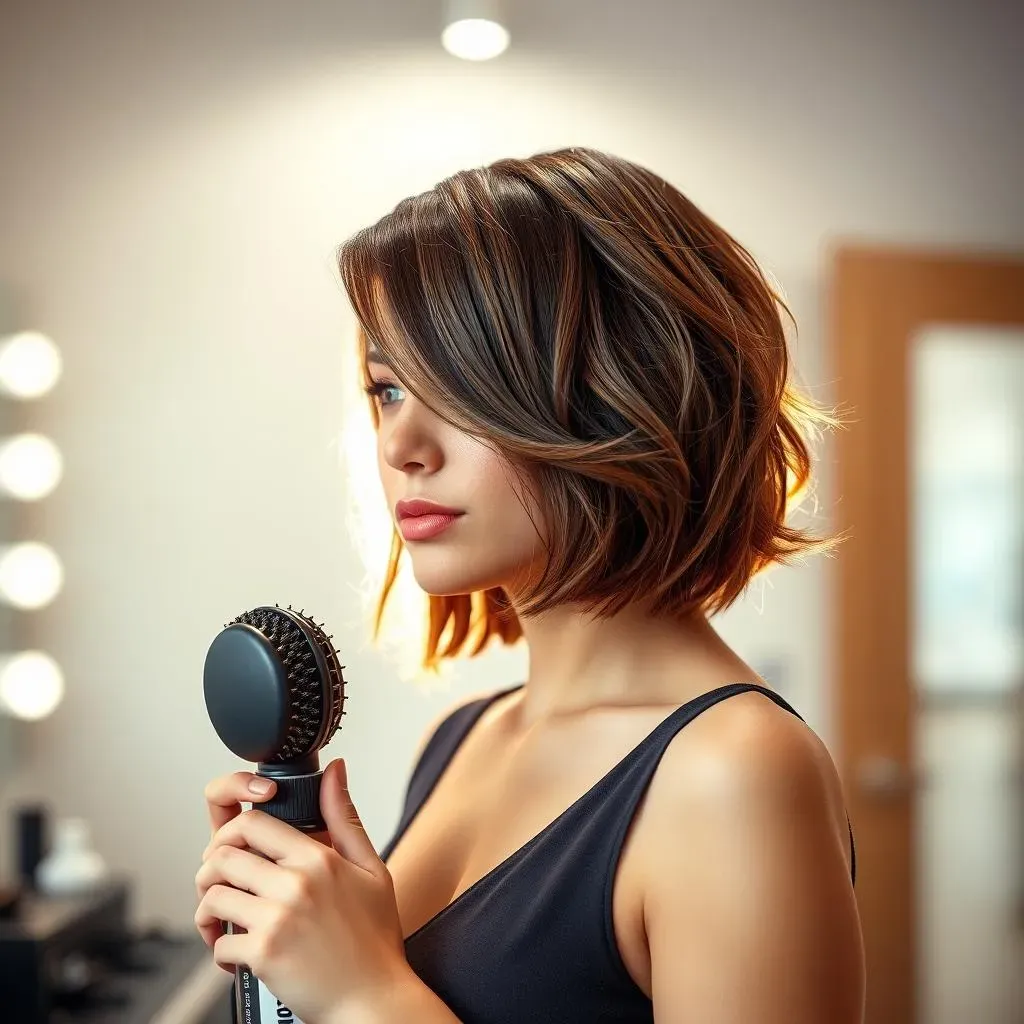
Tools You'll Need for Your DIY Bob Haircut
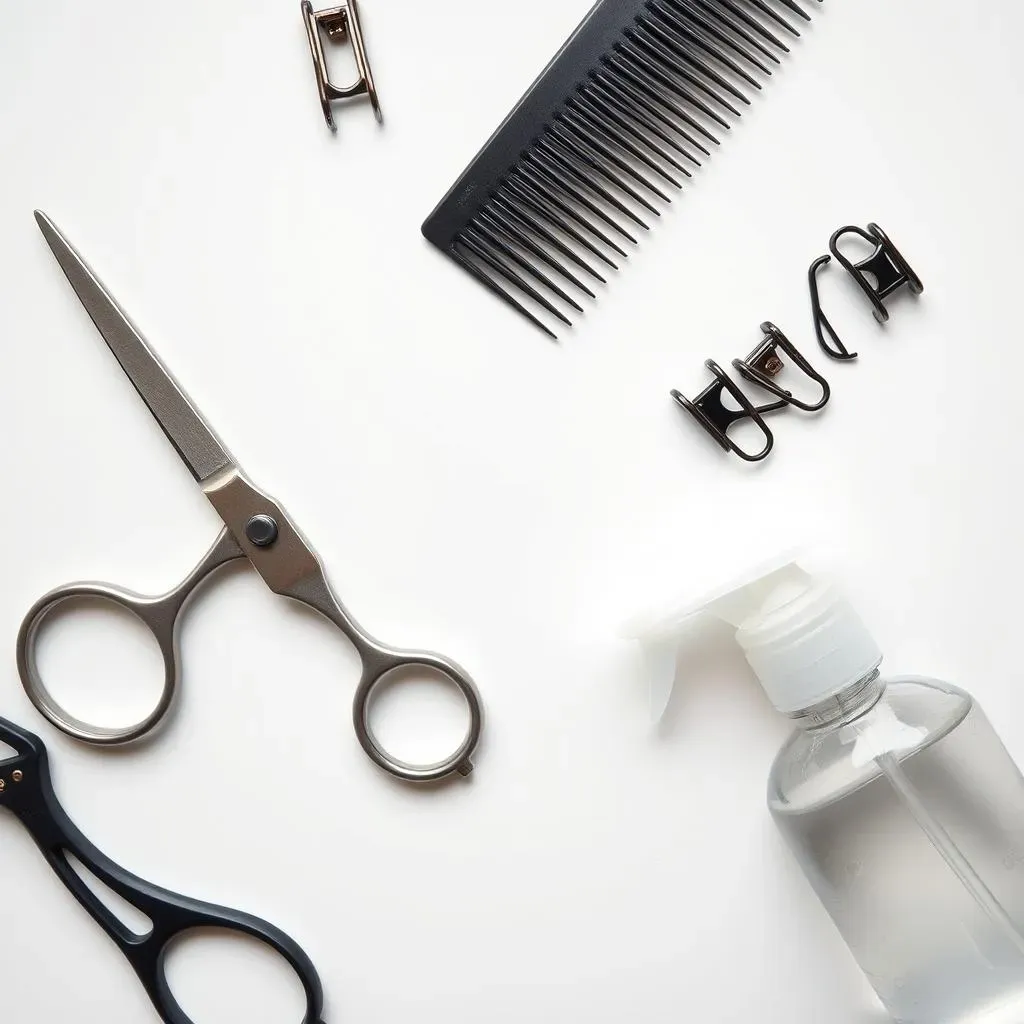
Tools You'll Need for Your DIY Bob Haircut
High-Quality Shears: The Foundation of a Great Cut
Let's be real, using your kitchen scissors for a haircut is a recipe for disaster. Invest in a pair of professional-grade hair shears. These are designed for precision and will give you a clean, even cut, which is crucial for a bob. Look for shears made from Japanese or German stainless steel, as they tend to hold their sharpness longer. Remember, sharp shears are safer than dull ones – they're less likely to slip and cause accidental nicks.
Consider the length and style of the shears as well. Shorter shears (around 5-6 inches) offer more control for detail work, while longer shears (6.5-7 inches) are better for cutting larger sections of hair. If you're new to cutting hair, start with shorter shears for maximum control.
Combs, Clips, and Water Spritzer: Your Hair-Cutting Allies
A good haircut isn't just about the shears; it's about the prep work too. You'll need a fine-tooth comb for sectioning and detangling your hair. Wide-tooth combs are great for distributing conditioner, but for cutting, you want something that can create clean, precise sections.
Hair clips are essential for keeping the sections you're not working on out of the way. Opt for sturdy clips that won't slip or pull on your hair. And don't forget a water spritzer bottle! Keeping your hair slightly damp makes it easier to cut evenly. Just be sure not to soak your hair, as wet hair stretches and can result in a shorter cut than you intended.
Tool | Why You Need It |
|---|---|
Hair Shears | For precise and clean cuts. |
Fine-Tooth Comb | For sectioning and detangling. |
Hair Clips | To keep hair out of the way. |
Water Spritzer | To keep hair damp for even cutting. |
StepbyStep Guide: Cutting a Classic Bob Haircut Yourself
StepbyStep Guide: Cutting a Classic Bob Haircut Yourself
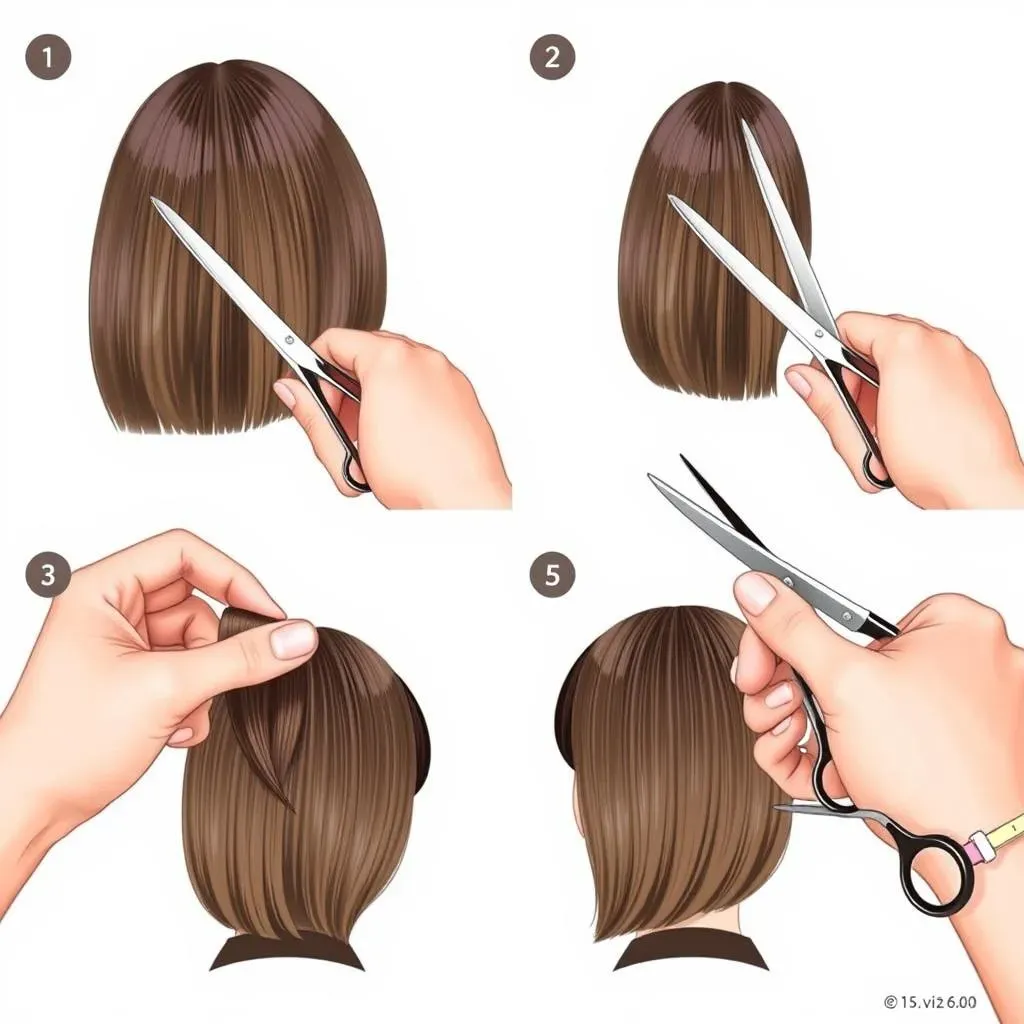
#1: Prep and Sectioning: Laying the Groundwork
Alright, so you're ready to take the plunge and bob haircut yourself? Awesome! First things first, preparation is key. Start with clean, detangled hair. If your hair is naturally straight, let it air dry completely. If it's wavy or curly, blow-dry it smooth using a round brush to minimize any natural texture that might affect the length. Once your hair is dry, use your fine-tooth comb to create a clean center part. This will be your guide for the rest of the cut.
Now for the sectioning. Divide your hair into four equal sections: two in the front and two in the back. Secure each section with a hair clip, making sure the clips are snug but not pulling too tightly. The goal here is to isolate each section so you can focus on cutting it evenly. Double-check your part and sections in the mirror to ensure everything is symmetrical. This is where a little extra effort pays off big time!
#2: The First Cut: Establishing the Length
deep breaths! This is where the magic happens. Start with one of the back sections. Release it from the clip and comb it straight down. Decide how much length you want to remove. Remember, you can always cut more off, but you can't put it back! It's better to err on the side of caution and start with a conservative trim. Using your index and middle fingers as a guide, hold the hair taut and make a clean, horizontal cut across the section. Use your shears to "point cut" into the ends, holding your shears vertically and snipping small pieces. This softens the line and prevents a blunt, harsh look.
Repeat this process on the other back section, making sure to match the length to the first section. A helpful tip is to take a small piece of hair from the first section you cut and use it as a guide when cutting the second section. This ensures both sides are even. Once you've completed the back sections, move on to the front sections, using the same technique. Again, take your time and double-check your work in the mirror. Don't be afraid to pause and assess your progress. Rushing is the enemy of a good DIY haircut.
#3: Refining and Balancing: The Finishing Touches
You've made the initial cut, and you're starting to see your bob take shape! Now it's time for the refining touches. Remove all the clips and comb your hair down. Check for any unevenness or stray hairs. If you spot any, carefully trim them using your shears. Pay close attention to the front sections, as these are the most visible. You can also use point cutting to blend the layers and create a softer, more natural look.
Once you're satisfied with the overall shape and length, it's time to style your new bob! Blow-dry your hair using a round brush to create volume and movement. Or, let it air dry for a more relaxed, textured look. Experiment with different styling products, such as mousse or texturizing spray, to achieve your desired finish. And there you have it – a stylish bob haircut, achieved entirely by yourself! Pat yourself on the back; you've earned it!
Step | Description | Tip |
|---|---|---|
Prep & Section | Clean, dry hair, center part, four sections. | Ensure symmetrical sections for an even cut. |
First Cut | Horizontal cut, point cutting to soften the line. | Start conservatively; you can always cut more. |
Refining | Check for unevenness, blend layers. | Pay close attention to the front sections. |
Advanced Techniques: Angled and ALine Bob Haircut Yourself
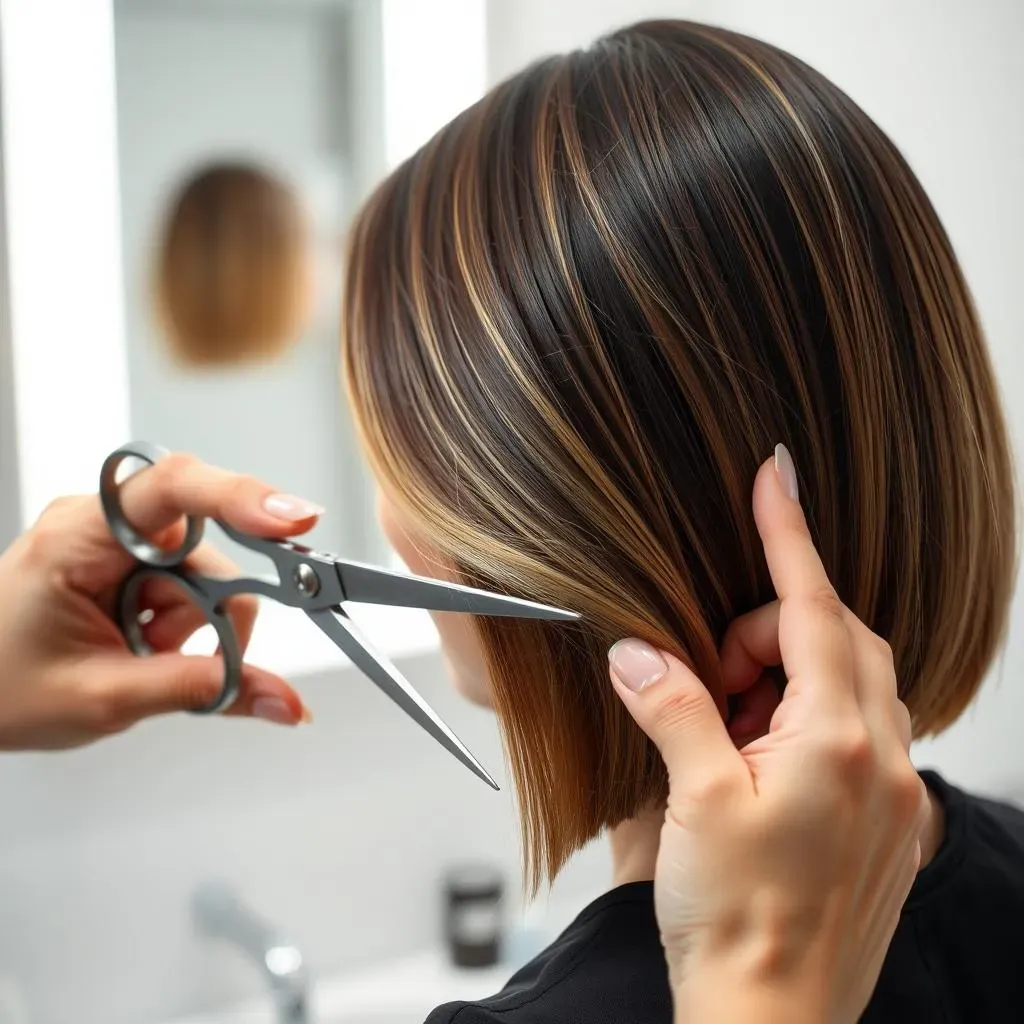
Advanced Techniques: Angled and ALine Bob Haircut Yourself
Angled Bob: The Dramatic Flair
Ready to kick your bob haircut yourself up a notch? The angled bob is where it's at! It's all about creating a steeper angle from the back to the front, giving your hair a more dramatic and edgy look. The key here is precision. After you've established your initial bob length using the classic method, focus on the front sections. Instead of cutting straight across, gradually increase the length as you move towards your face. The amount of angle is totally up to you – a subtle angle is chic and sophisticated, while a more drastic angle screams confidence.
To achieve a perfect angle, use your comb as a guide. Hold it at the desired angle and cut along the comb's edge. Remember to point cut to soften the lines. Regularly check the symmetry in the mirror, paying close attention to how the angle frames your face. You might find it helpful to use two mirrors – one in front and one in back – to get a 360-degree view. This ensures that both sides are even and the angle is consistent. Don't be afraid to make small adjustments until you're completely happy with the result.
A-Line Bob: Subtle and Stylish
If you're looking for something a little more subtle but still want to add some interest to your bob haircut yourself, the A-line bob is a fantastic choice. It's similar to the angled bob, but the angle is much gentler, creating a soft, flowing shape. The A-line bob is super flattering on most face shapes and adds a touch of elegance to any look. The trick to a great A-line bob is to maintain the length in the front while gradually shortening the hair towards the back. This creates a subtle "A" shape that's both stylish and easy to manage.
When cutting an A-line bob, start by establishing the desired length in the back, just like with a classic bob. Then, gradually increase the length as you move towards the front, creating a gentle slope. Avoid creating too much of an angle, as this can result in a more dramatic angled bob. The goal is to achieve a soft, flowing line that complements your facial features. Point cutting is your best friend here, as it helps to blend the layers and create a seamless transition between the back and front sections. Remember, less is more – start with a subtle angle and gradually increase it until you achieve your desired look.
Layering Techniques for Angled and A-Line Bobs
Want to add even more dimension to your angled or A-line bob haircut yourself? Consider incorporating some subtle layering techniques. Layering helps to remove weight from the hair, creating movement and texture. It's especially effective for thicker hair types, as it prevents the bob from looking too bulky or blocky. There are several ways to add layers to a bob, but one of the easiest is to use a technique called "vertical layering." This involves holding sections of hair vertically and point cutting into the ends, creating subtle layers that blend seamlessly with the rest of the hair.
Another option is to use a technique called "slide cutting," which involves sliding your shears down the hair shaft, removing small amounts of hair as you go. This creates a softer, more textured effect. When layering an angled or A-line bob, it's important to focus on the back sections, as this is where the layers will have the most impact. Avoid layering the front sections too much, as this can make the bob look too choppy or uneven. Remember, layering is all about creating subtle movement and texture, so don't overdo it. Start with a few strategically placed layers and gradually add more until you achieve your desired look.
Bob Style | Angle | Layering | Face Shape |
|---|---|---|---|
Angled Bob | Steeper angle from back to front | Optional, but adds movement | Round, square |
A-Line Bob | Gentle slope from back to front | Recommended for thicker hair | Oval, heart |
Troubleshooting Your Bob Haircut Yourself: Common Mistakes and How to Fix Them
Troubleshooting Your Bob Haircut Yourself: Common Mistakes and How to Fix Them
Uneven Length: The Most Common Culprit
So, you've taken the plunge and attempted a bob haircut yourself, but now one side seems longer than the other? Don't panic! This is probably the most frequent issue when cutting your own hair. The good news is it's usually fixable. First, take a deep breath and resist the urge to chop off a huge chunk. Instead, carefully examine your hair in the mirror. Pinpoint exactly where the unevenness is occurring. Is it just a few strands, or is it a significant difference in length? Once you've identified the problem area, use your comb to isolate the section and carefully trim away the excess length. Remember to point cut to blend the layers and avoid creating a harsh line.
A common mistake is to try and fix the unevenness by cutting straight across the longer side. This can actually make the problem worse, as it creates a blunt line that's difficult to blend. Instead, focus on making small, precise cuts. Use your fingers as a guide to ensure you're cutting the hair at the correct angle. And don't be afraid to ask for help! If you're really struggling to even things out, reach out to a friend or family member for a second opinion. Sometimes, a fresh pair of eyes can make all the difference.
Choppy Ends: Taming the Texture
Another common challenge when attempting a bob haircut yourself is ending up with choppy, uneven ends. This can happen if your shears aren't sharp enough, or if you're cutting too quickly. The key to avoiding choppy ends is to use sharp shears and to take your time. Instead of making one big cut, use a technique called "point cutting" to gradually remove small amounts of hair. This creates a softer, more textured look that's less prone to choppiness.
If you've already ended up with choppy ends, don't despair! There are several ways to fix them. One option is to use thinning shears to remove some of the bulk from the ends. Thinning shears have teeth that remove some hairs while leaving others intact, creating a more blended look. Another option is to use a texturizing spray or mousse to add some definition and movement to the hair. This can help to disguise the choppiness and create a more stylish, intentional look. And if all else fails, you can always visit a professional stylist for a trim. They can help to even out the ends and give your bob a more polished finish.
Problem | Solution |
|---|---|
Uneven Length | Identify the problem area, make small, precise cuts, ask for help. |
Choppy Ends | Use sharp shears, point cut, thinning shears, texturizing products. |
Styling and Maintaining Your New Bob Haircut
Styling and Maintaining Your New Bob Haircut
Daily Styling Tips for Your Bob
Alright, you've got your fresh bob haircut yourself, now let's talk about keeping it looking fabulous every day! The beauty of a bob is its versatility; you can rock it sleek and polished or tousled and effortless. For a smooth, classic look, blow-dry your hair using a round brush, focusing on creating volume at the roots and smoothing the ends. A flat iron can help to tame any flyaways and create a super-sleek finish. On the other hand, if you're going for a more relaxed vibe, let your hair air dry and use a texturizing spray or mousse to enhance your natural waves or curls. Scrunch your hair with your fingers to create definition and movement. And don't forget a heat protectant spray! This is a must-have, especially if you're using heat styling tools regularly. It will protect your hair from damage and keep it looking healthy and shiny.
Consider your hair type when choosing styling products. If you have fine hair, opt for lightweight products that won't weigh it down. Volumizing mousses and root-lifting sprays are great for adding body and thickness. If you have thick hair, you can use heavier products, such as creams and serums, to control frizz and add shine. Experiment with different products and techniques until you find what works best for your hair. And don't be afraid to switch things up! The same styling routine can get boring after a while, so try new things and have fun with your bob!
- Sleek & Polished: Blow-dry with a round brush, use a flat iron.
- Tousled & Effortless: Air dry, use texturizing spray or mousse.
- Heat Protection: Always use a heat protectant spray before heat styling.
Maintaining Your Bob's Shape and Health
A great bob haircut yourself requires regular maintenance to keep its shape and health. This means regular trims to remove split ends and maintain the desired length and style. How often you need a trim depends on your hair growth rate and the style of your bob. Generally, every 6-8 weeks is a good rule of thumb. If you're rocking an angled bob or A-line bob, you might need more frequent trims to maintain the sharp angle or subtle slope.
Besides regular trims, it's also important to take care of your hair's overall health. This means using a good quality shampoo and conditioner that's suited to your hair type. Avoid washing your hair too frequently, as this can strip it of its natural oils. When you do wash your hair, use lukewarm water and gently massage the shampoo into your scalp. Rinse thoroughly and follow with conditioner, focusing on the ends of your hair. A weekly deep conditioning treatment can also help to nourish and hydrate your hair, keeping it soft, shiny, and healthy.
Product Recommendations for Bob Haircuts
Choosing the right products can make a huge difference in how your bob haircut yourself looks and feels. Here are a few of my go-to recommendations:
- Volumizing Mousse: Adds body and lift to fine hair.
- Texturizing Spray: Creates effortless waves and definition.
- Heat Protectant Spray: Protects hair from heat damage.
- Shine Serum: Adds shine and controls frizz.
- Dry Shampoo: Refreshes hair between washes.
When choosing products, look for those that are specifically designed for your hair type. If you have oily hair, avoid heavy products that can weigh it down. If you have dry hair, look for moisturizing products that will add hydration and shine. And don't be afraid to experiment with different brands and formulas until you find what works best for you. A little research and experimentation can go a long way in achieving your perfect bob look!
Product Type | Benefit | Recommendation |
|---|---|---|
Volumizer | Adds body and lift | Lightweight mousse or root lift spray |
Texturizer | Creates waves and definition | Sea salt spray or texturizing cream |
Heat Protectant | Protects from heat styling | Spray or serum with heat protection |
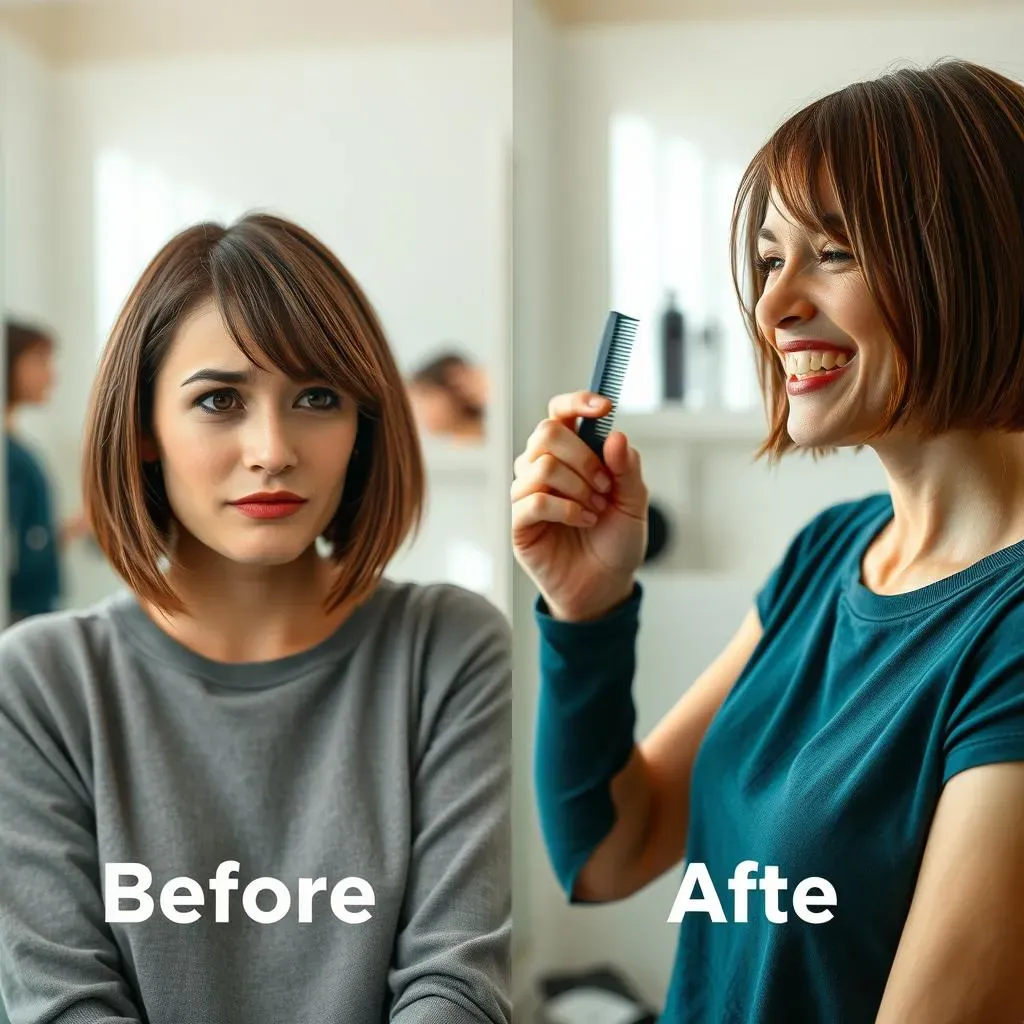
Conclusion: Embrace Your DIY Bob Haircut Journey
Taking the plunge and attempting a bob haircut yourself can feel like a daring move, but armed with the knowledge and techniques shared in this guide, you're well-equipped to achieve a stylish and satisfying result. Remember, practice makes perfect, and even seasoned stylists have learning curves. Don't be afraid to experiment, embrace imperfections, and most importantly, have fun with your new look. Whether you stick with the classic bob or venture into more advanced styles, the ability to confidently cut your own hair opens up a world of possibilities for self-expression and budget-friendly beauty. So, go ahead, rock that DIY bob with pride!