Table of Contents
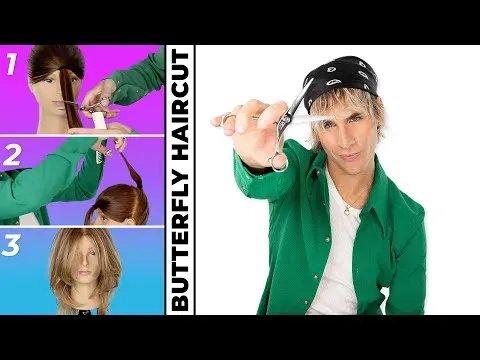
Let's be real. Salon visits? They cost a chunk of change and require scheduling your life around someone else's book. Plus, the small talk can be... intense. What if you crave that layered, face-framing magic everyone's rocking, but prefer to skip the salon song and dance? Good news: achieving a beautiful butterfly cut hair at home is actually within reach. This isn't some impossible feat requiring years of cosmetology school. It's about understanding a few key principles and making careful cuts.
Why Try the Butterfly Cut Hair at Home?

Why Try the Butterfly Cut Hair at Home?
Get That Salon Look Without the Salon Price Tag
Let's face it, a good haircut isn't cheap. You book the appointment, sit in the chair, make small talk, and walk out hundreds of dollars lighter for a style that might not even be exactly what you envisioned. Learning to do a butterfly cut hair at home immediately cuts that cost to zero, save for the price of some decent shears if you don't already own them. Think about the other things you could spend that money on – a weekend trip, a new pair of shoes, or just more fancy coffee.
Beyond the financial aspect, there's the sheer convenience. No more trying to squeeze a salon visit into your packed schedule. You can tackle your hair whenever you have a spare hour, be it a lazy Sunday morning or a random Tuesday night after work. It puts you in control of your time and your wallet, which feels pretty empowering, honestly.
Achieve Volume and Movement You Control
The butterfly cut is famous for creating serious volume and face-framing layers that look effortless. It's designed to make your hair bounce and move, giving it that coveted "lived-in" feel. When you do a butterfly cut hair at home, you get to tailor those layers precisely to your face shape and hair texture. No more hoping your stylist understands "just a little bit off the front" or "more layers but not *too* many." You are the one holding the scissors, making the decisions.
This cut works by creating shorter layers around the face that blend seamlessly into longer layers at the back. It's less about chopping off length and more about strategically removing weight to encourage movement and body. The result is hair that looks fuller and more dynamic without sacrificing significant length.
So, why exactly would you attempt a butterfly cut hair at home?
- Significant cost savings
- Total control over the style and layers
- Convenience of cutting on your own schedule
- Achieving noticeable volume and movement
- Learning a new, practical skill
Gathering Your Tools for a Butterfly Cut Hair at Home
Gathering Your Tools for a Butterfly Cut Hair at Home
Gathering Your Tools for a Butterfly Cut Hair at Home
Alright, before you even think about making the first snip for your butterfly cut hair at home, let's talk gear. The good news? You don't need a professional kit that costs more than your rent. You probably have most of this stuff lying around already. But there's one non-negotiable item: a decent pair of hair-cutting shears. Seriously, trying this with kitchen scissors is like attempting brain surgery with a butter knife – don't do it. Dull blades will just bend and damage your hair, leading to a raggedy mess instead of those smooth, flowing layers you're after. Beyond the shears, grab a good comb, some sectioning clips to keep things tidy, and ideally, a couple of mirrors so you can see what's happening in the back. Clean, dry hair is also key; damp hair stretches and can throw off your length when it dries.
Mastering the Butterfly Cut Hair at Home Technique
Mastering the Butterfly Cut Hair at Home Technique
Sectioning Your Hair Like a Pro (Or At Least Like You Know What You're Doing)
Alright, scissors in hand (the good ones, right?), mirrors set up, hair clean and dry. Now comes the part that separates the heroes from the zero-length disasters: sectioning. The butterfly cut hair at home relies on cutting sections of hair pulled forward. Sounds simple enough, but mess this up and you'll end up with uneven layers that look less like a butterfly and more like a moth-eaten curtain. The standard approach is to divide your hair horizontally from ear to ear. Everything above that line goes into a high ponytail right on top of your head, practically on your forehead. This will be your front section. Everything below that line gets pulled into a separate ponytail lower down, near the nape of your neck. This is your back section. Use those sectioning clips to keep stray hairs out of the way. Precision here pays off big time later.
The Forward Ponytail Chop: Where the Magic (or Mayhem) Happens
Now for the main event of your butterfly cut hair at home: the cutting itself. Start with the front ponytail, the one sitting high on your head. Comb it smooth and pull it straight out in front of your face. The length you cut off here will determine the shortest face-framing layers. Pinch the ponytail between your fingers at the desired length. Remember, you can always cut more off, but you can't glue it back on. Cut straight across below your fingers. Some people like to point cut (holding the scissors vertically and snipping into the ends) for a softer line, but a clean straight cut works fine too, especially for beginners. Release the ponytail and see those front layers fall into place. Now, take the back ponytail. Bring it forward over one shoulder. Again, comb it smooth, pinch at your desired length, and cut straight across. This cut creates the longer layers that blend with the front. It feels counter-intuitive, cutting hair that will sit at the back by pulling it forward, but trust the process. That forward pull is what creates the graduation and movement inherent in the butterfly cut.
- Double-check your sectioning before cutting.
- Always cut less than you think you need; you can adjust later.
- Keep your tension even on the ponytail as you cut.
- Consider point cutting for a softer, more blended edge.
- Use the mirrors to check symmetry (or lack thereof).
Styling and Maintaining Your New Butterfly Cut
Styling and Maintaining Your New Butterfly Cut
Pump Up the Volume: Styling Your Fresh Cut
you've successfully navigated the scissors and pulled off the butterfly cut hair at home. Nice work. Now, how do you make those layers sing? It's all about encouraging that built-in volume and movement. Forget heavy products that weigh things down. Think light mousses or volumizing sprays applied to the roots before drying. When you blow-dry, focus on lifting the roots, maybe even using a round brush to give those face-framing pieces a little bend away from your face. Flipping your head upside down for the initial drying stage works wonders. The goal is bouncy, not stiff. This cut is designed to look a bit undone, so don't overthink it.
Show Off Those Layers: Enhancing the Shape
The beauty of the butterfly cut is how the layers interact. To really highlight them after your butterfly cut hair at home, a little bit of heat styling can go a long way. Large barrel curling irons or even hot rollers can add soft waves that emphasize the different lengths. Curl the front layers away from your face for that classic swept-back look. For the back, alternate the direction of your curls for a more natural, textured finish. A texturizing spray or a light hold hairspray can help keep everything in place without making it feel crunchy. Remember, we're aiming for effortless chic, not prom night stiffness.
- Use volumizing products at the roots.
- Blow-dry focusing on lift.
- Consider a round brush for face-framing layers.
- Use large barrel irons or hot rollers for soft waves.
- Curl front layers away from the face.
- Finish with light texturizing or hairspray.
Keeping It Fresh: Maintenance and Touch-Ups
One of the perks of the butterfly cut hair at home is that maintenance is relatively low-key compared to blunt cuts or intricate styles. The layers grow out fairly gracefully. You'll likely notice the face-framing pieces getting longer first. When it's time for a touch-up, you can usually just redo the forward ponytail cut you did initially. Just trim off the minimal amount needed to refresh the shortest layers. The longer layers in the back will hold their shape longer. Listen, you don't need to be doing full haircuts every month. A simple trim of the shortest pieces every 6-8 weeks, maybe a little shape-up on the back ponytail section when needed, will keep your butterfly cut looking fresh without constant effort or trips back to the imaginary salon in your bathroom.
Your At-Home Butterfly Cut: The Verdict
So, you've navigated the sections, gathered your supplies, and maybe even made a few snips. Pulling off a butterfly cut hair at home isn't magic; it's just following a process carefully. It saves time, saves money, and frankly, gives you bragging rights. It might not be a flawless, red-carpet-ready chop on the first attempt – few things in life are – but with a bit of patience and attention to detail, you can absolutely achieve a noticeable, stylish layered look that works for you. Consider this less a one-time miracle and more a skill you've acquired. Now go style those fresh layers.