Table of Contents
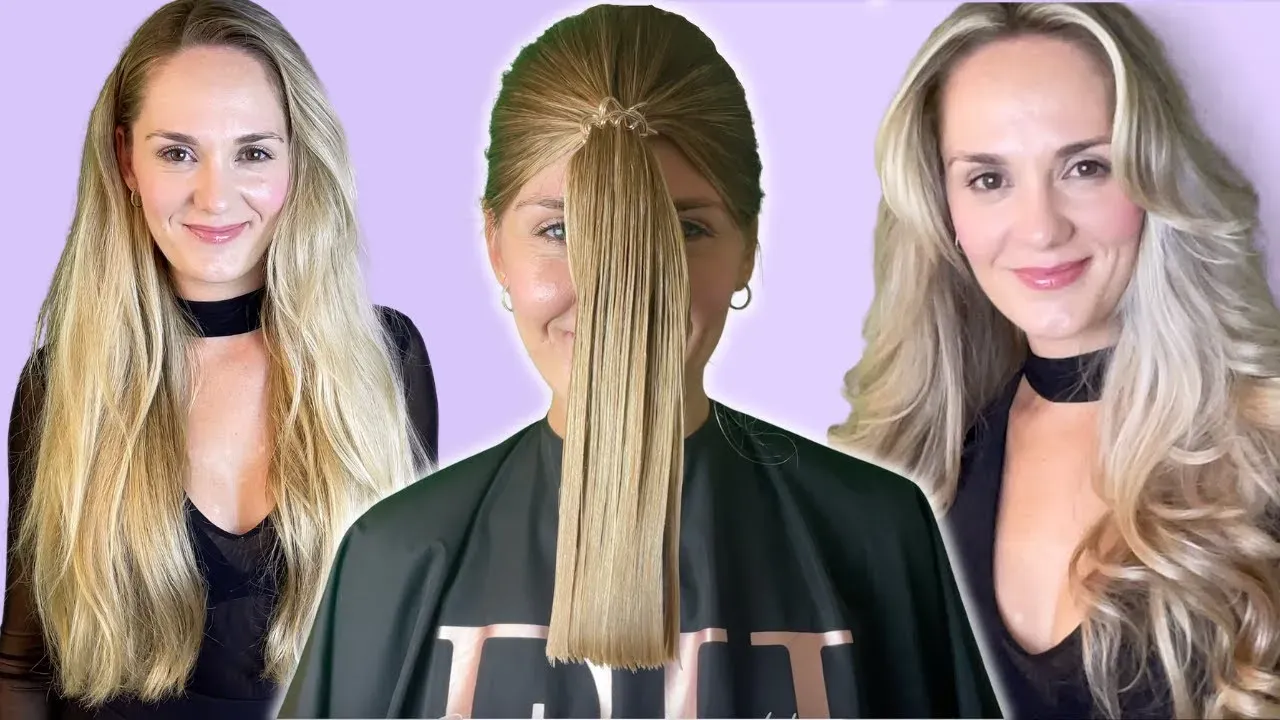
Ever scrolled through social media, stopped dead at those face-framing layers that seem to just *float*, and thought, "Yeah, I want that"? You're probably looking at the viral butterfly cut. It’s everywhere because it gives you volume and movement without sacrificing much length, creating shorter layers around the face and longer ones throughout. It’s like getting two haircuts in one, hence the "butterfly" effect when the layers separate.
What Exactly is the Butterfly Cut?
What Exactly is the Butterfly Cut?
Understanding the Look and Appeal
Alright, let's talk about this haircut everyone's buzzing about. What exactly is the butterfly cut? Imagine layers so strategically placed they mimic the shape of butterfly wings, shorter ones framing your face and longer ones flowing down. The magic lies in creating significant volume and movement, particularly around the face and crown, without taking away much overall length from the back.
It’s the haircut that gives you that effortless, blown-out look straight off a photoshoot. It’s versatile, works on most hair types (though it really shines on medium to thick hair), and grows out pretty gracefully. Think of it as the modern shag's more polished, less rock-and-roll cousin. It’s designed to make your hair look thicker and more dynamic, giving you those face-framing pieces that you can easily tuck or leave out.
The Technique Behind the Magic
So how do stylists actually *do* this? The core idea behind the butterfly cut is cutting the hair in two main sections: the front and the back. The front section is cut shorter to create those face-framing layers, often using techniques like cutting hair pulled forward towards the face. The back section gets longer layers, usually cut by pulling hair back or straight down.
When these two sections are styled together, the shorter front layers stack on top of the longer back layers, creating that layered, voluminous effect without drastically changing the length at the bottom perimeter. It’s a clever way to get the look of short layers and long hair simultaneously. This specific layering technique is key to achieving the distinct shape and movement of the butterfly cut.
Key Characteristics of the Butterfly Cut:
- Creates significant face-framing layers.
- Adds volume and movement, especially at the crown.
- Maintains overall length in the back.
- Works well for adding texture and body.
- Designed to look great styled both up and down.
Why Attempt a Butterfly Cut Hair Tutorial Yourself?
Why Attempt a Butterfly Cut Hair Tutorial Yourself?
so you've seen the butterfly cut and you're probably thinking, "Can I *really* do that myself?" It feels a bit daring, right? But honestly, there are some solid reasons why you might want to try a butterfly cut hair tutorial at home. First off, the cost. Salon haircuts, especially layered ones, can add up fast. Doing it yourself saves you a significant chunk of change. Beyond the money, it's about control. You can go at your own pace, snip a little at a time, and really customize the layers to exactly how you want them to fall around your face. It’s a learning experience too; you get a better understanding of how your hair behaves and what kind of layers work best for your texture. Plus, there's a certain satisfaction that comes from successfully giving yourself a great haircut. It feels like a small win, a mini act of self-reliance in a world that often tells you you need a professional for everything.
Preparing Your Hair for the Butterfly Cut Tutorial
Preparing Your Hair for the Butterfly Cut Tutorial
Getting Your Mane Ready for the Scissors
before you even *think* about grabbing scissors for this butterfly cut hair tutorial, you need to get your hair ready. This isn't a "wing it" situation; proper prep makes a huge difference. First things first: wash and dry your hair completely. Cutting wet hair is a whole different ballgame, and for this technique, you want to see exactly how your hair falls and behaves when it's dry. Make sure it's fully, totally dry – no damp spots lurking. Then, detangle like your life depends on it. Knots and tangles mean uneven cuts, and trust me, you don't want surprises when you're halfway through. A wide-tooth comb or a detangling brush works best here. Think of this prep phase as setting the stage; a clean, dry, knot-free canvas is essential for a successful outcome.
Your StepbyStep Butterfly Cut Hair Tutorial
Gather Your Tools and Section Your Hair
Alright, deep breaths. This is where the rubber meets the road on this butterfly cut hair tutorial. First, make sure you have everything you need: sharp hair scissors (don't even *think* about using kitchen shears – you'll regret it), a comb, hair ties or clips, and a hand mirror plus a larger mirror so you can see the back. Find a spot with good lighting and maybe put down a towel to catch the clippings.
Now, sectioning. This is crucial. The easiest way for this specific cut is to divide your hair into two main parts: the front section and the back section. Imagine drawing a line from the top of your head down behind your ears. Clip or tie off the back section securely – you won't touch this part just yet. The hair left in front of your ears is your first target area. This front section is where you'll create those face-framing layers that make the butterfly cut so distinctive.
Cutting the Front Section for Face-Framing Layers
Take that front section you just isolated. Comb it smooth and pull it forward, right in front of your face. Think of it like you're gathering it into a ponytail that sits just above your forehead. The higher you pull this ponytail, the shorter your shortest face-framing layers will be. For a softer look, don't pull it *too* high. Now, hold the end of the ponytail firmly between your fingers. Decide how much length you want to take off. Remember, you can always cut more, but you can't put it back. Snip straight across the end of this ponytail.
After making that first cut, let the hair down. You should see shorter pieces falling around your face. Comb through it and check the length. If you want them shorter or need to clean up the line, gather that same section back up, maybe slightly lower this time depending on where you want the layers to fall, and trim again. This forward-cutting technique is a core element of the butterfly cut hair tutorial because it naturally creates layers that are shorter in the front and gradually get longer as they blend into the back section.
Here's a quick checklist before you snip:
- Sharp hair scissors? Check.
- Hair clean and bone dry? Check.
- Hair fully detangled? Check.
- Back section secured out of the way? Check.
- Mentally prepared for minor asymmetry? Check. (It happens, it's fixable).
Styling Your Butterfly Cut Layers
Styling Your Butterfly Cut Layers
you've done the deed, you've got some layers happening. Now, the real fun begins: making those butterfly layers actually *look* like butterfly layers. This cut is designed to be styled, to really showcase the volume and movement you just created. The easiest way to bring these layers to life is with a blow dryer and a round brush. Focus on lifting the roots, especially around the crown and the face-framing pieces. Wrap those shorter front layers around the brush and blow downwards, creating that soft curve away from your face. Don't be afraid to use a little volumizing mousse or spray at the roots before drying. For extra bounce, you can pin the layers while they're still warm from the blow dryer and let them cool. If you prefer air drying, scrunching with a light texturizing spray can help define the layers, but a blow dry is really the key to getting that polished, airy effect the butterfly cut is known for.
Ready to Rock Your Butterfly Cut?
So there you have it – the breakdown on how to approach a butterfly cut hair tutorial right in your own space. It takes a steady hand and following the steps, but achieving those beautiful, face-framing layers and bouncy volume is definitely within reach. Remember, the goal isn't perfection on the first try, but giving yourself a fresh look that feels lighter and more dynamic. Whether you nailed it or learned a few things for the next attempt, you've just taken control of your hair journey. Go on, flip those new layers!