Table of Contents
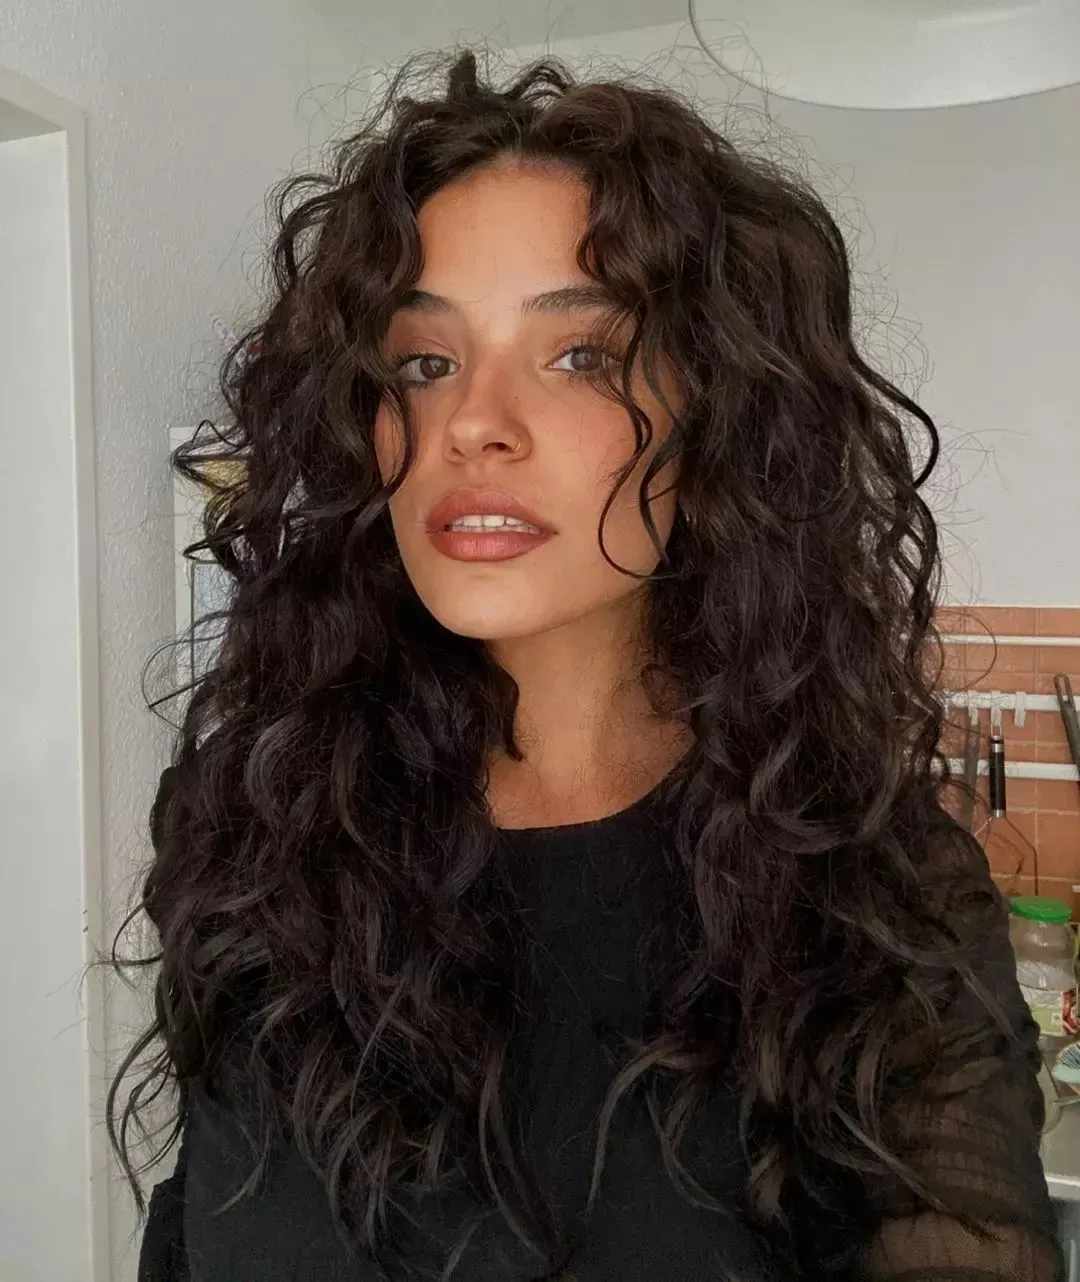
So, you took the plunge and got abutterfly cut in wavy hair. Maybe you saw those gorgeous, layered looks online and thought, "Yes, that's the effortless volume I need!" And for a hot minute, right after the salon, it probably looked fantastic. But then reality hit. Suddenly, your once predictable waves are doing their own thing. Layers you thought would enhance your texture seem to be fighting it, leaving you with awkward flips, uneven volume, or just a general sense of "what did I do?" You're not alone. This cut, while stunning on many hair types, can present a unique challenge for those of us blessed (and sometimes cursed) with natural waves. Your old routine might feel useless, and getting that salon-fresh look at home feels like trying to solve a Rubik's Cube blindfolded. This article dives into why the butterfly cut can be tricky for wavy hair, and more importantly, how to actually make it work for you. We'll break down the science behind the struggle, share concrete styling techniques, and point you towards the right products and tools to tame those layers and bring out the best in your waves. Stop wrestling with your hair every morning and let's figure out how to get your butterfly cut and wavy hair playing nicely together.
How the Butterfly Cut Can Trip Up Wavy Hair
How the Butterfly Cut Can Trip Up Wavy Hair
The Layering Lottery: Why it Doesn't Always Land Right on Waves
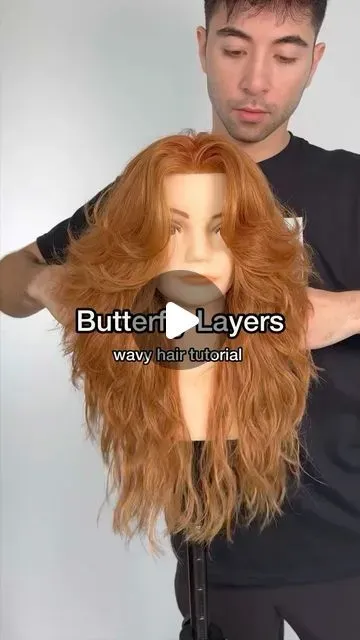
let's talk layers. The whole point of the butterfly cut is those face-framing layers that get progressively longer, mimicking wings. Sounds great on paper, right? Adds volume, movement, all that good stuff. But on wavy hair? It's like playing a layering lottery where the odds aren't always in your favor. Wavy hair has its own agenda, its own unique pattern and texture. When you introduce these disconnected, often blunt layers, they don't always blend seamlessly with the natural wave pattern. Instead of enhancing your waves, they can break them up, leaving you with weird, straight-ish bits next to defined waves, or layers that just sort of hang there awkwardly instead of flowing together. It's not the stylist's fault, necessarily; it's just the inherent challenge of imposing a structured cut on a hair type that prefers to do its own chaotic, beautiful thing.
The Blunt End Blues: Losing Your Wave's Anchor
Before the butterfly cut, maybe you had blunter ends. Those blunt ends acted like anchors for your waves, providing weight and encouraging clumps to form lower down. They gave your wave pattern something to 'hang onto', creating a cohesive look. Enter the butterfly cut, with its shorter, often more tapered ends on those face-framing layers and potentially throughout. Suddenly, you've lost that anchor. The shorter pieces can spring up differently than the longer ones, leading to a disconnected look. Your waves might struggle to form full spirals or S-shapes, instead breaking into smaller, frizzier sections, especially around the face where those layers are shortest and most prominent. It feels like your hair forgot how to be wavy overnight, and honestly, it's just trying to figure out where its heavy bottom went.
- Layers can disrupt natural wave clumps.
- Shorter layers lack the weight to pull waves down.
- Uneven wave patterns can appear next to each other.
- Face-framing pieces might stick out instead of blending.
- The transition from short to long layers can look choppy on some wave types.
Styling Headaches: Your Old Routine Just Doesn't Cut It
Perhaps the most frustrating part of getting abutterfly cut in wavy hairis realizing your go-to styling routine suddenly doesn't work anymore. That leave-in conditioner, gel, and scrunching combo that used to give you perfect waves? Now it leaves those new layers looking stringy, or worse, totally undefined while the bottom half looks great. You might find yourself needing different products for different sections of your head, which is frankly, exhausting. Diffusing becomes a puzzle of trying to capture layers that want to escape the diffuser bowl. Air drying can result in those dreaded "straight bits" near your face. It's like your hair is actively rebelling against your efforts, demanding a completely new approach you haven't figured out yet. The sheer unpredictability of how the waves will fall with these new layers can make getting ready feel less like styling and more like damage control.
Understanding the Layers: Why the Butterfly Cut Behaves Differently on Waves
Understanding the Layers: Why the Butterfly Cut Behaves Differently on Waves
Wave Mechanics vs. Layer Logic
The core issue when you put abutterfly cut in wavy hairboils down to physics and genetics. Straight hair falls relatively uniformly; layers reduce bulk and add visual interest by creating distinct lengths that stack or flow. Wavy hair, however, forms in patterns – spirals, S-shapes, loose bends. These patterns rely on the hair strand's natural inclination and the weight of the hair clump to form properly. When you cut layers that are significantly shorter or more disconnected than the rest of the hair, you mess with that natural pattern. The shorter pieces don't have the weight to form the same wave pattern as the longer pieces. They might spring up higher, form a different shape, or just refuse to wave at all. It’s like trying to get two different-sized slinkies to bounce in perfect sync – they just won't.
Mastering Styling Techniques for Your Butterfly Cut in Wavy Hair
Scrunching Smart: Taming Those Tricky Layers
Alright, let's talk scrunching. Your old method might have been a free-for-all, just squishing product into your hair until it looked wavy-ish. With abutterfly cut in wavy hair, you need precision. Those shorter layers around your face are the ones that will either make or break the look. When you scrunch, focus on cupping those layers gently upwards, encouraging the wave pattern without yanking them straight. Use a microfiber towel or an old cotton t-shirt – terrycloth is the enemy of defined waves, trust me. Flip your head over to get the back layers, but be mindful of how you bring your head back up; sometimes just flipping back can pull the waves straight. It's about coaxing the waves into shape, not forcing them. Think of it less like aggressive squishing and more like tenderly encouraging a delicate plant to grow.
Diffusing Without Disaster: Getting Volume Where You Need It
Diffusing with a butterfly cut on wavy hair can feel like playing whack-a-mole with your layers. The goal is volume and definition, especially around the crown where those shorter layers live, without creating a frizzy halo. Start with your hair mostly dry from air drying or plopping. Use the diffuser on a medium heat and low speed setting. Cup sections of hair into the diffuser bowl, bringing it up towards your scalp. Hold it there for a few seconds. Don't move the diffuser around constantly; that just creates frizz. Focus on drying the roots and encouraging the waves to set. Pay extra attention to those face-framing pieces, drying them carefully to ensure they curl nicely around your face instead of sticking out awkwardly. It takes practice, but a good diffuser technique can make those layers pop in the best way.
- Use a microfiber towel for scrunching.
- Gently cup layers upwards when scrunching.
- Focus scrunching on face-framing layers.
- Diffuse on medium heat, low speed.
- Cup sections of hair into the diffuser bowl.
- Hold diffuser in place instead of moving constantly.
- Pay special attention to drying roots and face-framing layers.
Essential Products and Tools for Managing a Butterfly Cut on Wavy Hair
Essential Products and Tools for Managing a Butterfly Cut on Wavy Hair
Taming Creams and Gels: Finding Your Wave's Best Friend
Navigating the product aisle after getting abutterfly cut in wavy haircan feel like a minefield. What worked before might be too heavy for those delicate new layers or not strong enough to hold the shorter pieces. For waves with this cut, you often need products that offer flexible hold without weighing things down or making them crunchy. Look for lightweight styling creams that define without stiffness, or gels with a medium hold. Applying these products correctly is key – emulsify a small amount in your hands and gently scrunch or praying-hands it into damp hair, focusing on distributing it evenly, especially through those face-framing layers. Avoid applying too much product at the roots, which can flatten volume before you even start.
Diffusers and Microfiber: Your New Styling Allies
Forget rough towel drying and air drying if you want your butterfly cut layers to look their best. A good diffuser is non-negotiable for achieving volume and encouraging wave formation with this cut. As mentioned earlier, low speed and medium heat are your friends. Cup sections of hair and hold the diffuser in place. Equally important is ditching the terrycloth towel. Swap it for a microfiber towel or an old cotton t-shirt for drying and scrunching. This drastically reduces frizz and helps your waves clump together beautifully, preventing those shorter layers from looking like broken springs. It's a simple swap, but it makes a world of difference in how your waves behave.
Product Type | Why It Helps the Butterfly Cut on Waves | Look For |
|---|---|---|
Lightweight Styling Cream | Defines waves without heavy buildup | "Lightweight," "Defining," "Hydrating" |
Medium Hold Gel | Provides structure and hold for layers | "Medium Hold," "Flexible Hold," "Anti-Frizz" |
Microfiber Towel/Cotton Tee | Reduces frizz during drying/scrunching | Soft texture, high absorbency |
Diffuser Attachment | Adds volume, encourages wave formation | Adjustable heat/speed settings |
Finishing Touches: Locking in the Look
Once you've styled and dried yourbutterfly cut in wavy hair, a few finishing touches can make all the difference. A light-hold hairspray can help set those face-framing layers in place and combat humidity without making your hair feel like a helmet. If your waves feel a bit dry or look dull, a tiny amount of lightweight hair oil or serum can add shine and reduce frizz without collapsing your volume. Apply it by gently patting it over the surface or scrunching it into the ends. Sometimes, a refreshing spray on day two or three can reactivate your products and revive your waves without needing to re-wet completely. It's about enhancing the finished style, not starting over.
Solving Common Problems with the Butterfly Cut and Wavy Hair
Solving Common Problems with the Butterfly Cut and Wavy Hair
The Awkward Flip or Stick-Out Layer
One of the most frequent complaints about thebutterfly cut in wavy hairis that the shortest face-framing layers just don't want to blend. Instead of gently curving around your face, they might flip out awkwardly at the jawline or worse, stick straight out like you've had a run-in with a faulty crimping iron. This usually happens because these layers are too short to complete a full wave pattern, or they lack the weight to fall naturally. To combat this, try finger coiling these specific pieces when damp. After applying your styling product, gently twist small sections of these layers around your finger to encourage them to form a spiral or curve. You can also use a small barrel curling iron on a low heat setting *after* your hair is completely dry, just on the ends of these stubborn pieces, to guide them into a more flattering shape. Sometimes, a little targeted manipulation is all it takes to make peace with those rogue layers.
Lack of Definition and Uneven Waves
Another headache is the overall lack of definition or the appearance of uneven wave patterns throughout your head. The shorter layers might be defined, but the longer layers look limp, or vice versa. This often stems from inconsistent product application or drying techniques across the different lengths. Ensure you're evenly distributing your styling products from root to tip, paying attention to getting product on both the shorter and longer sections. When diffusing, spend extra time cupping the longer sections in the bowl to encourage their wave pattern to set. If air drying, try "plopping" your hair into a t-shirt for 20-30 minutes before letting it down; this helps compress the hair and encourages all the layers to form cohesive wave clumps. It's a bit more effort than a simple scrunch, but it helps unify the different lengths in your butterfly cut in wavy hair.
- Finger coil stubborn face-framing layers when damp.
- Use a low-heat curling iron *after* drying for recalcitrant ends.
- Ensure even product distribution on both short and long layers.
- Spend ample time diffusing longer sections to encourage definition.
- Try plopping with a t-shirt to unify wave patterns across layers.
Making Peace with Your Butterfly Cut and Waves
Getting a butterfly cut with wavy hair isn't always an instant, effortless win right out of the salon chair. It often requires a bit of a learning curve and a willingness to experiment. Understanding how those shorter face-framing layers interact with your natural wave pattern is the first step. It's about finding the right balance between enhancing volume and preventing frizz or awkward separation. By adjusting your styling techniques – maybe focusing on damp styling, diffusing, or specific wrapping methods – and being strategic about the products you use, you can get those layers to cooperate. It might take a few tries, and yes, there will still be days when your hair decides to have its own agenda. But with the right tools and a little patience, you can absolutely make this popular cut work with and for your wavy texture, turning those struggles into styles you actually like.