Thinking about a fresh new look but dreading the salon prices? You're not alone! Many are now taking matters into their own hands, and learning how to cut your own hair bob is becoming increasingly popular. But before you grab those scissors and dive in headfirst, it's essential to arm yourself with the right knowledge and techniques. This guide will walk you through the entire process, from gathering your tools and prepping your hair, to mastering the cutting technique and styling your brand-new bob. We'll also cover common mistakes and how to fix them, ensuring you achieve a salon-worthy finish without ever leaving your bathroom. Whether you're aiming for a classic chin-length bob, a trendy layered style, or a chic asymmetrical cut, we'll provide the tips and tricks you need to confidently cut your own hair bob and rock a stylish new look. So, ready to ditch the salon and embrace your inner stylist? Let's get started!
Prep Work: Gathering Supplies and Sectioning Hair for Your Bob
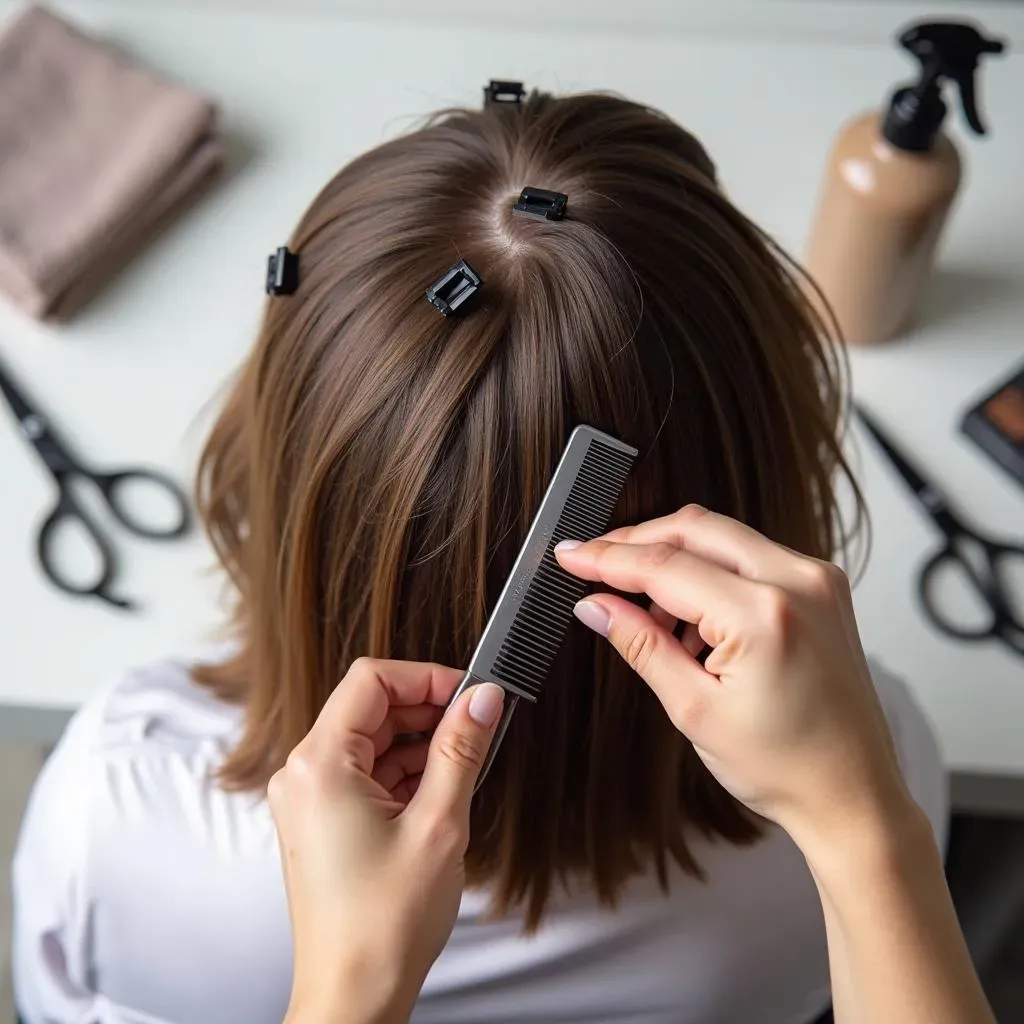
Prep Work: Gathering Supplies and Sectioning Hair for Your Bob
The Essential Toolkit for a DIY Bob
so you're ready to take the plunge! First things first, let's talk tools. You wouldn't try to build a house with just a hammer, right? Same goes for cutting your hair. Having the right supplies makes all the difference between a chic bob and a total hair-mergency. Think of it as setting yourself up for success. I've seen so many people skip this step and regret it later. Trust me, a little preparation goes a long way.
Here's what you'll need to gather before you even think about picking up those scissors:
- Sharp Hair Scissors: Seriously, don't use your kitchen scissors! Invest in a good pair of hair-cutting shears. They're designed for clean, precise cuts.
- Comb: A fine-tooth comb is your best friend for sectioning and creating even lines.
- Spray Bottle with Water: Damp hair is easier to manage and cut evenly. Keep that spray bottle handy!
- Hair Clips: To keep the sections you're not working on out of the way.
- Mirror, Mirror on the Wall: You'll need a good mirror to see what you're doing, and maybe even a hand mirror to check the back.
- Towel: To protect your clothes from getting wet and covered in hair.
Why Sectioning is Your Secret Weapon
Now that you've got your tools assembled, let's talk sectioning. This is where the magic happens, folks. Sectioning your hair properly is crucial for achieving an even and balanced bob. Think of it like mapping out a construction project – you need a clear plan before you start cutting. I always tell people, if you skip the sectioning, you might as well be cutting blindfolded!
Here's a simple method for sectioning your hair for a bob:
- Start with Damp Hair: Lightly dampen your hair with the spray bottle.
- Create a Center Part: Use your comb to create a clean center part from your forehead to the nape of your neck.
- Divide into Sections: Divide your hair into four sections: two in the front and two in the back. Secure each section with a hair clip.
- Double-Check: Make sure each section is even and manageable.
Pro Tips for Sectioning Success
you've got the basics down, but let's take it to the next level with some pro tips. These are the little things that can make a big difference in the final result. I've learned these tricks over years of experimenting, so you don't have to make the same mistakes I did!
- Use a Tail Comb: A tail comb is perfect for creating precise parts and sections.
- Keep the Tension Consistent: When holding a section of hair, maintain consistent tension to ensure an even cut.
- Work in Small Sections: Don't try to cut too much hair at once. Smaller sections are easier to manage and control.
- Don't Be Afraid to Adjust: If a section feels uneven, don't hesitate to adjust it before cutting.
Remember, patience is key. Don't rush the sectioning process. The more time you spend prepping your hair, the better your final cut will be. Trust me, your patience will pay off!
The Technique: StepbyStep Guide to Cutting a Bob at Home
The Technique: StepbyStep Guide to Cutting a Bob at Home
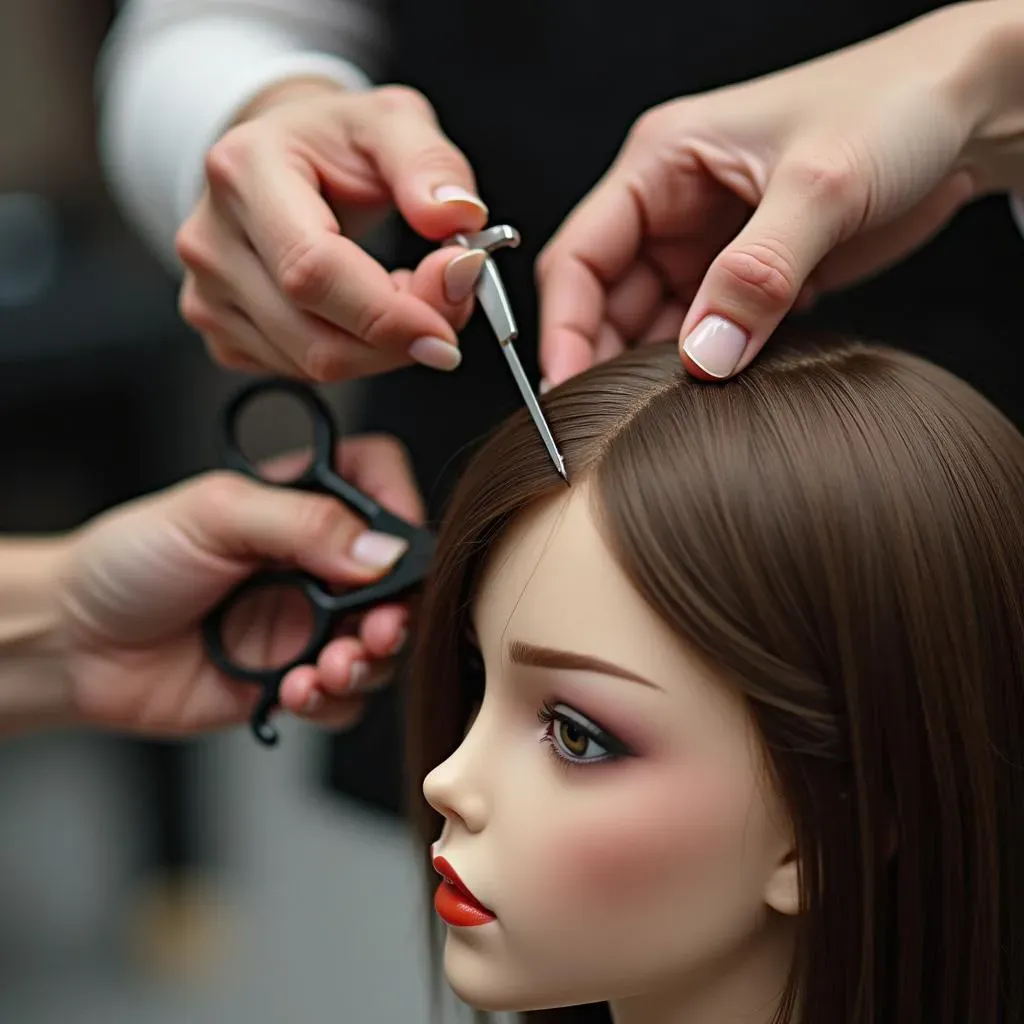
The Point-Cut Method: Your New Best Friend
Alright, you've prepped your hair, you've got your tools, now for the exciting part: the cut! I'm a huge fan of the point-cut method for bobs. Why? Because it's forgiving and creates a soft, textured edge. We're not going for blunt and blocky here, people! This technique involves holding your scissors vertically and making small, angled snips into the hair. It's like you're gently "chipping" away at the length, rather than creating a harsh line. Trust me, it's way easier than it sounds, and the results are so worth it.
The point-cut method is not just about technique; it's about control. By using small, deliberate snips, you minimize the risk of taking off too much length at once. It's like slowly sculpting a masterpiece – you can always take away more, but you can't put it back! I always tell my friends, start conservative, and work your way up. You'll thank me later.
Here's a quick rundown of why point-cutting rocks:
- Creates soft, textured edges
- More forgiving than blunt cuts
- Allows for better control over length
- Reduces the risk of harsh lines
Step-by-Step: Cutting Your Bob
let's get down to the nitty-gritty. This is where we put all that prep work into action. Remember those sections we created? We're going to work with them one at a time, using the point-cut method to gradually achieve our desired bob length. It's like following a recipe – each step is important, and the final result depends on your attention to detail. So, take a deep breath, and let's get started!
Here's a step-by-step guide to cutting your bob using the point-cut method:
- Start with the Back Sections: Release one of the back sections. Comb it through and decide how much length you want to remove.
- Point-Cut Technique: Hold the section of hair between your fingers and use the point-cut method to trim the ends. Remember, small, angled snips!
- Check for Evenness: Compare the length of the cut section to the other back section. Adjust as needed.
- Work Your Way Forward: Repeat the process on the remaining sections, gradually working your way towards the front.
- Pay Attention to the Angle: If you want a slightly angled bob, cut the front sections a bit longer than the back.
- Double-Check Everything: Once you've cut all the sections, double-check for evenness and make any final adjustments.
Here is a table to guide you:
Step | Action | Tip |
|---|---|---|
1 | Start with Back Sections | Comb through and decide on length |
2 | Point-Cut Technique | Small, angled snips |
3 | Check for Evenness | Compare sections, adjust as needed |
4 | Work Your Way Forward | Repeat on remaining sections |
5 | Pay Attention to Angle | Front sections longer for angled bob |
6 | Double-Check Everything | Final adjustments for evenness |
Troubleshooting: Fixing Mistakes and Achieving an Even Cut
Troubleshooting: Fixing Mistakes and Achieving an Even Cut
Oops! Common Bob-Cutting Mishaps
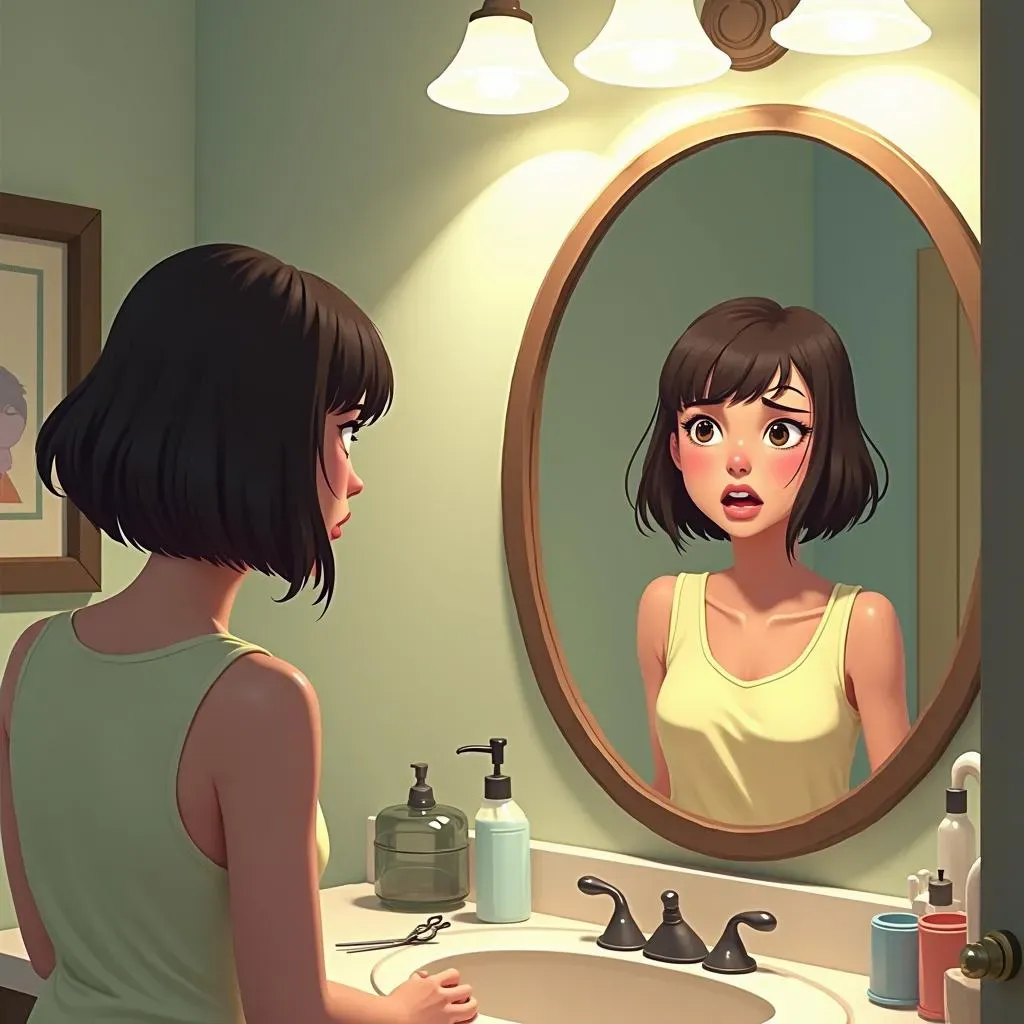
so you've taken the plunge, scissors in hand, and maybe, just maybe, things didn't go exactly as planned. Don't panic! We've all been there. Even seasoned stylists have off days. The key is to recognize the mistake, assess the damage, and figure out how to fix it. Remember, a bad haircut isn't the end of the world – it's just a learning opportunity (and a chance to get creative!). I've seen bobs that started as "oops" moments turn into stunning, unique styles. It's all about how you handle it.
Let's talk about some common bob-cutting blunders and how to tackle them:
- Uneven Length: This is probably the most common issue. One side is shorter than the other.
- Choppy Ends: Instead of a soft, textured edge, you've got a jagged, uneven line.
- Too Short: You got a little scissor-happy and took off more length than you intended.
- Asymmetrical Gone Wrong: You were going for a cool, asymmetrical bob, but it ended up looking lopsided.
The Fix-It Guide: Salvaging Your Bob
Alright, damage control time! Let's break down how to fix those common bob-cutting mistakes. Remember, patience and a steady hand are your best friends here. Don't try to rush the process, and don't be afraid to take breaks if you're feeling overwhelmed. I always tell people, it's better to go slow and steady than to try to fix everything at once and make it worse. Think of it like editing a piece of writing – you want to refine and polish, not completely rewrite the whole thing!
Here's how to tackle those bob blunders:
- Uneven Length: Carefully examine the length difference. Dampen your hair and use the point-cut method to trim the longer side to match the shorter side. Go slow and check frequently.
- Choppy Ends: Use the point-cut method to soften the jagged edges. Hold your scissors vertically and make small, angled snips into the ends.
- Too Short: Unfortunately, you can't magically make hair grow back. The best you can do is try to style it in a way that minimizes the shortness. Consider adding layers or texture to create more volume.
- Asymmetrical Gone Wrong: If the asymmetry is too extreme, you can either even it out into a symmetrical bob or embrace the unevenness and make it a deliberate style choice.
Tools and Techniques for an Even Cut
So, how do you prevent these mistakes from happening in the first place? It all comes down to technique and having the right tools. I'm a firm believer that anyone can achieve a great bob at home with the right approach. It's not about being a professional stylist; it's about being careful, methodical, and paying attention to detail. Think of it like baking a cake – if you follow the recipe and use the right ingredients, you're much more likely to get a delicious result!
- Use Sharp Scissors: Dull scissors can cause jagged, uneven cuts.
- Work in Small Sections: Smaller sections are easier to control and manage.
- Check Your Work Frequently: Use a mirror to check the length and evenness of each section as you go.
- Don't Be Afraid to Ask for Help: If you're struggling with the back, ask a friend or family member to help you.
Here is a table to guide you:
Mistake | Solution | Prevention |
|---|---|---|
Uneven Length | Trim the longer side | Check evenness frequently |
Choppy Ends | Point-cut to soften edges | Use sharp scissors |
Too Short | Style to minimize shortness | Cut conservatively |
Asymmetry Gone Wrong | Even out or embrace it | Plan asymmetry carefully |
Styling Your New Bob: Tips and Tricks for a SalonWorthy Finish
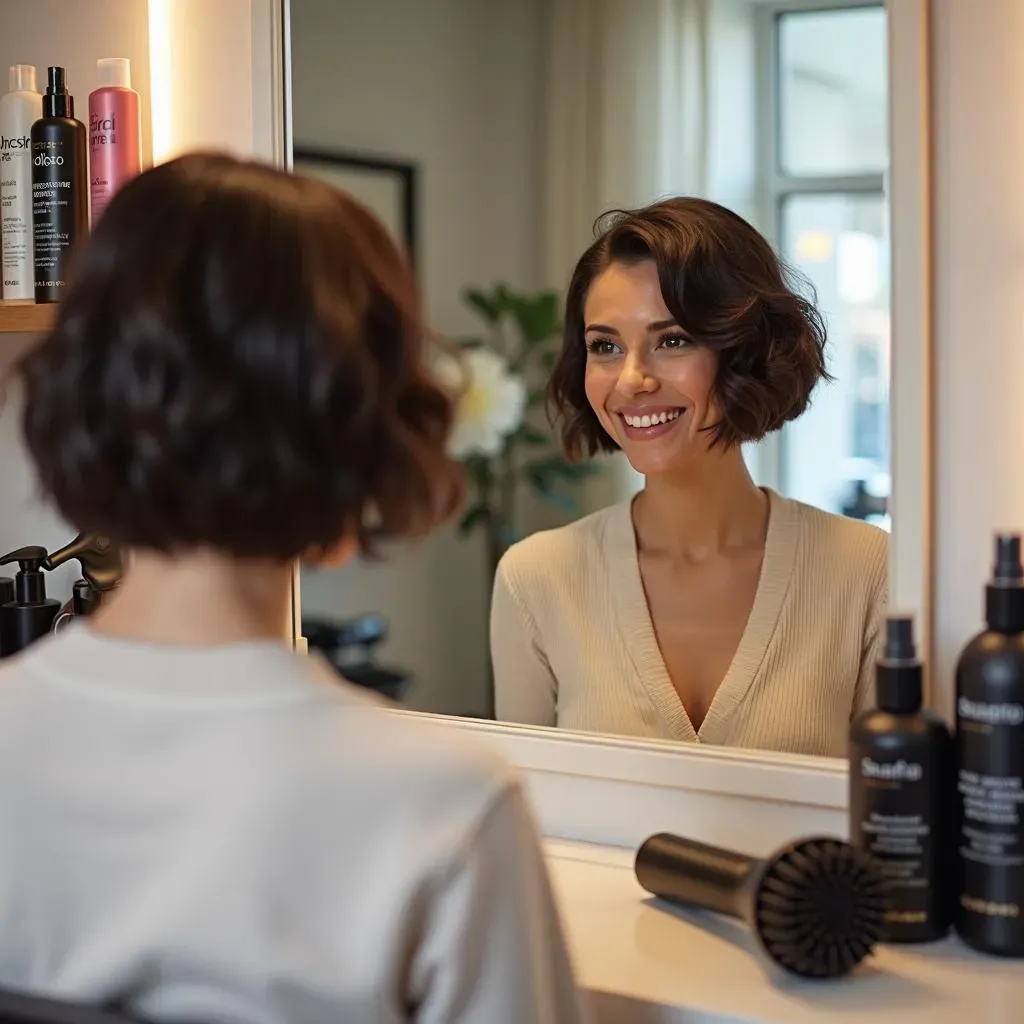
Styling Your New Bob: Tips and Tricks for a SalonWorthy Finish
Finding Your Bob's Perfect Products
so you've got your fresh new bob, and it looks pretty darn good. But let's be real, a great haircut is only half the battle. The right styling products can take your bob from "meh" to "wowza!" It's like having the perfect ingredients for a recipe – you can't make a masterpiece without them. I've spent years experimenting with different products, and trust me, it's worth finding what works for your hair type and style. Think of your hair like a delicate flower – it needs the right nourishment to bloom!
Here's a breakdown of some essential bob-styling products and what they do:
- Texturizing Spray: Adds volume and grit for a tousled, effortless look.
- Volumizing Mousse: Lifts roots and creates overall body.
- Smoothing Serum: Tames frizz and adds shine.
- Hair Spray: Provides hold and keeps your style in place.
- Heat Protectant: Essential if you're using hot tools!
And remember, less is more! Start with a small amount of product and add more as needed. You don't want to weigh your hair down and end up with a greasy mess.
Mastering the Art of the Blowout
A good blowout can make all the difference in how your bob looks. It's like giving your hair a mini-makeover! But let's be honest, mastering the art of the blowout takes practice. I remember my first attempt – I ended up looking like I stuck my finger in a light socket! But don't worry, with a little patience and the right technique, you can achieve a salon-worthy blowout at home. Think of it like learning to ride a bike – you might fall a few times, but eventually, you'll get the hang of it!
Here's a step-by-step guide to achieving a perfect blowout for your bob:
- Apply Heat Protectant: This is crucial to protect your hair from damage.
- Rough Dry: Use your fingers to lift your roots and dry your hair about 80% of the way.
- Section Your Hair: Divide your hair into manageable sections.
- Use a Round Brush: Wrap each section around the round brush and direct the airflow from your dryer down the hair shaft.
- Focus on the Roots: Lift your roots with the brush to create volume.
- Cool Shot: Finish each section with a cool shot of air to set the style.
Here is a table to guide you:
Step | Action | Tip |
|---|---|---|
1 | Apply Heat Protectant | Don't skip this step! |
2 | Rough Dry | Lift roots for volume |
3 | Section Your Hair | Manageable sections are key |
4 | Use a Round Brush | Direct airflow down the shaft |
5 | Focus on Roots | Lift for extra volume |
6 | Cool Shot | Set the style |
Embracing Your Bob's Natural Texture
sometimes, the best styling is no styling at all! Embrace your bob's natural texture and let it do its thing. It's like letting your true self shine through – no need to hide behind a mask of products and hot tools. I've seen so many bobs that look absolutely stunning with minimal effort. It's all about finding the right products to enhance your natural texture, not fight against it. Think of it like finding the perfect pair of jeans – they should fit you comfortably and flatter your shape without any fuss.
Here are some tips for embracing your bob's natural texture:
- Air Dry: Let your hair air dry whenever possible to avoid heat damage.
- Use a Diffuser: If you have curly or wavy hair, use a diffuser to enhance your natural texture without creating frizz.
- Apply a Texture Cream: A texture cream can help define your natural waves or curls.
- Scrunch Your Hair: Scrunch your hair with your hands to encourage natural waves and texture.
Remember, confidence is the best accessory! Rock your natural bob with pride and let your personality shine through.
Rock Your DIY Bob: Confidence and Style in Every Snip
So, you've taken the plunge and learned how to cut your own hair bob! Hopefully, this guide has empowered you with the knowledge and confidence to maintain a stylish look without breaking the bank. Remember, practice makes perfect, and don't be afraid to experiment with different lengths and styles to find what suits you best. With a little patience and the right techniques, you can achieve a salon-worthy bob right in the comfort of your own home. Now go forth, rock your new 'do, and enjoy the freedom of being your own stylist!