Thinking about a fresh, stylish bob but dreading the salon prices? You absolutely can cut your own hair in a bob right at home! It might sound intimidating, but with the right tools, a steady hand, and our detailed guide, you'll be rocking a chic new look in no time. This article breaks down the entire process into manageable steps, from gathering your supplies to perfecting the final touches. We'll cover essential techniques for achieving a symmetrical and flattering bob, plus offer expert tips for avoiding common mistakes. Whether you're aiming for a classic chin-length bob, a trendy A-line, or a layered masterpiece, we've got you covered. Get ready to unleash your inner stylist and discover how easy and rewarding it can be to cut your own hair in a bob. Let's dive in!
Tools You'll Need to Cut Your Own Hair in a Bob
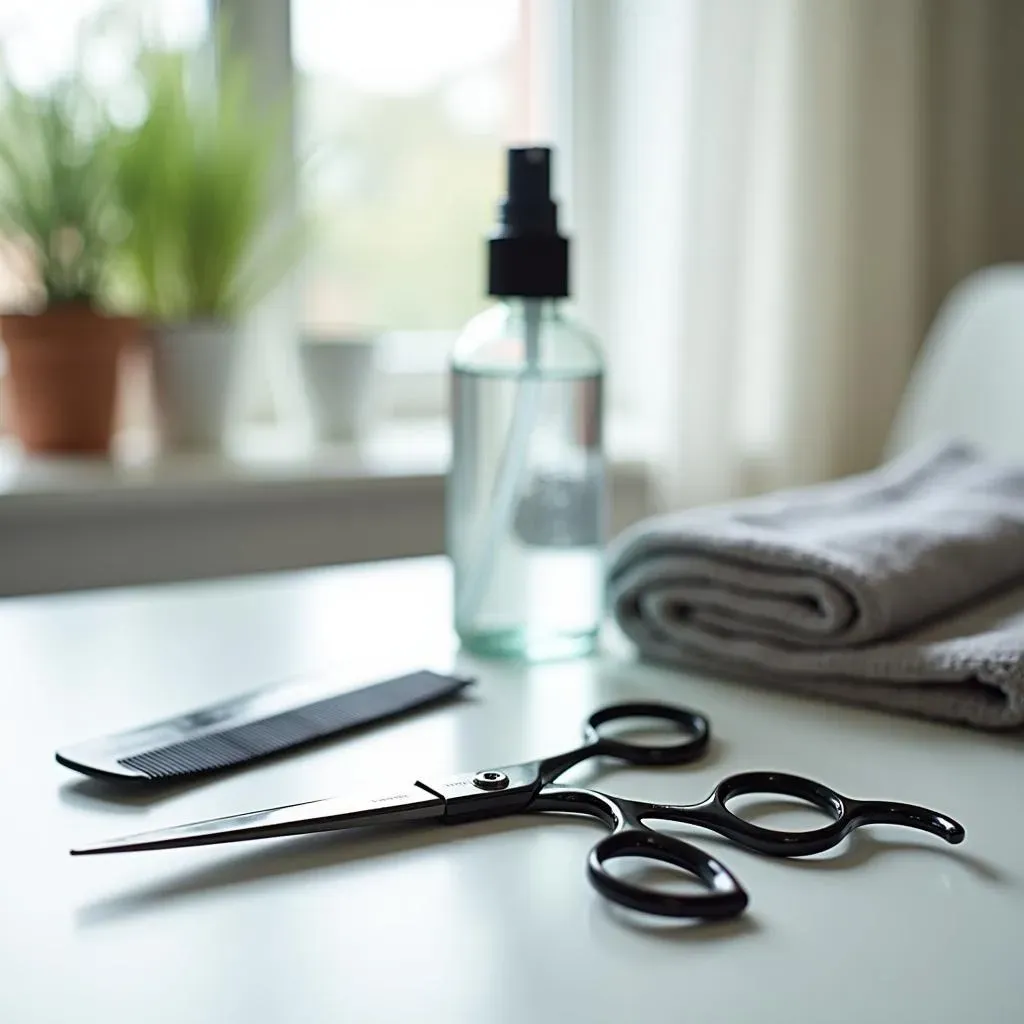
Tools You'll Need to Cut Your Own Hair in a Bob
Sharp Shears are Key
Let's be real, dull scissors are your worst enemy when attempting to cut your own hair in a bob. You're not just trimming; you're shaping a whole new style! Invest in a pair of professional-grade hair shears. Trust me, the clean, precise cuts you'll get are worth every penny. Think of it as an investment in your future fabulous bobs! They don't have to break the bank, but avoid the kitchen scissors at all costs.
Why professional shears? Because they're designed for hair! They have a sharper blade angle and are made of higher-quality steel, which means they'll slice through your hair without snagging or causing split ends. Plus, they're more comfortable to hold for longer periods, which is crucial when you're meticulously crafting your bob. It's like the difference between using a butter knife and a scalpel – you want precision, not a jagged mess!
The Rest of Your Arsenal
so you've got the shears sorted. What else do you need to successfully cut your own hair in a bob? A good comb is essential – preferably a fine-toothed comb for precise sectioning. You'll also want a spray bottle filled with water to keep your hair damp, which makes it easier to manage and cut evenly. And, of course, a mirror is a must! Ideally, use two mirrors so you can see the back of your head.
Don't forget clips! Sectioning clips are your best friends for keeping the hair you're not working on out of the way. They'll prevent you from accidentally chopping off more than you intended. Finally, grab a towel to drape around your shoulders to catch falling hair. Trust me, your vacuum cleaner will thank you!
Tool | Why You Need It |
|---|---|
Sharp Hair Shears | Clean, precise cuts; prevents split ends |
Fine-Toothed Comb | Precise sectioning and even distribution |
Spray Bottle with Water | Keeps hair damp and manageable |
Two Mirrors | Allows you to see the back of your head |
Sectioning Clips | Keeps hair out of the way; prevents mistakes |
Towel | Catches falling hair; easy cleanup |
StepbyStep Guide to Cutting a Bob Haircut at Home

StepbyStep Guide to Cutting a Bob Haircut at Home
Prep is Key: Sectioning and Dampening
Alright, so you've got your tools ready. Now, let's get down to business! First, you'll want to dampen your hair thoroughly. Not soaking wet, just damp enough to easily manipulate. Then, using your fine-toothed comb, create a clean center part from your forehead to the nape of your neck. This divides your hair into two equal sections. Next, divide each of those sections into smaller, more manageable subsections. Think horizontal partings about an inch or two thick. Clip each subsection out of the way as you go – this is where those sectioning clips come in handy!
Why all the sectioning? Because it's the secret to achieving an even and balanced bob. By working in small sections, you can ensure that each strand is cut to the correct length. Imagine trying to sculpt a statue without breaking it down into smaller pieces first – it would be a disaster! Sectioning gives you control and precision, minimizing the risk of wonky lines and uneven layers. It's a bit time-consuming, but trust me, the results are worth it.
The First Cut: Establishing the Length
deep breaths! This is where the magic happens. Take your first subsection – the one closest to your face on either side of your part. Hold it taut between your index and middle fingers, and decide how much length you want to take off. Remember, you can always cut more, but you can't glue it back on! So, err on the side of caution and start with a smaller trim. Using your sharp shears, make a clean, horizontal cut across the subsection. This will be your guide for the rest of your bob.
Now, repeat this process for the remaining subsections on each side of your head, using your initial cut as a reference. As you move towards the back of your head, you may want to angle your cuts slightly to create a subtle A-line shape. This is totally optional, but it can add a bit of extra flair to your bob. Just be sure to maintain consistency on both sides of your head to ensure symmetry. And remember, patience is key! Take your time, double-check your work, and don't be afraid to pause and reassess as you go.
Step | Description | Why It's Important |
|---|---|---|
1. Dampen Hair | Slightly wet, not soaking | Easier to manage and cut evenly |
2. Center Part | Clean part from forehead to nape | Divides hair into equal sections |
3. Section Hair | Divide each section into 1-2 inch subsections | Provides control and precision |
4. First Cut | Trim the first subsection to desired length | Sets the guide for the rest of the bob |
5. Repeat | Cut remaining subsections using the first cut as a guide | Ensures evenness and symmetry |
Tips for Achieving the Perfect Bob When Cutting Your Own Hair

Tips for Achieving the Perfect Bob When Cutting Your Own Hair
Mirror, Mirror on the Wall: Visibility is Key
Seriously, you can't expect to cut your own hair in a bob perfectly if you can't see what you're doing! Invest in a good quality mirror, and even better, use two! Set one up in front of you and another behind you so you can see the back of your head. Good lighting is also crucial. Natural light is best, but if that's not an option, make sure you have bright, even lighting that illuminates your entire head. No shadows allowed!
Think of it like this: you wouldn't try to paint a masterpiece in the dark, would you? Cutting your hair is an art form, and you need to be able to see your canvas clearly. So, take the time to set up your workspace properly and ensure that you have optimal visibility from all angles. Trust me, your bob will thank you for it!
The Devil is in the Details: Point Cutting and Texturizing
so you've got the basic shape of your bob down. Now it's time to add some personality! Point cutting is a technique where you hold your shears vertically and make small, choppy cuts into the ends of your hair. This softens the blunt line of the bob and adds texture and movement. It's like giving your hair a little bit of sass!
You can also use texturizing shears to remove bulk and create even more dimension. Just be careful not to overdo it – a little bit goes a long way! Remember, the goal is to enhance your natural texture, not to create a frizzy mess. Experiment with different techniques and find what works best for your hair type and desired style. And don't be afraid to watch some tutorials online for inspiration. The possibilities are endless!
Tip | Description | Benefit |
|---|---|---|
Use Two Mirrors | One in front, one behind | Allows you to see all angles of your head |
Good Lighting | Bright, even illumination | Eliminates shadows and improves visibility |
Point Cutting | Vertical, choppy cuts into the ends | Softens the blunt line and adds texture |
Texturizing Shears | Removes bulk and creates dimension | Enhances natural texture and movement |
Dealing with Mistakes When You Cut Your Own Hair in a Bob
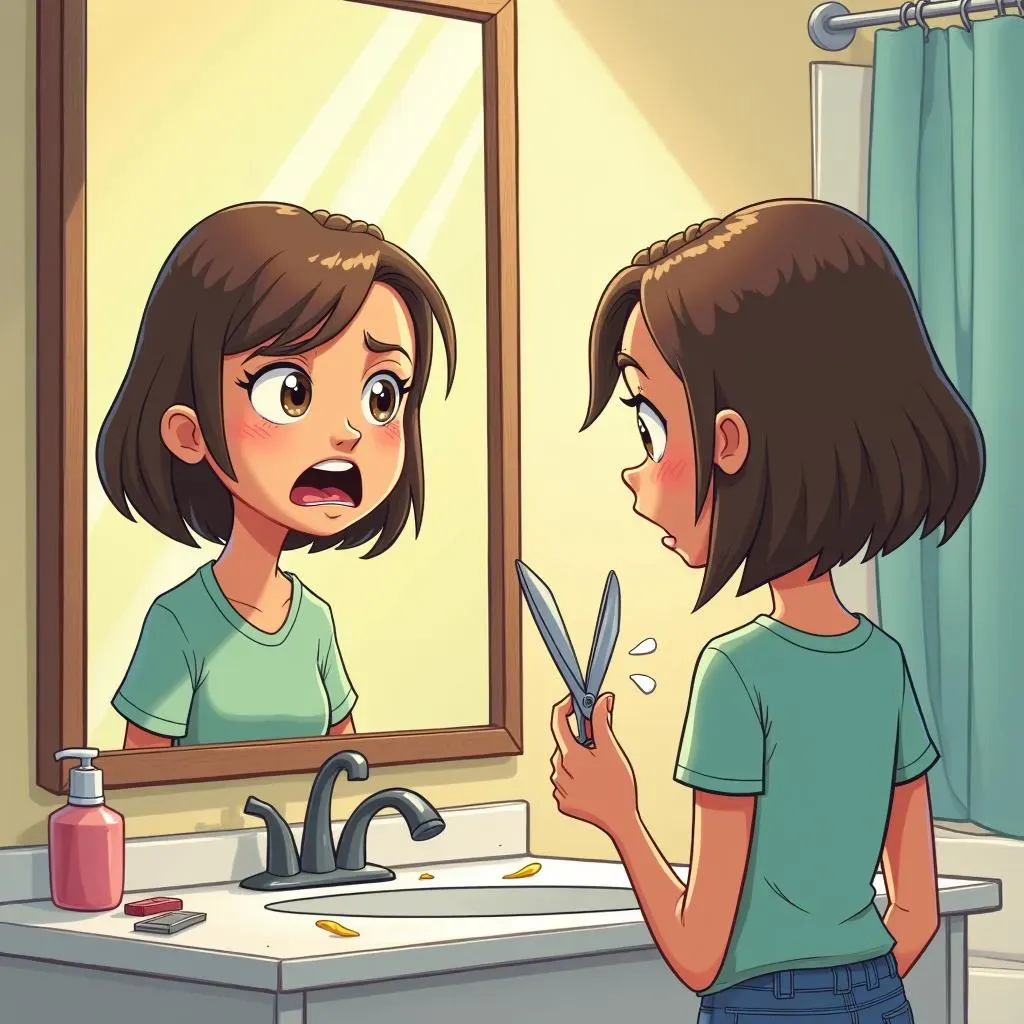
Dealing with Mistakes When You Cut Your Own Hair in a Bob
It's Shorter Than Expected: The "Oops, I Went Too Short!" Fix
so you got a little scissor-happy and now your bob is shorter than you envisioned. Don't panic! It happens to the best of us, especially when you cut your own hair in a bob. The first thing to do is assess the damage. Is it just a tiny bit too short, or are we talking a major chop job? If it's just a slight trim, you can probably salvage it with some styling tricks. Think volumizing mousse, root lifter, and strategic blow-drying to add some extra oomph and make it appear a bit longer.
However, if you've gone significantly shorter than planned, you might need to adjust your expectations and embrace the new length. Consider adding some layers to soften the edges and create a more intentional look. Or, if you're feeling bold, you could even try a trendy pixie cut! Remember, hair grows back, and this could be an opportunity to experiment with a style you never would have considered otherwise. See it as a happy accident!
Uneven Sides: The Symmetry SOS
Ah, the dreaded uneven bob! This is a common pitfall when you cut your own hair in a bob, especially when you're working with two mirrors and trying to eyeball the symmetry. If you notice that one side is noticeably longer than the other, don't despair. The fix is usually pretty straightforward: simply dampen your hair again, section it carefully, and trim the longer side to match the shorter side.
The key here is to be precise and patient. Use your comb to ensure that both sides are evenly parted and that you're cutting at the same angle. And don't be afraid to take small snips at a time – it's always better to err on the side of caution. Once you've evened out the sides, double-check your work from all angles to make sure everything looks balanced. And if you're still not happy with the result, consider seeking professional help. A stylist can quickly and easily correct any minor imperfections and give you the perfect bob you've been dreaming of.
Mistake | Possible Solution |
|---|---|
Too Short | Volumizing products, layers, embrace a shorter style |
Uneven Sides | Carefully trim the longer side to match the shorter side |
Maintaining Your SelfCut Bob Haircut
Maintaining Your SelfCut Bob Haircut
Regular Trims are a Must
so you've successfully navigated the DIY bob haircut. Congrats! But the journey doesn't end there. To keep your bob looking sharp and stylish, you'll need to commit to regular trims. I'm talking every 4-6 weeks, depending on how fast your hair grows. This will prevent split ends, maintain the shape of your bob, and keep it looking fresh and polished. Think of it like maintaining a garden – you need to prune it regularly to keep it thriving!
Now, you might be thinking, "Do I really have to cut it myself again?" And the answer is, not necessarily! If you're feeling confident, you can certainly continue to cut your own hair in a bob. But if you're starting to feel a bit nervous, there's no shame in visiting a professional stylist for a trim. Just be sure to communicate your desired length and shape clearly to avoid any unwanted surprises. The goal is to maintain the bob you love, not to completely reinvent it!
Styling to Show Off Your Work
so you're keeping up with the trims. What else can you do to keep your self-cut bob looking its best? Styling, of course! A great haircut is only as good as its styling. Experiment with different products and techniques to find what works best for your hair type and desired look. Volumizing mousse can add body and lift to fine hair, while smoothing serum can tame frizz and flyaways. A round brush and blow dryer can create a sleek, polished finish, while a curling iron or wand can add waves and texture.
Don't be afraid to play around and try new things! Watch some tutorials online, experiment with different parts and textures, and find what makes you feel confident and fabulous. Remember, your self-cut bob is a reflection of your personal style, so have fun with it! And don't forget to protect your hair from heat damage with a good quality heat protectant spray. After all, you've put in the effort to cut your own hair in a bob, so you want to keep it healthy and strong!
Maintenance Tip | Description | Benefit |
|---|---|---|
Regular Trims | Every 4-6 weeks | Prevents split ends and maintains shape |
Experiment with Styling | Try different products and techniques | Enhances your personal style |
Heat Protectant | Use before heat styling | Protects hair from damage |
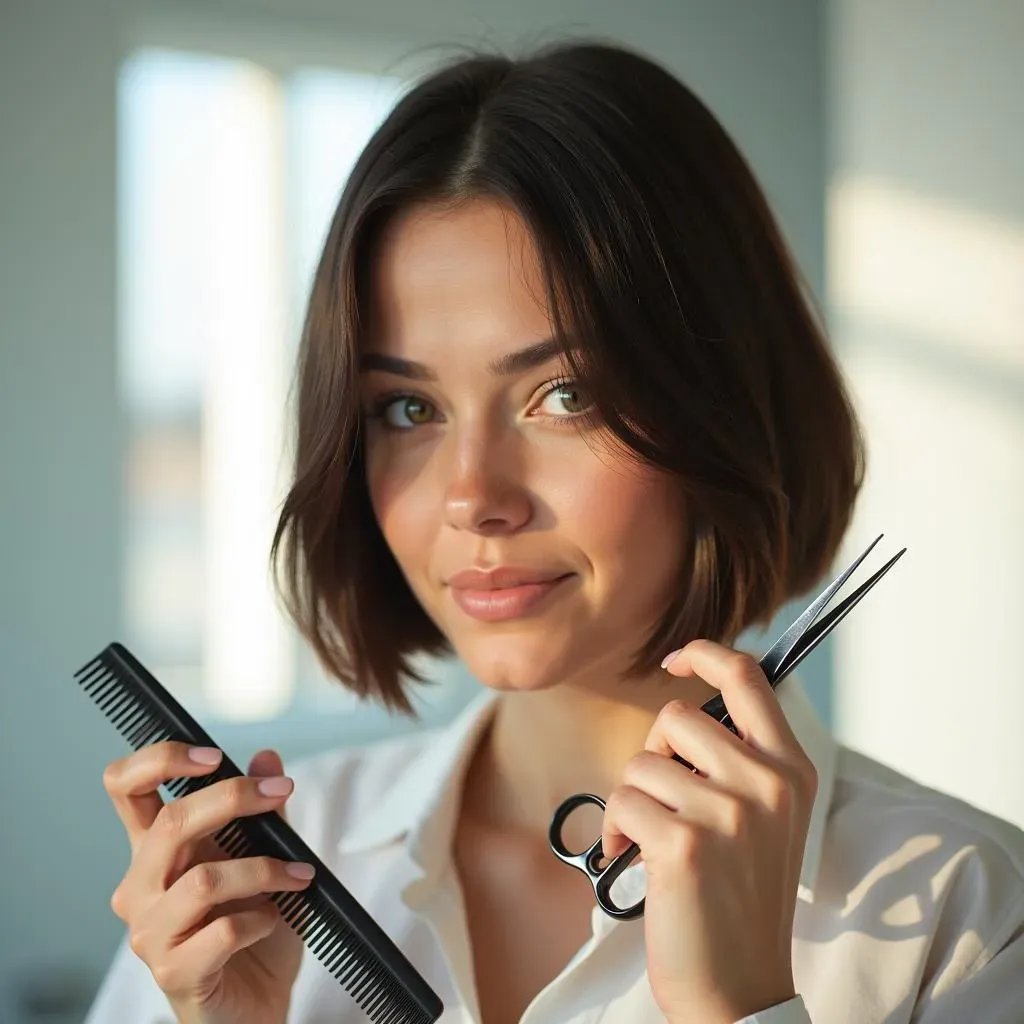
Conclusion
So, you've taken the plunge and learned how to cut your own hair in a bob! Remember, practice makes perfect. Don't be discouraged if your first attempt isn't flawless. The beauty of a bob is its versatility and the ability to customize it to your unique style. By following these tips and techniques, you can maintain a fresh, stylish look without breaking the bank. Embrace the freedom of DIY hairstyling and enjoy your fabulous, self-cut bob!