Are you a curly-haired person who's ever walked out of a salon feeling like your curls were totally misunderstood? It's a tale as old as time: you ask for a trim, and suddenly you're sporting a whole new, unwanted 'do. Getting great hair cuts curly shouldn't be a gamble. This article is your roadmap to navigating the world of curly hair cuts and finally achieving the style you've always wanted. We'll break down the crucial differences between dry and wet cuts, helping you understand which technique suits your unique curl pattern. Plus, we'll explore how to find a stylist who truly "gets" curls, moving beyond the generic "curl specialist" title. Communication is key, so we'll equip you with practical tips on how to articulate your desired cut, using your own hair as a visual aid. Get ready to dive into the power of layers for adding shape and volume, and learn why prioritizing healthy hair is the ultimate secret weapon for stunning curls. Say goodbye to hair cut horror stories and hello to gorgeous, confident curls!
Dry Cut vs. Wet Cut: Which is Best for Your Curly Hair?
Dry Cut vs. Wet Cut: Which is Best for Your Curly Hair?
Understanding the Basics: Dry Cuts
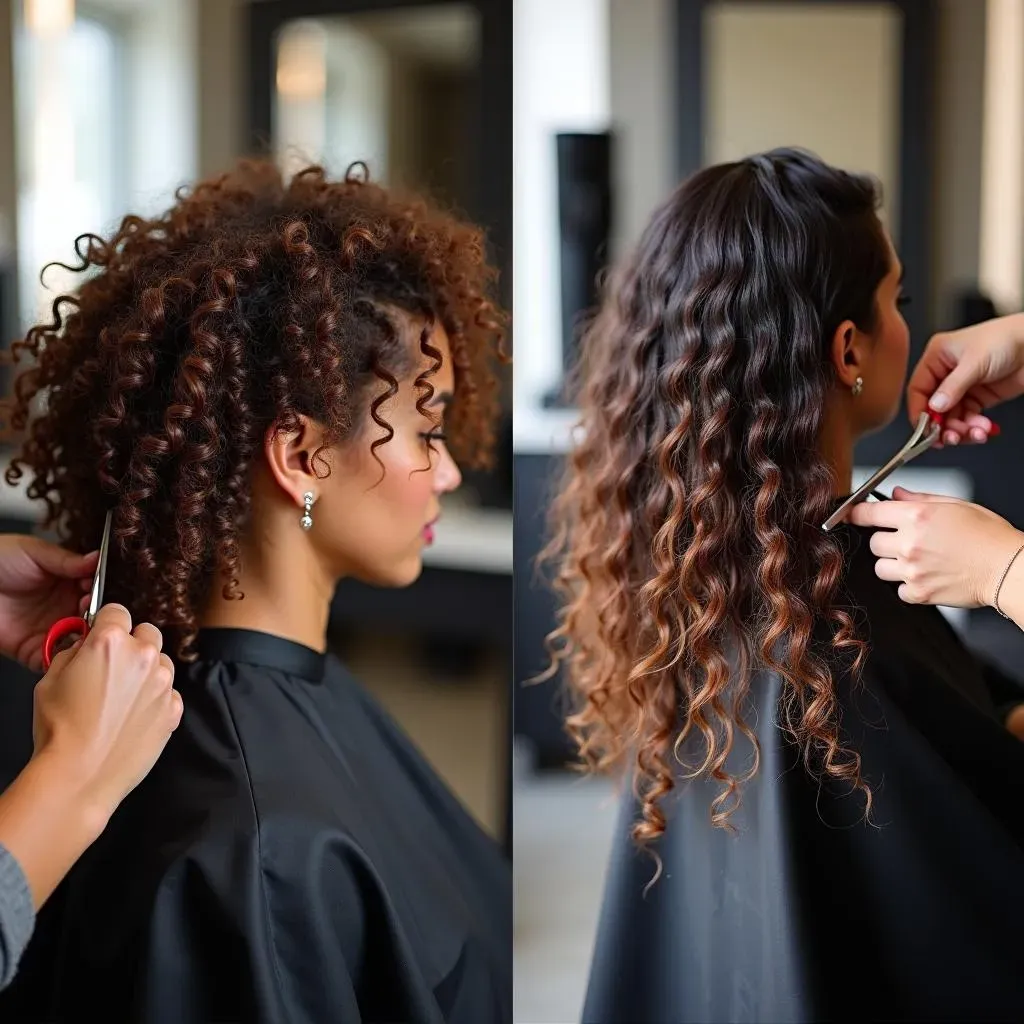
so you're diving into the world of curly cuts, awesome! Let's start with the dry cut. Imagine your curls as springs – when they're dry, they're in their natural, springy state. A dry cut is exactly what it sounds like: your stylist snips away while your hair is dry, allowing them to see the exact shape and bounce of each curl. This is especially crucial for tighter curl patterns (think 3b to 4c) because shrinkage is a real thing. You don't want to end up with a surprise bob when you thought you were just getting a trim!
When Wet Cuts Work: Looser Curls
Now, wet cuts aren't the enemy, especially if you rock looser waves or curls (like 2a to 3a). When hair is wet, it's elongated, making it easier to create precise lines and even layers. Think of it like sculpting – sometimes you need a blank canvas to start. Plus, if you're going for a more structured style, a wet cut can provide that foundation. However, communication is still key! Make sure your stylist understands your curl pattern and how much your hair will shrink as it dries.
Finding the Right Stylist: Beyond the "Curl Specialist" Label

Finding the Right Stylist: Beyond the "Curl Specialist" Label
so you're on the hunt for a curl whisperer, huh? Don't get too hung up on the "curl specialist" title alone. It's more about finding someone with a genuine understanding of curly hair textures and the skills to back it up. Think of it like this: a chef can specialize in Italian food, but that doesn't guarantee they can make a decent pizza. Same goes for hair. Instead of solely relying on labels, look for stylists who are passionate about continuing their education, stay updated on the latest curly hair techniques, and have a portfolio that showcases a range of curl types and styles. That's where the real magic happens.
Communicate Like a Pro: Getting the Hair Cuts Curly You Actually Want

Communicate Like a Pro: Getting the Hair Cuts Curly You Actually Want
Alright, let's get real about hair cuts curly. You've found a stylist who seems promising, now how do you ensure you actually get the cut you envision? This is where your communication skills come into play. Don't just say "I want layers." Show them! Bring photos of cuts you love, and even more importantly, cuts you don't like. But here's the kicker: use your own hair to demonstrate. Pull up sections to show where you want the layers to start and end. Twist a curl to illustrate how much length you're comfortable losing. Think of your hair as a 3D model, and you're the architect guiding the stylist. The more visual and specific you are, the less room there is for misinterpretation.
And hey, don't be shy about bringing your own products! Sulfate and silicone-free, of course. This way, you know exactly what's going on your hair, and you can avoid any potential allergic reactions or product incompatibilities.
Also, consider your lifestyle. Are you a wash-and-go kind of person, or do you enjoy spending time styling your curls? Shorter, more defined curly styles often require more styling, so be honest with yourself about how much effort you're willing to put in. The goal is to find a cut that complements your lifestyle, not complicates it.
Do This | Not That |
|---|---|
Bring photos of styles you love AND hate. | Just saying "I want layers." |
Use your own hair to demonstrate desired length and layers. | Relying solely on verbal descriptions. |
Bring your own trusted hair products. | Blindly trusting salon products. |
Layers, Layers, Layers: How to Use Them for Shape and Volume in Hair Cuts Curly
Layers, Layers, Layers: How to Use Them for Shape and Volume in Hair Cuts Curly
Short and Sweet: Layers for Short Curly Hair
Got a pixie cut or a bob with curls? Layers are your best friend! They can transform a potentially triangular shape into a bouncy, voluminous masterpiece. The key here is to avoid layers that are too short on top, which can create a "shelf" effect. Instead, ask your stylist for soft, blended layers that start around your cheekbones or jawline. This will add lift and movement without sacrificing definition.
Also, consider an undercut! It might sound intimidating, but a subtle undercut can remove weight from the under layers, allowing the top layers to really shine. Just make sure your stylist is experienced with undercuts on curly hair to avoid any unwanted bulkiness.
Mid-Length Magic: Layers for Shape and Volume
If you're rocking mid-length curls (hitting around your shoulders or collarbone), layers are crucial for preventing that dreaded "triangle head." Think of layers as the scaffolding that supports your curls, giving them structure and preventing them from falling flat. The placement of your layers will depend on your curl pattern and face shape, so it's essential to have an open conversation with your stylist.
For looser curls, longer layers can add movement and prevent the hair from looking too heavy. For tighter curls, shorter layers can create more volume at the crown. Experiment with different layering techniques to find what works best for you.
Long and Luscious: Layers for Long Curly Hair
Long curly hair can be gorgeous, but it can also be a lot to handle. Layers are essential for preventing your curls from becoming weighed down and shapeless. However, the key with long hair is to avoid over-layering, which can create a wispy, uneven look.
Instead, focus on long, gradual layers that start around your chest or even lower. This will add movement and prevent your hair from looking like one giant mass of curls. Also, consider your hair density. If you have thick hair, you may need more layers to remove weight. If you have fine hair, fewer layers are better to avoid a stringy appearance.
Remember, healthy hair is always the priority. Don't be afraid to trim off any damaged ends, even if it means sacrificing some length. Healthy curls will always look better than long, damaged ones.
Hair Length | Layering Tips |
|---|---|
Short | Soft, blended layers; consider an undercut |
Mid-Length | Crucial for preventing "triangle head"; experiment with length |
Long | Long, gradual layers; consider hair density |
Healthy Hair First: Ditching Damage for Dream Curls
Healthy Hair First: Ditching Damage for Dream Curls
Why Healthy Hair Matters
let's talk about the real deal: healthy hair. It doesn't matter how amazing your cut is if your curls are dry, brittle, and damaged. Think of it like this: you can't build a beautiful house on a weak foundation. The same goes for your curls. If you want those dream curls, you've got to prioritize hair health first.
That means ditching the heat styling, sulfates, and silicones that can strip your hair of its natural moisture. Embrace deep conditioning treatments, gentle detangling techniques, and protective styling to minimize breakage. And most importantly, don't be afraid to cut off those damaged ends! I know it can be scary to lose length, but trust me, healthy, shorter curls will always look better than long, damaged ones.
Snip, Snip, Hooray: Cutting Off the Damage
Seriously, that damaged hair has GOT to go. Split ends are like a bad relationship – they're only going to get worse if you don't cut them off. Plus, split ends can travel up the hair shaft, causing even more damage. So, be brave and book that trim! Ask your stylist to assess your hair and snip off any damaged ends, even if it's just a tiny bit. You'll be amazed at how much healthier and bouncier your curls will look.
And while you're at it, consider ditching those razors and thinning shears, unless you're specifically going for a textured, piece-y look. Razors can create weak points in the hair shaft, leading to frizz and breakage. Thinning shears can disrupt the curl pattern and create unevenness. Stick to blunt cuts and layering techniques that enhance your natural curl pattern.
Think of it like this:
- Healthy Hair = Strong, defined curls, less frizz, more shine
- Damaged Hair = Weak, undefined curls, lots of frizz, dullness
Conclusion: Embrace Your Curls, Love Your Hair
Finding the right hair cuts curly is a journey, not a destination. By understanding your curl type, communicating effectively with your stylist, and prioritizing hair health, you're well on your way to unlocking your best curls ever. Don't be afraid to experiment, advocate for your hair's needs, and remember that healthy, happy curls are always the goal. So go forth, book that appointment, and get ready to rock a haircut that truly celebrates your unique texture and style. Your dream curls are waiting!