Table of Contents
Thinking about a stylish bob but dreading the salon? You're not alone! Many of us have wondered, "Can I really learn how to cut hair bob cut at home?". The answer is yes, with a bit of patience and the right guidance, you can achieve a fantastic bob without breaking the bank. This article is your ultimate guide, designed to take you from hair-cutting novice to bob-slaying pro. We'll start with gathering the essential tools, making sure you're prepped for success. Then, we'll break down the cutting process, focusing on the back, sides, and how to achieve that perfect shape. Finally, we’ll discuss the secrets to refining your cut, adding texture, and making your new bob look like it came straight from a salon. Get ready to transform your look and save some money in the process – let's get snipping!
Gathering Your Bob Cut Arsenal
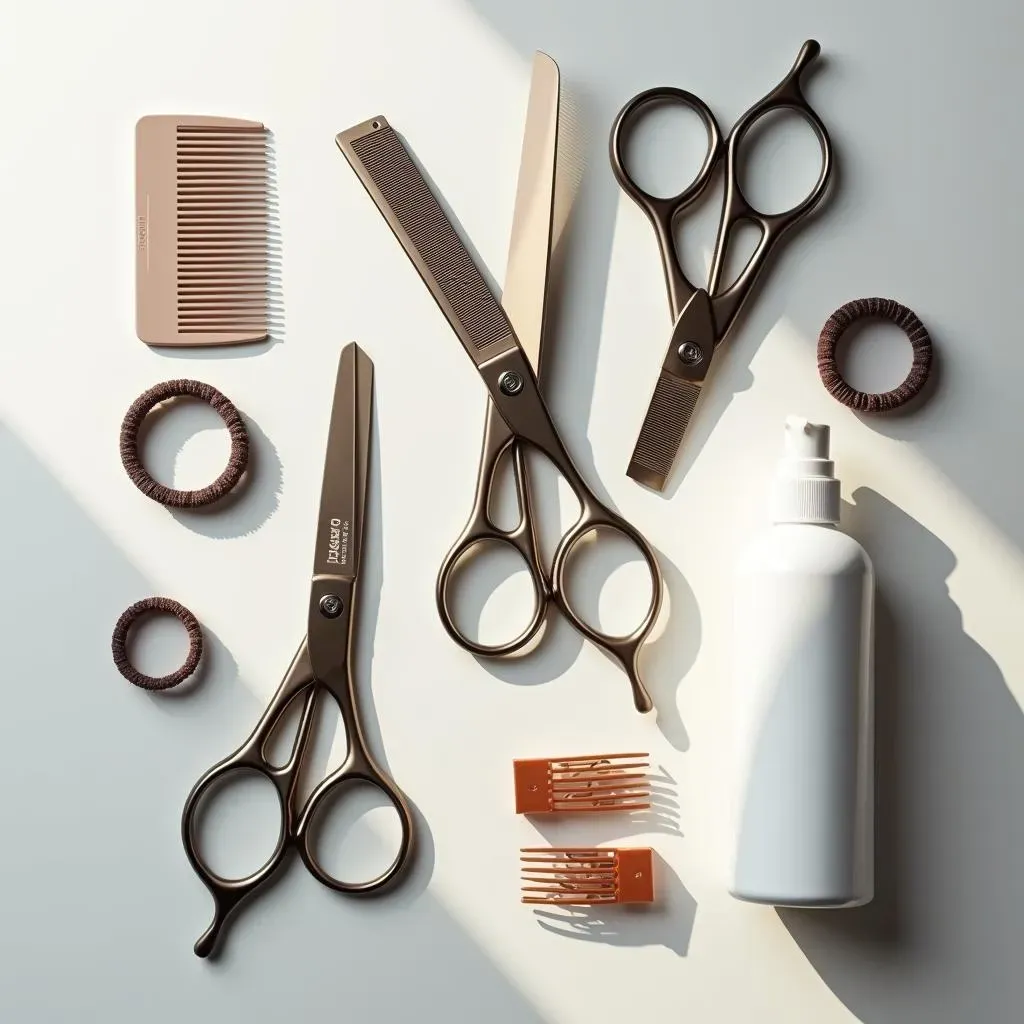
Gathering Your Bob Cut Arsenal
Okay, so you're ready to dive into the world of DIY bob haircuts? Awesome! Before you even think about picking up those scissors, let's talk about your toolkit. It's like prepping for a big cooking project – you wouldn't try to bake a cake without the right ingredients, would you? The same goes for cutting hair. You will need a few key items. First, a good pair of hair-cutting shears is a MUST. I cannot stress this enough. Please, don't grab the kitchen scissors. You need proper shears, they are sharper and will give you a clean cut, that's crucial for a bob. Think of them as your magic wands. Next up, some hair clips or ties, these will be your best friends, holding back sections of hair and getting them out of the way. A comb with fine teeth is also super important. It helps to create nice, even sections. And finally, a spray bottle with water, this will keep your hair damp. Damp hair is easier to manage. I mean, trying to cut dry hair? That’s just asking for trouble.
Tool | Why You Need It |
|---|---|
Hair-Cutting Shears | For clean, precise cuts. |
Hair Clips or Ties | To section and hold hair out of the way. |
Fine-Tooth Comb | For even sections and detangling. |
Spray Bottle | To keep hair damp for easier cutting. |
How to Cut Hair Bob: The Back Section
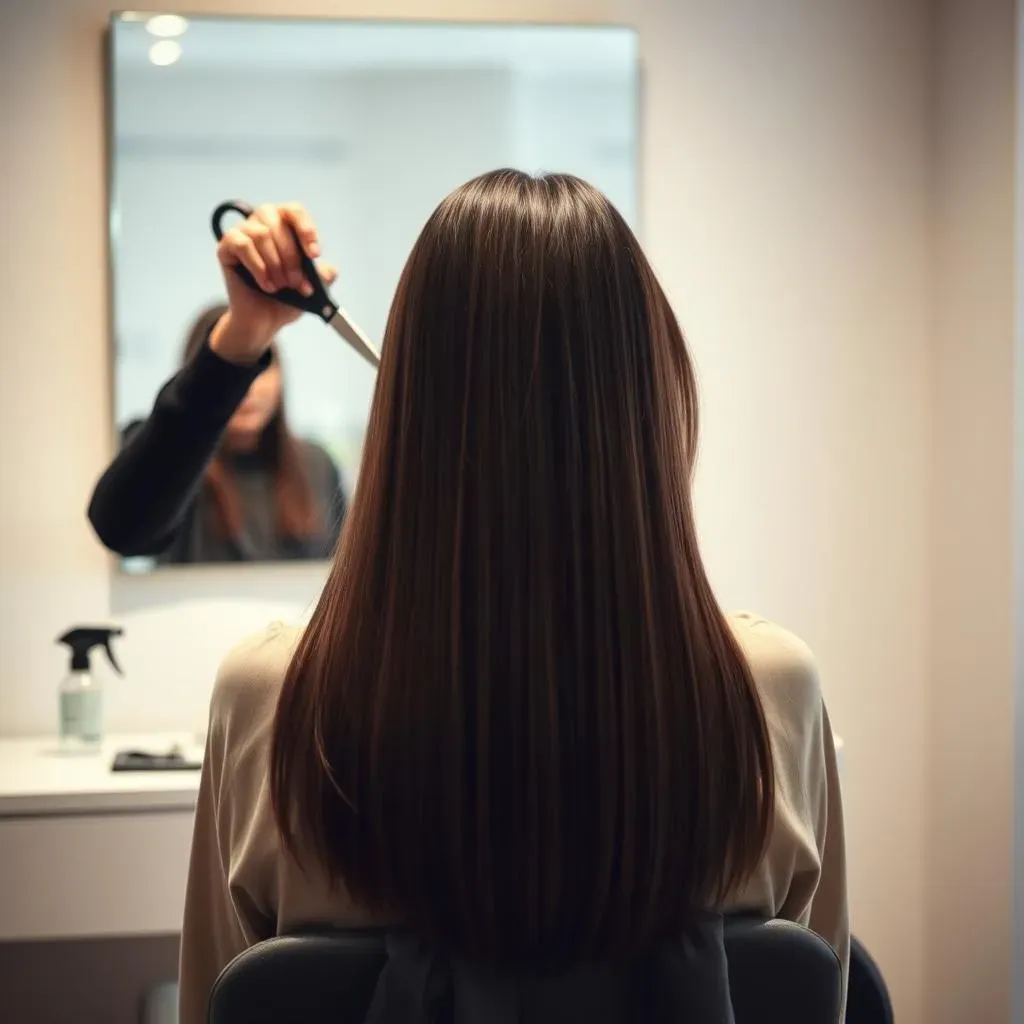
How to Cut Hair Bob: The Back Section
Getting Started with the Back
Alright, let's tackle the back section, this is where the magic begins. First, make sure your hair is damp, not soaking wet, just a bit damp. It's like trying to write on a dry erase board – if it’s too dry, it won’t work. If it’s too wet, it will smear. Now, using your comb, create a clean horizontal part across the back of your head, from ear to ear. This is going to be your guide for this first cut, so take your time and make sure it’s straight. Imagine you’re drawing a line with a ruler, but on your head. Clip the hair above this part out of the way, you don’t want it getting in your way. You can use hair ties as well. This will isolate the section you’re working on, making everything much easier.
The First Cut
Now, for the actual cut. Take a deep breath, it’s going to be fine. Starting in the middle of the back section, take a small, thin section of hair (about half an inch or so). Hold it between your index and middle finger, pulling it down gently. Make your first cut, keeping your shears parallel to the floor. Don't try to chop it all off at once, little by little is better. This first cut will be your guide for the rest of the back. Once you have this guide length, take another small section next to the first one, use the first cut as a guide to cut the second section and continue on one side of the head. Repeat the process on the other side of the head, making sure both sides match in length. Keep going until you've cut all the hair in the back section. If you need to use the spray bottle to keep the hair damp, feel free to do so.
Checking Your Work
Once you've cut the entire back section, it's time to check your work. Comb through the cut hair to ensure that the line is straight and even. It’s like checking your math homework, you want to make sure you didn’t make any mistakes. If you find any uneven spots, carefully trim them. Remember, it's better to cut less than to cut too much. You can always cut more, but you can't put hair back on. It’s a good idea to check the length against the front of your face, to make sure that you have the bob length you want. The back section is the foundation of your bob, so it's crucial to get it right. If you're unsure, take a break and come back to it later with a fresh set of eyes.
Step | Action |
|---|---|
1 | Create a clean horizontal part across the back of your head. |
2 | Clip the hair above the part out of the way. |
3 | Make the first cut in the middle, using small sections. |
4 | Use the first cut as a guide for the rest of the back. |
5 | Check your work and trim any uneven spots. |
Cutting the Sides and Shaping Your Bob

Cutting the Sides and Shaping Your Bob
Preparing the Side Sections
Okay, so the back is looking good, right? Now, let's move on to the sides, which are crucial for framing your face. Just like with the back, we need to start with damp hair. It's like painting – you wouldn't paint a dry canvas; you’d prep it with a bit of water to make the paint glide better. Now, comb through your hair and create a clean part down the middle of your head. This will give you two equal side sections to work with. Clip or tie the back section out of the way so it doesn’t interfere, we want to focus on one thing at a time. These sections are where the bob really starts to take shape, so a bit of focus now will pay off later.
Cutting the Side Sections
Now for the fun part! Take a small section of hair from one side, starting near your face. Hold it between your fingers, just like you did in the back. Use the length of the back section as a guide to cut this side section. You want to make sure that the sides blend well with the back. Remember, small cuts are better than big chops. Keep going section by section, working your way back from the face towards your ear. This is where you can start to get creative with the shape. If you want a more angled bob, cut the front sections a bit longer than the back. If you want a classic bob, keep the sides about the same length as the back. Repeat this process on the other side, making sure that both sides are even. This step is super important for a balanced look.
Shaping and Blending
Once you've cut all the hair on the sides, it's time to do a little shaping and blending. Comb through your hair to check for any uneven spots. If you find some, trim them carefully. Now, you can start thinking about the overall shape of your bob. Do you want a sharp, defined line, or something a bit softer and more textured? Depending on your preference, you can use your scissors to refine the edges, creating the look you want. If you want a softer edge, you can even try using a hair razor to taper the ends a little bit. It's like sculpting, you’re taking away little bits to reveal the final shape. Just be patient, and don’t be afraid to make small adjustments. This is where your bob goes from a simple cut to a stylish masterpiece.
Step | Action |
|---|---|
1 | Create a middle part and separate side sections. |
2 | Use the back length as a guide for the sides. |
3 | Cut in small sections, working from face to ear. |
4 | Shape and blend the sides for the final look. |
Refining Your Bob Cut and Adding Texture

Refining Your Bob Cut and Adding Texture
Tapering and Texturizing
Alright, so you’ve got the basic bob shape down, that’s awesome! Now, let's talk about taking it from "just cut" to "salon fabulous." This is where tapering and texturizing come in. Tapering is like giving your hair a gentle slope, rather than a blunt edge. It helps to soften the line and make it look more natural. You can do this using your hair razor, holding it at a slight angle and gently gliding it along the ends of your hair. It's like sanding down a piece of wood to make it smooth. If you don’t have a razor, you can achieve a similar effect with your shears by point-cutting – this means holding your shears vertically and making small snips into the ends of your hair. It's like creating tiny little steps instead of a straight line. This will remove the harsh lines and create a softer look. Texturizing is about removing bulk and adding movement to your hair. If your hair is thick, this step is super important, it prevents that triangular, heavy look.
Thinning and Adding Volume
If you have thick hair you might want to consider using thinning shears. These are not the same as regular cutting shears, they have teeth on one side that remove some of the hair without cutting it all off. It's like thinning out a garden, you remove some plants so the others have more room to grow. Use thinning shears on the ends of your hair, making small snips to remove some of the bulk. This will help your bob look lighter and more airy. If you’re looking for more volume, you can add some subtle layers. This means cutting the hair at different lengths, creating that lift and movement. Be careful with this step though, layers can be tricky, so start with small sections and don't cut too much at once. You can also use some styling products, like volumizing mousse or texture spray, to enhance the natural body of your bob. Remember, it's all about balance, you want to remove excess bulk without making your hair look thin or stringy.
Technique | Purpose |
|---|---|
Tapering | Softens the edges of your bob. |
Texturizing | Removes bulk and adds movement. |
Thinning | Reduces thickness, especially for dense hair. |
Layering | Adds volume and lift to your bob. |
Final Touches and Maintenance
Once you’re happy with the shape and texture of your bob, it's time for the final touches. Comb through your hair one last time, checking for any stray hairs or uneven spots. If you find any, carefully trim them. Now, step back, take a look in the mirror, and admire your work! You did it! You’ve successfully cut your own bob! Now, let's talk about maintenance, because a bob needs a little bit of upkeep. Depending on how fast your hair grows, you will need to trim it every 4-6 weeks to maintain its shape. You don’t have to do a full cut each time, just a little trim to keep it looking fresh. If you’re unsure about doing it yourself, you can always visit a salon for a maintenance cut, or just let a professional create the bob style and then trim it yourself at home. The important thing is to keep your bob looking its best.
Remember, practice makes perfect, so don’t be discouraged if your first attempt isn’t flawless. Just keep practicing, and you’ll get better with each try. And if you ever feel lost, there are tons of tutorials online that can help you out. Cutting your own hair can be a bit daunting at first, but it’s also super rewarding. Not only will you save money, but you’ll also gain a new skill that you can use to keep your hair looking great. So, go ahead, grab those shears, and get ready to rock that bob!
Wrapping Up Your DIY Bob Cut
So, you've braved the scissors and successfully navigated the world of at-home bob haircuts. It wasn't so scary, was it? Remember, the key to a great DIY bob is patience, precision, and a willingness to experiment. Don't be afraid to tweak things as you go. If you're feeling hesitant, start with a longer length, you can always go shorter. With practice, you'll become more confident and might even find yourself looking forward to your next trim. Now go rock that stylish bob you created all by yourself!