Table of Contents
Ever looked at a chic bob and thought, "I could totally do that"? Well, maybe you can! Cutting your own hair can feel like a daring adventure, especially when it comes to a stylish bob. But with a little guidance, you can achieve a great look without a salon visit. This article is your friendly guide on how to cut your hair in a bob at home, showing you each step to create a fashionable A-line bob. We'll start with the basics like parting and sectioning, then move to the all-important cutting process, and finally, show you how to blend everything together for a polished finish. Think of it as a DIY haircutting class, where you are the star student. Remember, it might not be perfect on the first try, but the satisfaction of creating your own bob is totally worth it. So, grab your scissors, and let's get started on this transformation!
Parting and Sectioning for Your Bob
Parting and Sectioning for Your Bob
Prep Work: Finding Your Natural Part
Alright, let's get down to business. Before you even think about picking up those scissors, you've got to get your hair ready. It's like prepping a canvas before you start painting. First things first, grab your brush and give your hair a good going-over. You want to get rid of any knots or tangles, so you’re working with a smooth surface. Now, find your natural part. Don’t force it to go where it doesn't want to. It's usually where your hair naturally falls. This is the starting point for our bob masterpiece. Think of it as the foundation of your haircut, you wouldn’t build a house on shaky ground, right?
Sectioning: Divide and Conquer
Now that your hair is smooth and parted, it's time to section things off. Think of it like dividing a pizza, we are making sure each piece gets its fair share of attention. We are going to divide your hair into three sections: the left, the right, and the back. The back section is super important, because that's where you start cutting. Use hair ties or clips to keep each section separate, like you are setting up boundaries for a tiny kingdom. This keeps things organized and prevents you from accidentally snipping a part of your hair that you didn't intend to touch. Trust me, it's easier to manage this way.
Section | Purpose |
|---|---|
Back Section | Starting point for cutting, establishes the length. |
Left Section | Will be cut to blend with the back. |
Right Section | Will be cut to blend with the back and other side. |
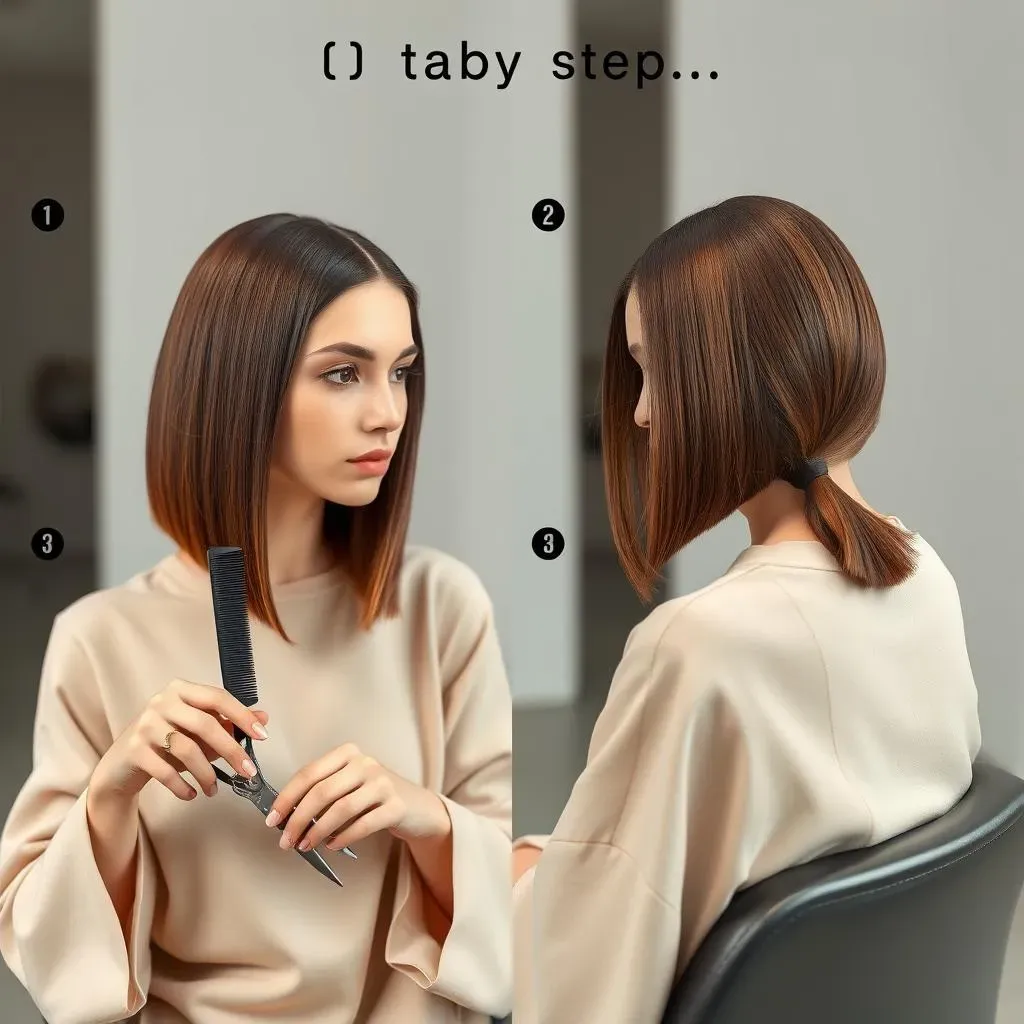
The Back Section: Ponytail Power
let's focus on the back section now. Take that section of hair and pull it into a low ponytail. The ponytail should sit right at the nape of your neck. Make sure it's nice and centered, not leaning to one side. This ponytail isn’t just for looks, it’s your guide. It's going to help you to make a clean, straight cut. The lower the ponytail, the longer your bob will be. So, if you’re going for a shorter bob, slide that hair tie up a bit. If you want it a bit longer, slide it down. This little adjustment is key to getting the length you want. Remember, we’re going for precision here. It's not a race; take your time to ensure that ponytail is exactly where you want it.
Cutting Your Hair Into a Bob Shape
Cutting Your Hair Into a Bob Shape
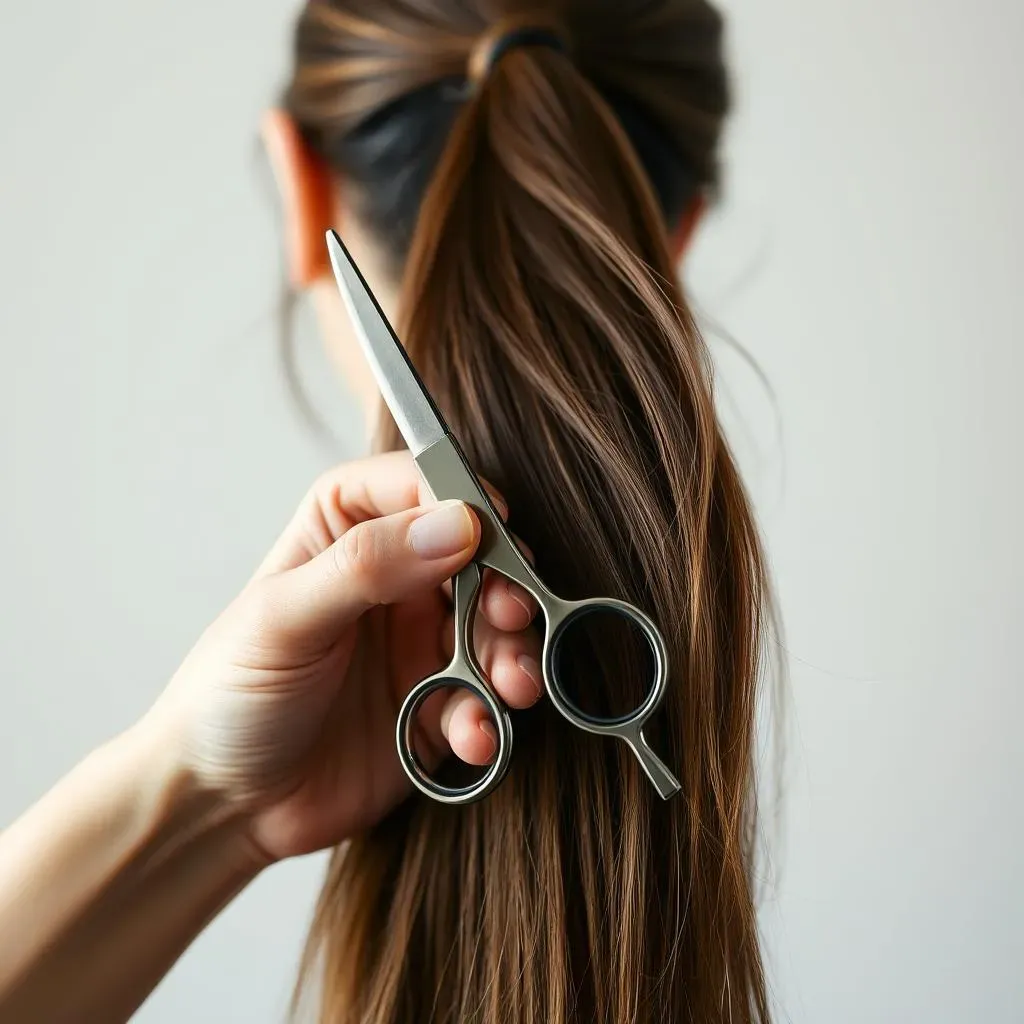
The Big Snip: Cutting the Back Section
here’s where the magic happens, or at least where the actual cutting does. Remember that ponytail you so carefully positioned? That's your target. Now, take your scissors—make sure they're sharp, dull scissors are a recipe for disaster—and cut straight across the ponytail. Yes, just like that! Don't overthink it. The goal is to create a clean, even line. This first cut sets the foundation for your entire bob. Think of it like laying the first brick in a wall; it needs to be straight. If you're nervous, start with a little bit of hair and then trim again. You can always take more off, but you can't glue it back on.
Once you've made that first cut, take a step back and check your work. Does it look even? If not, make small adjustments. This isn't a race; it's a careful process. Remember, we're aiming for an A-line bob, which means the back should be slightly shorter than the front. This initial cut is the key to setting the length for the back of your bob and will guide the rest of your cutting.
Shaping the Sides: Creating the A-Line
Now that the back is done, it's time to tackle the sides. Let down those side sections you carefully clipped away. Now, we're going to create the A-line shape, which is what gives a bob its signature look. Take one side section and comb it out straight. You'll want to cut this section on a diagonal, blending it into the back. Think of it like creating a smooth, sloping line that gradually gets longer towards the front. Don't just chop straight across, or you will end up with a very different style. The diagonal cut will naturally create that A-line shape that we are after. Repeat this on the other side, trying to match the angle and length as closely as possible. It's like trying to make twins, not identical, but close enough!
Take a pause here and look at your hair in the mirror. Does the A-line shape look like it's coming together? If you need to make tiny adjustments, do it. Remember, the key is to blend the sides into the back, creating a smooth transition. This is where you really start to see your bob take shape. It’s like watching a sculpture come to life—you're slowly chiseling away at it until you get the form you want. This is the most important part for getting that classic bob style.
Step | Description |
|---|---|
Back Cut | Cut straight across the ponytail to set the length. |
Side Cut | Cut diagonally, blending into the back for the A-line shape. |
Blending and Shaping Your Bob Haircut
Blending and Shaping Your Bob Haircut
Tapering the Look: Smoothing Out the Edges
so you've got the basic shape of your bob down, but now it's time to make it look like you actually went to a salon, not just attacked your hair with scissors in your bathroom. This is where tapering comes in. Tapering is about blending any harsh lines and making everything flow nicely. You might have some spots where the hair looks a little blocky, or the layers seem too abrupt. Grab your scissors and start snipping at those edges, holding the scissors at a slight angle. Think of it like softening the edges of a drawing with a smudge tool. This isn't about taking off a lot of length, but rather refining the existing cut. You're just making sure that the different sections of your hair flow together smoothly, like a waterfall cascading down a cliff.
If you are feeling brave, you could try using a razor. A razor can help create a softer, more feathered look. But if you have never used one before, maybe stick with the scissors for now. It’s all about tiny adjustments. Don't get all carried away and take off too much hair. The goal here is to refine, not to redesign. Take your time and work in small sections. It’s like adding spices to a dish, a little bit at a time, until you get it just right. Remember, a smooth, tapered bob is the goal.
Adding Texture: Layers for Movement
Now, for those of you who want to add a little extra oomph to your bob, let's talk about layers. Layers can add movement and texture to your hair, preventing it from looking too flat or boxy. This is especially useful if you have thick hair that tends to look heavy. To add layers, you want to take small sections of your hair and cut them at a slightly different length than the surrounding hair. Think of it as creating a staircase with your hair, where each step is a bit shorter than the one below it. This will give your bob some lift and dimension. You don't have to go crazy here. A few subtle layers can make a huge difference.
If you are a newbie to layers, start with a few face-framing layers. This will help give your bob a more modern and stylish look. It's like adding a sprinkle of fairy dust to your haircut. It's important to note that less is more sometimes. You want to enhance your hair, not give it a whole new structure. So, add layers slowly and carefully and step back and check your progress. This step will bring your bob to a whole new level.
Technique | Purpose |
|---|---|
Tapering | Softens harsh lines, blends layers. |
Layering | Adds movement and texture, prevents flatness. |
The Final Check: Evenness and Adjustments
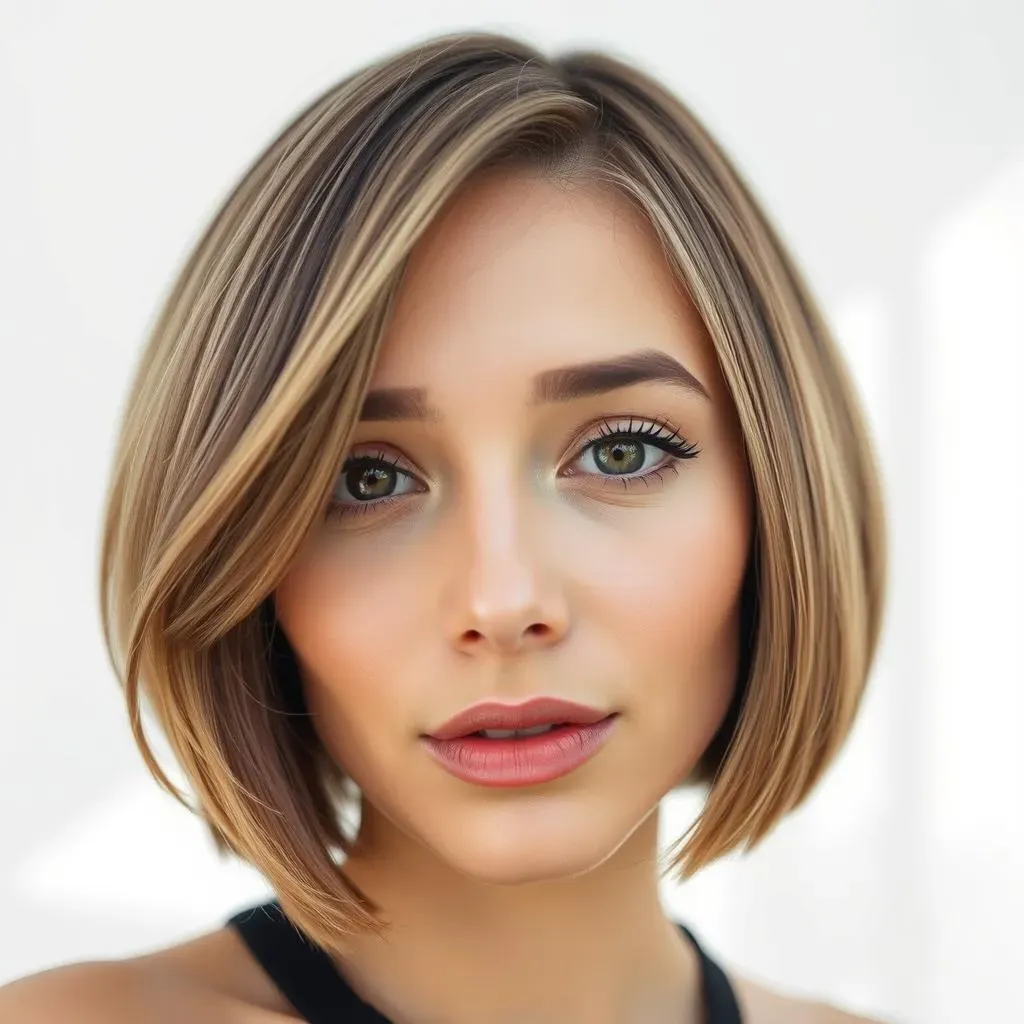
Alright, you are almost there! It's time for the final check. Stand in front of a mirror and really look at your bob. Is it even? Do both sides look like they are the same length and angle? Check the back, make sure there are no random hairs sticking out. If you see anything that looks a little wonky, grab your scissors and make those tiny adjustments. It is like you are a detective, looking for any flaws in your masterpiece. Don’t be afraid to get up close and personal with your hair. It’s all about making sure that every single strand is working together to create the perfect bob.
Remember, perfection is not the goal, but a well-balanced, even cut is. This is where you really put the finishing touches on your bob. It's all about fine-tuning and making those little changes that will elevate the whole look. If you are happy with the look of your bob, then congratulations! You have successfully cut your own hair into a bob. Now, go show off your new cut. You deserve it!
Wrapping Up Your DIY Bob
So, you've taken the plunge and cut your own hair into a bob! Give yourself a pat on the back. Remember, mastering how to cut your hair in a bob takes practice, and it’s okay if it isn’t perfect the first time around. The key is to take your time, follow the steps carefully, and don't be afraid to make small adjustments as you go. Keep in mind that a bob typically needs a trim every 3-4 weeks to keep its shape, so you'll get more chances to refine your technique. And who knows? Maybe you'll even start experimenting with different styles like an asymmetrical or inverted bob in the future. The most important thing is that you now have the skills to rock a stylish bob, all thanks to your own two hands!