Table of Contents
Ever looked at a stylish bob and thought, "I could totally do that myself"? Well, maybe you can! Cutting your own hair might seem like a scary movie plot, but with the right prep and a little bit of guts, you can absolutely rock a DIY bob. This guide will take you through the process, step-by-step, showing you exactly how to cut your own bob hair at home. We'll start by getting your tools together, then move into the actual cutting (don't worry, it's not as terrifying as it sounds). We'll talk about how to style your new 'do and even cover some common hiccups you might face. So, ditch the salon appointment and let's get snipping. By the end of this, you might just have a brand new look and a newfound skill. Ready to transform your hair and embrace the bob life? Let's dive in!
Gathering Your Hair Cutting Arsenal
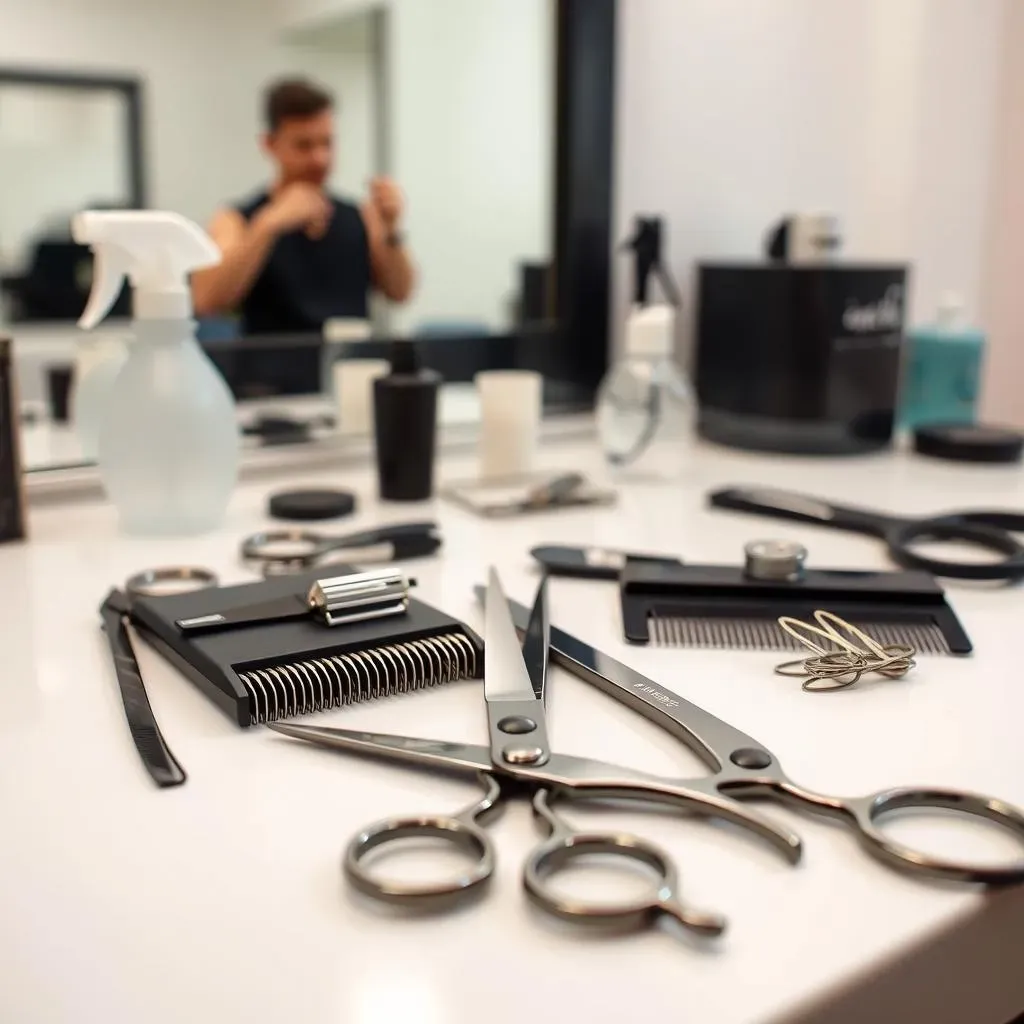
Gathering Your Hair Cutting Arsenal
Okay, so you're ready to grab those scissors, huh? Hold your horses! Before we even think about snipping, we need to get our toolkit ready. Think of it like prepping for a battle, but instead of swords, we've got shears and clips. First, you'll need a good pair of hair-cutting shears. Not your kitchen scissors, okay? These are designed for hair, and they'll give you a much cleaner cut. Then you'll need a comb, preferably one with fine teeth for sectioning. Hair clips are a must for keeping things tidy, and a spray bottle filled with water can help if your hair dries out while you're working. Don't forget a mirror, preferably one that lets you see the back of your head. And finally, have a towel handy, because things might get a little hairy.
Tool | Why You Need It |
|---|---|
Hair Cutting Shears | For a clean, precise cut. |
Fine Tooth Comb | For sectioning and detangling. |
Hair Clips | To keep hair out of the way. |
Spray Bottle | To keep hair damp. |
Mirror | To see what you're doing. |
Towel | To catch stray hair. |
The Bob Haircut: StepbyStep

The Bob Haircut: StepbyStep
First Things First: Sectioning Your Hair
Alright, let's get to the exciting part. Before you start snipping away like a mad scientist, it's super important to section your hair. Think of it like dividing a cake into equal slices, you want everything to be even. Start by parting your hair down the middle, right from your forehead to the nape of your neck. Now, using your comb, create another part from the top of your ear to the middle part, on both sides. You should now have three sections: one at the back and one on each side of your head. Use your hair clips to secure the side sections, keeping them out of your way. This leaves you with the back section ready to be trimmed first. This is the base for your bob, so it's important to get this bit right.
Make sure your hair is damp, but not soaking wet. If it starts to dry out, grab your spray bottle and give it a little spritz. You want it to be easy to manage and cut. Now, take a deep breath, because this is where the magic happens!
Making the Cut: The Back Section
Okay, back section is ready to go. Here's the deal: you're going to cut straight across, but before you do, decide how long you want your bob to be. A good starting point is around chin length. Once you have decided how long you want your bob, take the hair in your back section and hold it straight down. Now take your scissors and make your cut. Be brave, but careful. Remember, it's better to cut a little bit at a time, you can always take more off, but you can't stick it back on. If you are nervous, start a little longer than your target length. Once you've made your initial cut, double-check that it's even. Use your comb to comb through the section and see if any bits are longer than others and make adjustments accordingly. Once you're happy with the length and it's all even, you are ready to move onto the side sections.
Remember, this is a journey, not a race. Take your time, be precise, and don't panic if it's not perfect on your first try. You are learning a new skill!
Step | Action |
|---|---|
1 | Part hair down the middle. |
2 | Create side sections from ear to middle part. |
3 | Clip side sections out of the way. |
4 | Cut the back section straight across. |
5 | Double-check for evenness. |
Styling and Maintaining Your New Bob

Styling and Maintaining Your New Bob
So, you've got your bob, and it's looking pretty good, right? Now, let's talk about keeping it that way. Styling a bob can be super fun because it's so versatile. You can go for a sleek, straight look with a flat iron, or add some waves with a curling iron. If you're feeling low-maintenance, a little bit of texturizing spray can give you that effortless, tousled vibe. When it comes to maintaining your bob, regular trims are key, especially if you went for a blunt cut. I'd say aim for a trim every 4-6 weeks to keep it looking sharp. You can do this yourself with a bit of practice, or visit a professional if you're not feeling confident. The good thing is, now you know the basics of cutting your own hair. Also, don’t forget to use a good quality shampoo and conditioner to keep your hair healthy and shiny. Remember, your hair is your crown, so treat it like royalty!
Styling Tip | How To |
|---|---|
Sleek and Straight | Use a flat iron on dry hair. |
Beachy Waves | Use a curling iron or texturizing spray. |
Textured Look | Apply texturizing spray and scrunch with your fingers. |
Another thing to think about is how you treat your hair at night. Sleeping on a silk pillowcase can help reduce friction, which means less frizz and breakage. Also, try not to sleep with your hair tied up too tightly, as this can cause creases and damage. If you're a fan of using heat tools, make sure you use a heat protectant spray beforehand. This will help keep your hair healthy and prevent split ends. And remember, less is more sometimes. Don’t overdo it with products, it can make your hair look greasy or weighed down. A little bit goes a long way. The key is to find what works best for your hair type and stick to it. So, experiment, have fun, and enjoy your fabulous new bob!
Troubleshooting Your DIY Bob Haircut

Troubleshooting Your DIY Bob Haircut
Uh Oh, It's Uneven!
Okay, so you've taken the plunge, and your bob isn't quite as symmetrical as you'd hoped? Don't panic! This is super common, especially when you're new to cutting your own hair. The first thing to do is to take a deep breath, and assess where the unevenness is. Is one side longer than the other? Are there random bits sticking out? If one side is longer, you can carefully trim it to match the shorter side. Use your comb to make sure you're cutting straight across. If there are just a few rogue hairs, you can use your scissors to trim them, using the rest of your hair as a guide. Remember to take it slow, and don't try to fix everything in one go. Small adjustments can make a big difference. Sometimes, a little bit of unevenness can add character, so don't aim for perfection, just aim for balance.
My Bob Looks Too Blunt!
So, you've got a bob, but it's looking a little too blocky? Don't worry, you can definitely soften things up. If your bob is looking too blunt, you can try point cutting. This is where you hold your scissors vertically and snip into the ends of your hair. This will create a more textured, less blunt look. You can also try using thinning shears to remove some bulk. Just be careful not to go overboard, as they can take off a lot of hair quickly. Another trick is to use a hair razor to gently blend the ends of your hair. This can give your bob a more natural, effortless look. Remember, when it comes to fixing a blunt bob, it's all about adding texture and movement, so play around with different techniques until you find what works best for your hair type and style.
Problem | Solution |
|---|---|
Uneven Length | Carefully trim the longer side to match the shorter side, using a comb as a guide. |
Rogue Hairs | Trim individual hairs using the rest of your hair as a guide. |
Too Blunt | Try point cutting, thinning shears, or a hair razor to add texture. |
Help! I Cut it Too Short!
Okay, this is the one we all dread, but it happens. You've gotten a little scissor-happy and now your bob is shorter than you intended. First things first, don't panic! It's just hair, and it will grow back. There's no magic trick to make it longer instantly, so you'll have to wait it out. In the meantime, there are things you can do to style it and make it look its best. You can try using volumizing products to give it some lift, or you can add some waves or curls to give it a bit more length. You can also try a new part to change up the way it looks. It might not be exactly what you wanted, but you can still rock a short bob. The key is to embrace it and have fun with it. In the future, when cutting your own hair, always start with a bit more length, as you can always cut more off, but you cannot put it back on!
The Final Snip: Embracing Your DIY Bob
So, you've taken the plunge and given yourself a bob. How does it feel? Hopefully, pretty darn good! Remember, like any skill, cutting your own hair gets easier with practice. Maybe your first attempt isn't perfect, and that's okay. The important thing is that you learned something new and saved yourself a trip to the salon. If you're feeling brave, you can always experiment with different lengths and styles as you get more confident. So, go ahead and rock that bob, and remember, it's just hair, it grows back. And if you mess up, well, hats are always an option. Congrats on taking control of your style!