Table of Contents
Ever looked at a stylish bob and thought, "I could totally do that myself"? Well, you're not alone, and you absolutely can! Cutting your own hair bob might seem daunting, but with the right guidance, it's totally achievable. This article is your go-to guide, breaking down the process into simple, manageable steps. We'll start by gathering the necessary tools—think sharp scissors, not your kitchen shears! Then, we'll move on to the actual cutting, with clear instructions on how to section your hair and achieve that perfect bob length. Finally, we’ll give you some tips to keep your new hairstyle looking fresh. Forget expensive salons; you're about to learn how to cut your own hair bob and rock a fabulous new look, all from the comfort of your own bathroom. Let’s get started!
Gather Your Tools Before You Cut Your Own Hair Bob
Gather Your Tools Before You Cut Your Own Hair Bob
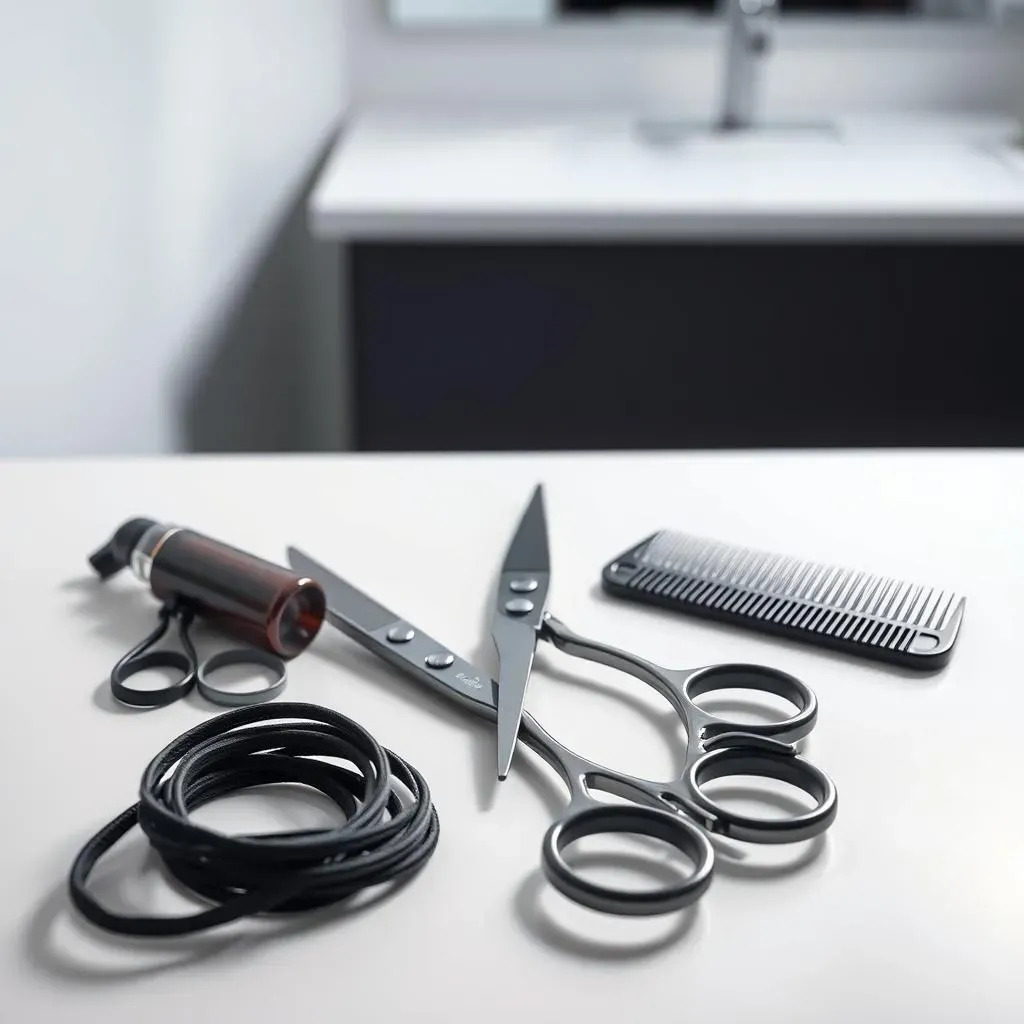
Okay, so you're ready to take the plunge and cut your own hair into a bob? Awesome! But before you grab any old scissors, let's talk tools. Think of it like baking a cake; you wouldn't use a spoon to measure flour, right? Same deal here. You'll need a good pair of hair-cutting shears, not the ones you use for paper. These are sharper and give a cleaner cut. Then, a comb with fine teeth is your best friend for sectioning and making sure everything is even. Hair ties are a must to keep different parts of your hair out of the way. If you're feeling fancy, you might want some hair clips too. And if you want to be super precise, grab a spray bottle with water to keep your hair damp while you work. Having all of this ready beforehand will make the process go much smoother. Trust me, preparation is key to avoid any hair-cutting mishaps!
Here’s a quick checklist to make sure you've got everything you need before you start.
Tool | Why You Need It |
|---|---|
Hair-cutting shears | For clean, precise cuts. |
Fine-tooth comb | To section your hair evenly. |
Hair ties or clips | To keep hair out of the way. |
Spray bottle | To keep hair damp. |
StepbyStep Guide for Cutting Your Own Hair Bob
StepbyStep Guide for Cutting Your Own Hair Bob
First Things First: Sectioning Your Hair
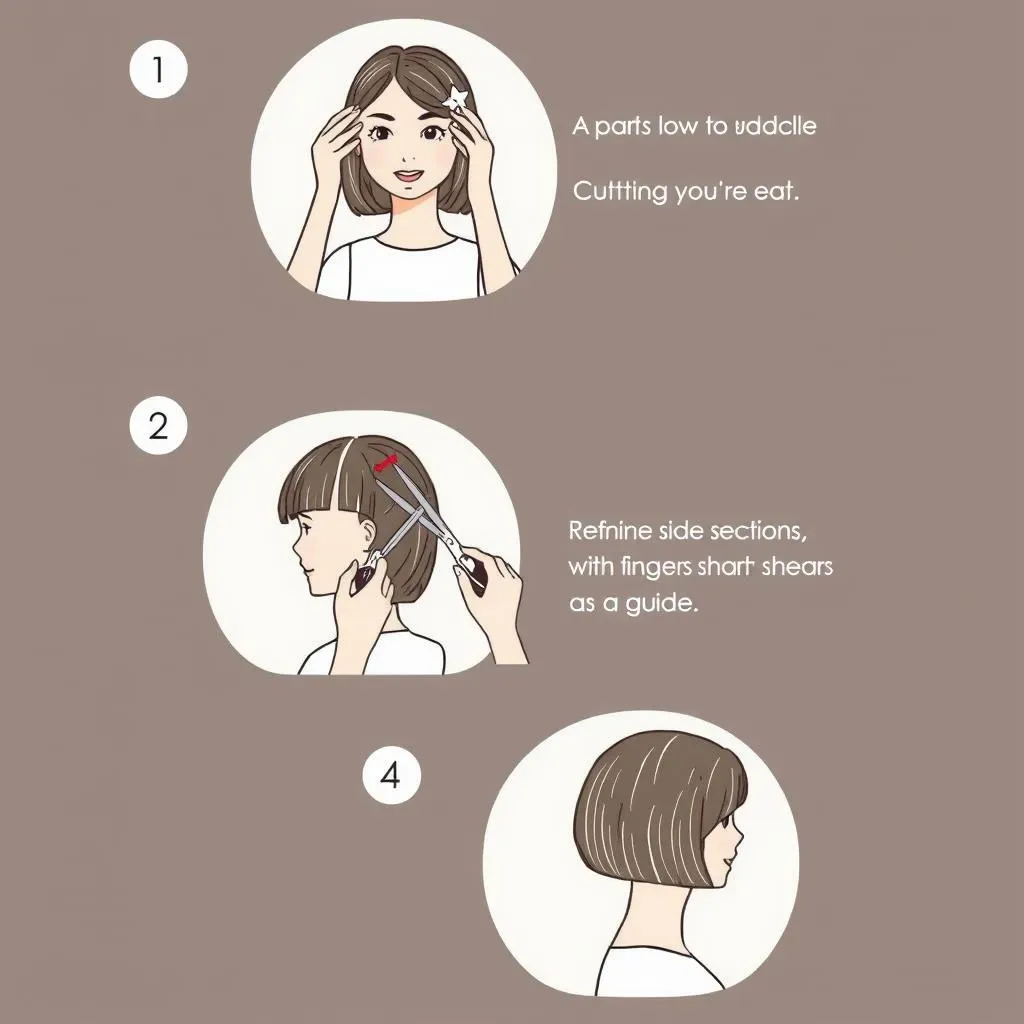
Alright, let's get to the actual cutting! The first step is sectioning your hair. This is crucial for getting an even bob. Start by making a clean part down the middle of your head, from your forehead to the nape of your neck. Then, create a horizontal section from ear to ear, essentially dividing your hair into a top and a bottom section. Tie up the top section to keep it out of the way. Now, the bottom section is what we'll be working with first. Divide that bottom section into two equal parts, and tie one side up. We’re going to tackle one side at a time. This might sound like a lot, but it's way easier than trying to cut everything at once.
Think of it like building with LEGOs; you wouldn't try to put all the pieces together at the same time, you build in sections.
The Big Chop: Cutting the Back
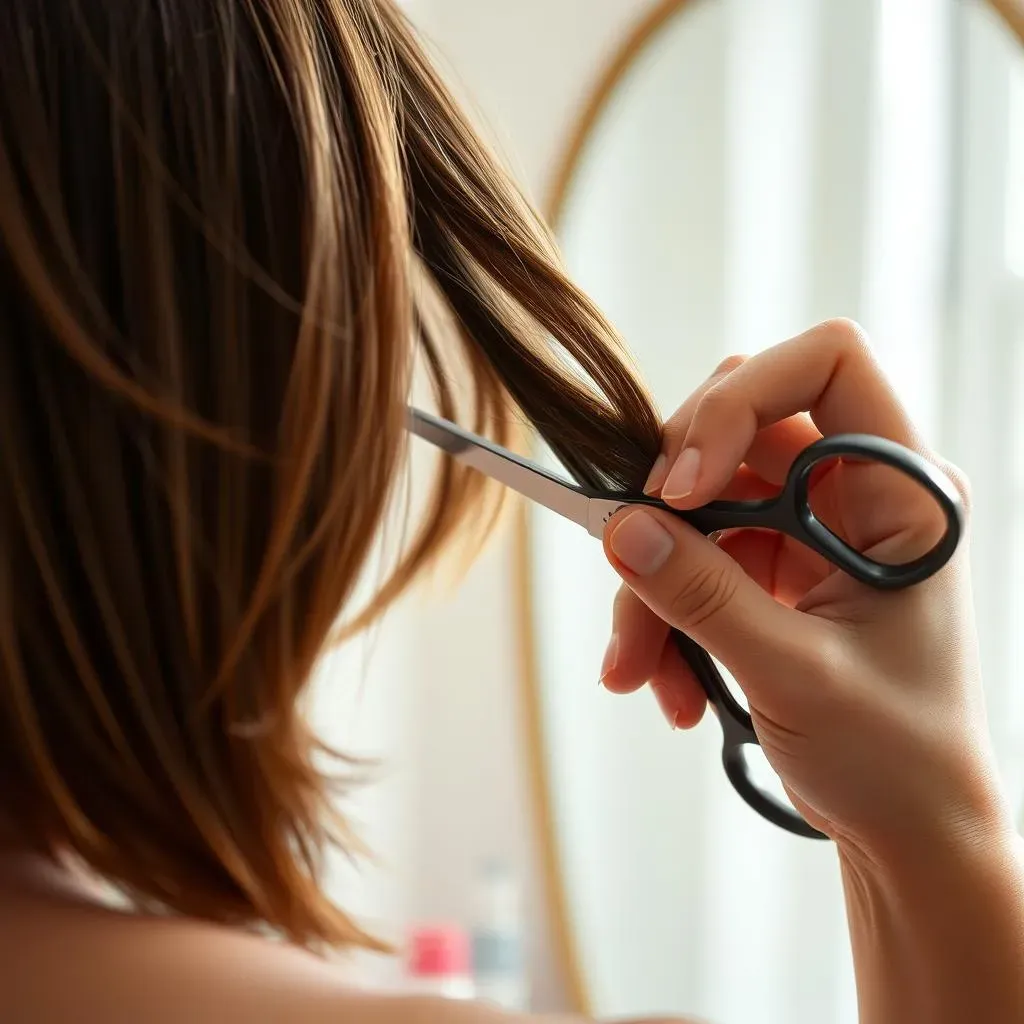
Now for the fun part, the actual cutting! Take that first section of hair you left down, and comb it out nice and smooth. Decide how long you want your bob to be, and remember, you can always cut more off, but you can't put it back. So, start a little longer than you think you want. Hold the section of hair between your fingers, and using your sharp shears, make a clean, horizontal cut. Use your fingers as a guide to keep the cut straight. Don't stress too much about being perfect on this first cut, it's just a guide. Once you have that done, repeat the process on the other side of the bottom section. Now, you have the back of your bob roughly cut. You can adjust the length and make any tweaks you need, making sure both sides are even.
Here's a little tip: after each cut, comb your hair down and check if the lengths match.
Step | Action |
|---|---|
1 | Part hair down the middle. |
2 | Section top part, ear to ear. |
3 | Divide bottom into two equal parts. |
4 | Cut one side of the bottom section. |
5 | Cut the other side of the bottom section. |
Refining and Shaping: The Sides
Okay, back to those top sections we tied up. Let them down, one side at a time. Comb them out and check to see how they match the back. Then, using the back as a guide, cut the side sections so they blend in with the back. This is where you get to shape your bob. If you want a more A-line bob, make the front pieces a bit longer than the back. Or, if you want it to be all one length, just match the sides to the back. Take your time here and make sure both sides are matching. Remember, it's better to cut a little at a time. Once you’re happy with the front and sides, comb it all together to make sure everything looks even and balanced.
"The best way to learn is by doing, so don't be afraid to make mistakes. Just remember, hair grows back!" - Anonymous Hair Enthusiast
Tips and Tricks for Maintaining Your Cut Own Hair Bob
Tips and Tricks for Maintaining Your Cut Own Hair Bob
Regular Trims Are Key
Alright, so you've got your bob, and it looks amazing! But here’s the thing: bobs need a little upkeep to stay sharp. Think of it like a lawn; if you don't mow it, it gets all shaggy and uneven. The same goes for your bob. To keep it looking fresh, plan for mini-trims every 4-6 weeks, depending on how fast your hair grows. This doesn't mean you have to do a full cut every time, just a little snip to keep the lines crisp. You can totally do this yourself, or if you're feeling a little nervous, a quick visit to a salon can do the trick. The key is consistency; it will help maintain the shape and prevent any weird, uneven growth.
I remember the first time I tried to maintain my bob. I waited way too long, and it started to look like a weird, overgrown helmet. Lesson learned: regular trims are a must!
Styling and Product Tips
Now, let’s talk styling. Bobs are super versatile, which is why they're so great. You can wear them sleek and straight, tousled and textured, or with some fun waves. The key is finding what works best for your hair type and your personal style. A little bit of styling product can go a long way here. For a sleek look, a smoothing serum or a light hair oil can do wonders. If you're going for texture, try a sea salt spray or a texturizing paste. And if you’re all about volume, a root-lifting spray or mousse can be your best friend. Don't be afraid to experiment and see what makes your bob look its best. And remember, less is often more, so start with a small amount of product and build up as needed.
It’s all about finding the right balance!
Tip | Description |
|---|---|
Regular Trims | Snip every 4-6 weeks to maintain shape. |
Styling Products | Use serums, sprays, or paste for desired look. |
Experiment | Try different styles to find what suits you. |
Dealing with Uneven Ends
Okay, let’s be real, sometimes you might end up with a few uneven ends, especially when you're cutting your own hair. Don’t panic; it happens to the best of us. The key is to not try to fix it all at once. Instead, try lifting small sections of your hair and very carefully trim the longer pieces until they blend in with the rest. If you have thinning shears, they can be really helpful for blending those ends and removing some volume. But be careful not to overdo it; thinning shears can be tricky! If you’re feeling overwhelmed, it’s always a good idea to get a professional to fix any major mistakes. Think of it as a learning experience; each cut gets you a little bit better.
"Mistakes are proof that you're trying." - Some wise person
When to Call in the Pros
While cutting your own hair bob can be empowering, there are times when you should definitely call in the professionals. If you're attempting a complicated style or you've made a major cutting error, a salon is your best bet. Think of it like this: you wouldn't try to fix a broken arm yourself, right? Sometimes, hair needs the same level of expertise. Don’t be ashamed to ask for help; even seasoned DIYers need a hand sometimes. A good stylist can not only correct any mistakes but also give you tips and advice for maintaining your bob at home. Remember, it's all about feeling confident and happy with your hair.
It's okay to admit when you need a little help!
- Don't overdo it with thinning shears.
- If unsure, seek professional help.
- Learn from any mistakes.
Your DIY Bob: A Cut Above the Rest
So, there you have it—a complete guide on how to cut your own hair bob. It might seem a bit scary at first, but with patience and a steady hand, you can achieve a great-looking bob without stepping foot in a salon. Remember to start slow, take your time, and don’t be afraid to make small adjustments. Like any skill, practice makes perfect, and with each trim, you'll get better and more confident. Now go ahead, grab those scissors, and show off that amazing DIY bob you created all by yourself. You got this!