Table of Contents
Ever looked at a stylish short bob and thought, "I could totally rock that," but the salon prices made you cringe? Well, guess what? You can! This guide is all about empowering you to learn how to cut your own hair in a short bob, right in the comfort of your own home. Forget those pricey appointments and say hello to a fresh new look created by yours truly. We’ll start by gathering everything you need, because no one wants to be halfway through a haircut and realize they're missing a vital tool. Then, we’ll move step-by-step through the process of cutting your own short bob, making sure to keep it simple. Finally, I’ll give you the lowdown on how to keep your fresh style looking sharp. Get ready to unleash your inner stylist and discover how to cut your own hair in a short bob!
Gathering Your BobCutting Arsenal
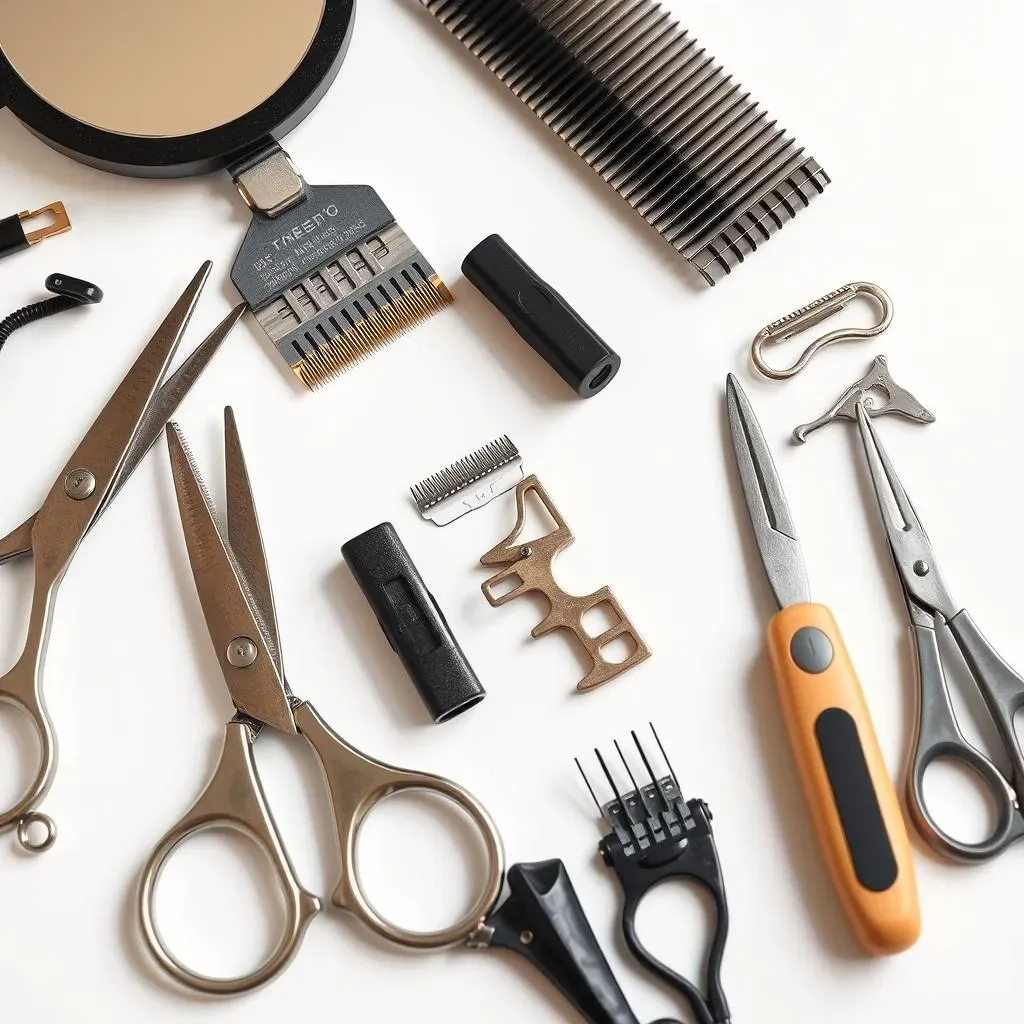
Gathering Your BobCutting Arsenal
Alright, so you're thinking about taking the plunge and doing a DIY bob? Awesome! First things first, you can't just grab any old scissors and start hacking away. You need the right tools, trust me. Think of it like a chef needing their knives. Here's what you'll need: a good pair of hair-cutting shears – not your kitchen scissors, those are a no-go! A hair razor is also super helpful for shaping and blending, and some electric hair clippers can be great for getting a super sharp line. You'll also need some sectioning clips to keep your hair out of the way, a comb, and a mirror, of course. Oh, and maybe a towel to catch all the falling hair, unless you like finding hair bits in your socks for the next week. Getting this stuff together is half the battle, so let’s make sure we are set up for success.
StepbyStep: Cutting Your Own Short Bob
StepbyStep: Cutting Your Own Short Bob
Sectioning Your Hair
now for the fun part, but don't get too scissor-happy just yet. First, we need to divide your hair into sections. Think of it like a map, we're charting a course for our bob masterpiece. Use your comb to create three even sections: one at the back of your head and one on each side. Secure each section with a ponytail holder or sectioning clip. This keeps things tidy and makes sure you're not accidentally snipping off more than you intended. It’s all about precision here, not a free-for-all hair massacre, so let’s take our time.
Making the First Cut
Now, grab those hair-cutting shears, take a deep breath, and let's get started. We'll begin with the back section. Hold the section of hair straight out, and with your scissors, cut straight across, moving the hair tie up or down depending on how short you want your bob to be. Remember, it's always better to start a little longer, you can always go shorter, but you can’t glue it back on! Once the back section is done, you’ll have a good idea of how short the rest of your bob should be. Now, don't panic if it's not perfect, it’s just the first cut, we can shape it up later.
- Start with the back section
- Cut straight across
- Adjust hair tie for length
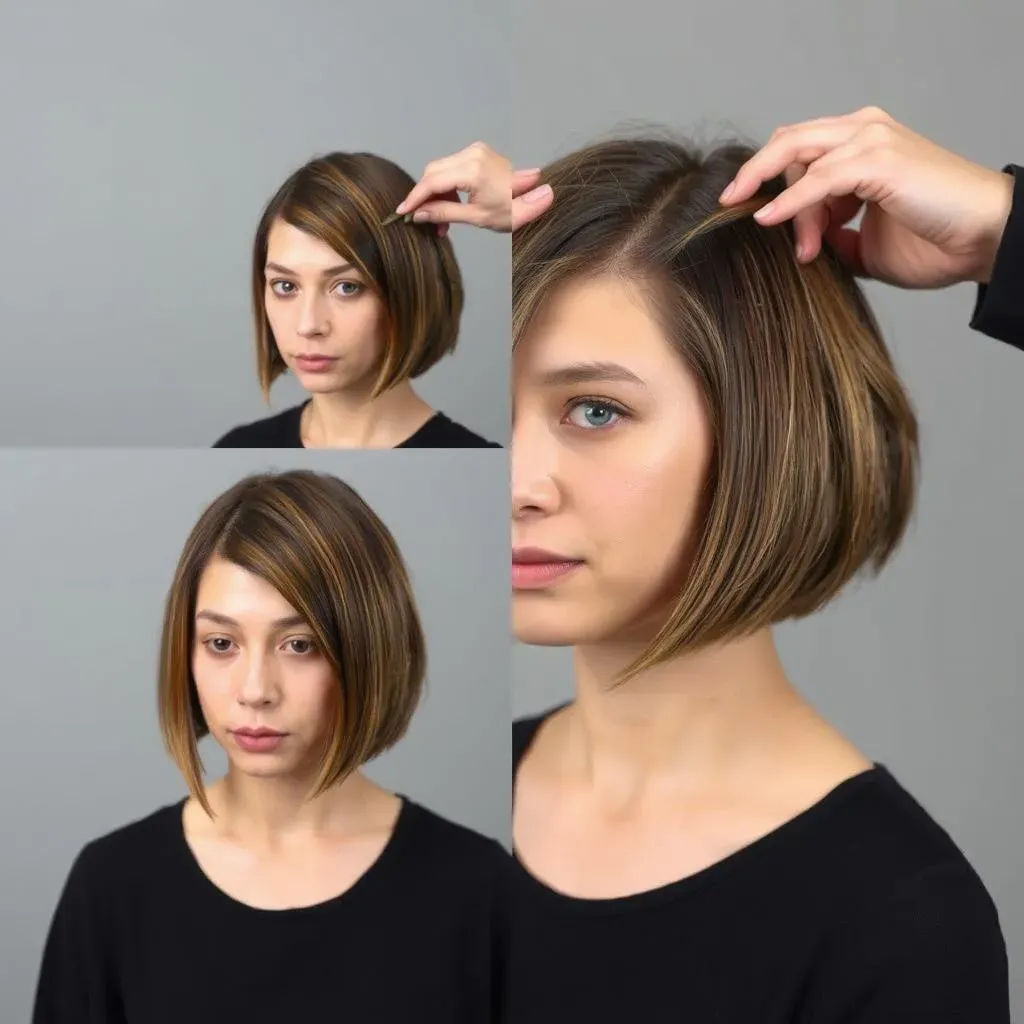
Shaping the Sides and Adding Texture
Now, for the sides, we're going to use that hair razor to shape the hair until it matches the back and is the length you're going for. It's like sculpting, but with hair. Use light, feathery strokes, and take your time. Don't rush this part, it's where the bob really starts to take shape. And if you want to add some volume, cut layers by combing out a section of hair and then trimming the ends with your scissors. Finally, to blend the ends, lift small pieces of hair and run the razor down the ends in a downward, angled motion. This is like the secret sauce to a perfect bob, so take your time and make it count.
Maintaining Your Freshly Cut Short Bob

Maintaining Your Freshly Cut Short Bob
The 4-6 Week Rule
so you've got your awesome new bob, and it looks amazing. Now, here’s the thing: a short bob is a bit like a high-maintenance plant; it needs regular care to stay looking its best. Unlike longer styles, a short bob can lose its shape pretty quickly as it grows out. To keep that sharp, clean line, you’re gonna need to trim it fairly often. I’m talking about every 4-6 weeks. This might sound like a lot, but trust me, it's worth it. Think of it as a quick touch-up rather than a full-on haircut. You can do it yourself using the same techniques we just talked about, or visit a pro for a quick shape-up. The key is to be consistent if you want to maintain the look.
Trimming and Thinning
Now, let's talk about keeping your bob looking sharp and not like a fluffy mushroom. When you’re doing those maintenance trims, pay attention to the ends of your hair. You can use thinning shears to add some texture and remove bulk. Just be careful, these tools are powerful, and you don't want to overdo it. A good rule of thumb is to avoid using thinning shears in the middle or near the top of your hair, unless you want a super choppy look. Focus on the ends to keep things light and airy. Also, remember that you don’t have to do a full chop every time, just a little trim here and there to maintain the shape and keep it fresh. If you are not confident, you can always go to a professional.
Maintenance Task | Frequency | Tips |
|---|---|---|
Trimming | Every 4-6 weeks | Start with small trims, always better to cut less |
Thinning | As needed | Focus on the ends, avoid the roots |
Professional Touch Up | Optional | Great for complex styles or if you are not confident |
Wrapping Up Your DIY Bob
So, there you have it—your very own, freshly cut bob! Learning how to cut your own hair in a short bob might seem daunting at first, but with a bit of patience and the right tools, it’s totally achievable. Remember, it’s okay if it’s not absolutely perfect the first time; practice makes progress. And hey, if it gets a little wonky, that's what hats and headbands are for, right? The key takeaway here is that you’ve saved some cash and gained a new skill. Now go on, rock that bob with pride, and maybe even inspire a friend to join the DIY haircut club!