Ever stared at your reflection, wishing for a chic bob, but dreading the salon bill? I've been there! The good news is you can totally rock a stylish bob without stepping foot in a salon. This guide will show you exactly how to cut your own hair into a bob. We'll cover everything, from grabbing the right tools to adding those final touches that make your bob look professionally done. Forget those expensive salon visits, and get ready to take control of your style. We'll break it down into easy-to-follow steps, so even if you've never cut your own hair before, you'll feel confident giving yourself a fresh new bob. We will start by gathering all the tools you will need, then we'll prep your hair, dive into the actual cutting process, and finally, we'll get to those finishing touches that will make your bob look fabulous. Let's get started and unleash your inner stylist!
Gather Your Hair Cutting Arsenal
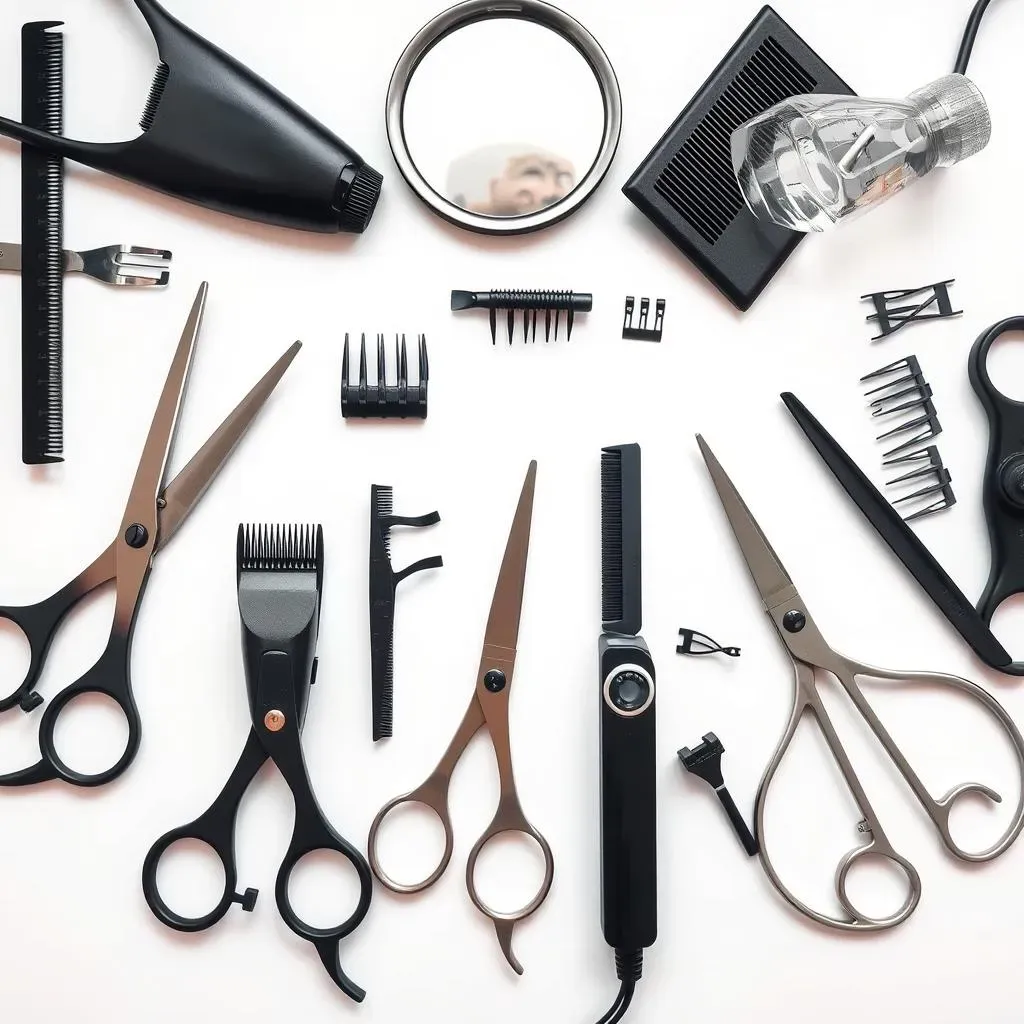
Gather Your Hair Cutting Arsenal
The Essential Tools: Your Haircutting Kit
so you're ready to chop some hair? First things first, let's talk tools. You can't just grab any old scissors from the junk drawer – trust me, I've tried. You'll need a decent pair of haircutting shears. These are different from your kitchen scissors; they're sharper and designed for clean cuts. Next up, consider a good set of electric hair clippers, especially if you're aiming for a super precise bob, or want to clean up the edges. Finally, a hair razor can be your best friend for shaping and adding texture. It's like sculpting, but with hair! Having these three will give you options.
Before I forget, think about getting a comb and some hair clips to section off your hair, which will make the whole process way easier. And, of course, a mirror – preferably one you can see the back of your head in, or even better, two mirrors. You'll feel like a real stylist once you have everything laid out.
Don't forget to lay down some old towels or newspaper on the floor. Hair gets everywhere, and you don't want to spend the rest of the day picking it up.
Optional But Helpful: Level Up Your Haircut
Now, let's talk about some extras. If you're feeling adventurous, grab some thinning shears. These are great for removing bulk and adding texture to the ends of your hair. They're not essential, but they can make a big difference if you want a more layered look. And a spray bottle with water is key for keeping your hair damp while you work, especially if you have thick hair that dries quickly. You don't want to be working with dry hair, it's not gonna go well. Also, if you mess up a little, it's easy to fix with some water.
Tool | Purpose | Why You Need It |
|---|---|---|
Haircutting Shears | Cleanly cuts hair | Sharp, precise cuts without damaging hair |
Electric Hair Clippers | Precise, even cuts | Great for edges and very short bobs |
Hair Razor | Shapes and textures | Creates soft, layered looks |
Comb & Hair Clips | Sectioning hair | Makes cutting organized and easy |
Mirror(s) | See your work | Essential for seeing the back of your head |
It's like a painter needs a palette, you need your tools ready.
Safety First: Handling Your Tools
Before you start snipping away, let's talk safety. Those shears are sharp, so handle them with care. Always cut away from your body, and never rush. It's better to take your time and get it right than to end up with a lopsided bob. The hair razor can be tricky, so watch some tutorials before you start using it, you dont want to cut yourself. And remember, if you're not feeling confident, it's okay to ask a friend for help. It's better to get help than to have a bad haircut. This is your hair, and we want you to love it.
Prep Your Hair for the Cut
Prep Your Hair for the Cut
Dry Hair is Key
so you've got your tools, now let's get your hair ready. This is super important: start with dry hair. I know, I know, it might seem easier to cut when it's wet, but trust me on this one. When your hair is wet, it stretches and looks longer than it actually is. This means you could end up cutting way more than you intended. Dry hair gives you a much better idea of the actual length you're working with, so you'll get a more accurate cut. Plus, it's easier to see how your hair naturally falls when it's dry, which helps with shaping your bob.
Think of it like this, if you are building a house with wet cement, the measurement will be off. Same with hair, you need dry hair to get an accurate cut. It's also way easier to see the shape and style your hair is going to take when it's dry. If you have curly hair, you know, the shrinkage is real. So dry hair it is.
Hair Condition | Why It Matters |
|---|---|
Dry Hair | Accurate length, natural fall, easier to shape |
Wet Hair | Stretches, inaccurate cut, harder to shape |
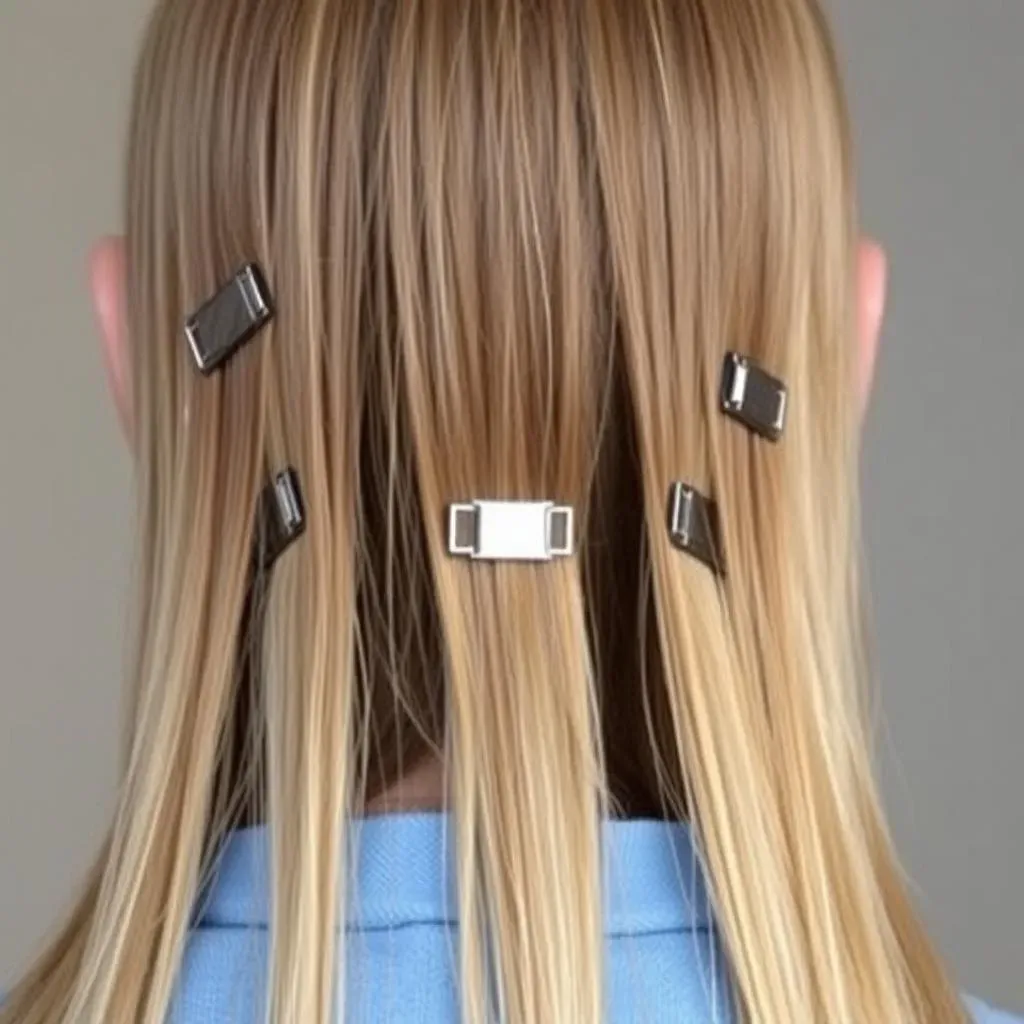
Sectioning for Success
Now, for the fun part, sectioning your hair. This is where those clips come in handy. You're going to divide your hair into three main sections. Imagine you're drawing a line from the top of one ear, over the crown of your head, to the top of the other ear. This is your first section—the back section. Clip the rest of your hair out of the way. Now, split the remaining hair down the middle, creating two side sections. Clip those up too. This way, you're only working with one section at a time, which makes the whole process way less overwhelming. It’s like organizing your closet before you try to find an outfit; it just makes sense.
I can’t stress enough how important this step is. It's like the foundation of a building, get it right and the rest will be smooth. Take your time, and make sure each section is neat and out of the way. This will prevent you from accidentally snipping off more than you wanted. Remember, slow and steady wins the race, or in this case, the bob. Once you're all sectioned off, you're officially ready to start cutting. Get excited!
The Bob Cut: StepbyStep
The Bob Cut: StepbyStep
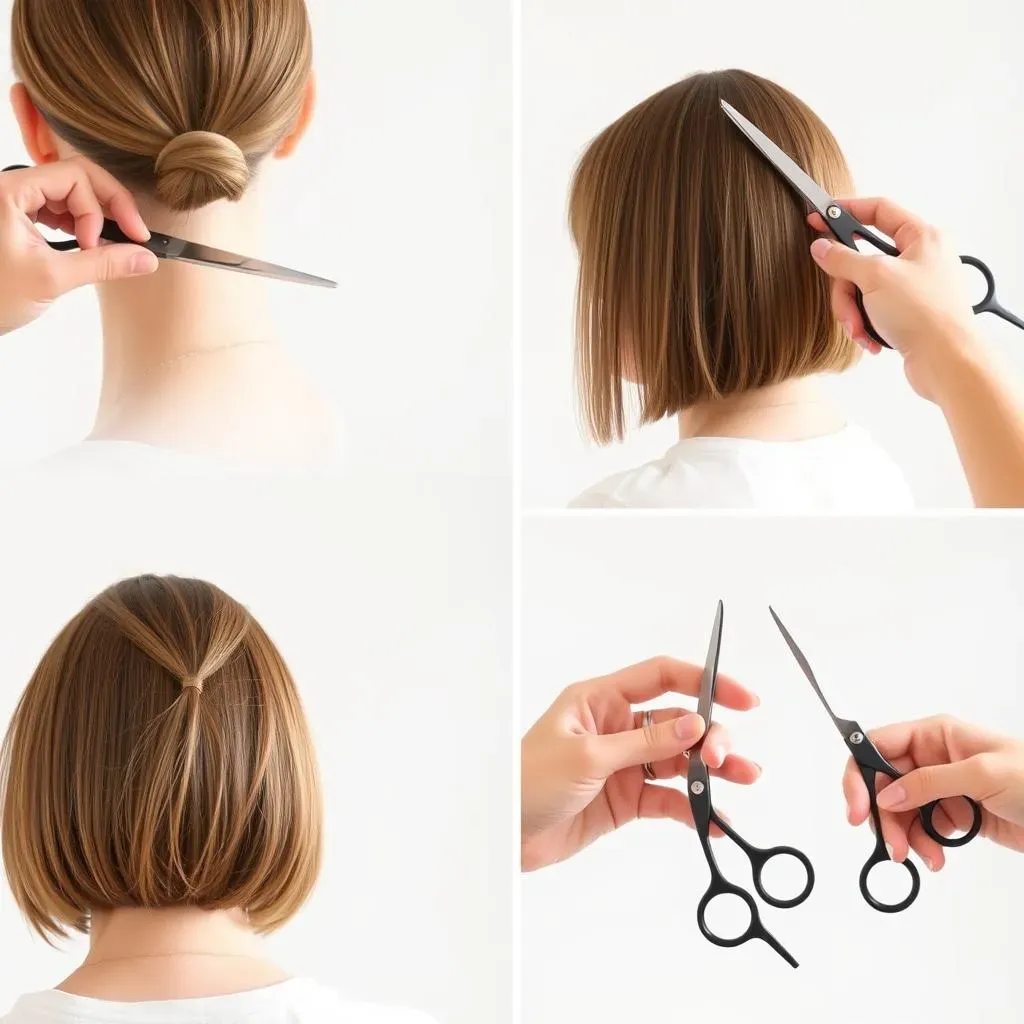
First Snip: The Back Section
Alright, you've got your hair sectioned, now comes the moment of truth. Start with that back section – the one you clipped away first. Grab your scissors, or clippers, and decide how short you want your bob to be. Remember, it's always better to start a little longer, you can always go shorter later. I like to start by moving the hair tie down to where I want the final length to be. Then, I cut straight across, below the tie. If you're using clippers, do the same, but be extra careful to keep them moving smoothly. Try to get an even cut all the way across the back ponytail so the back section will appear straight and even. Don't worry if it's not perfect, we'll clean it up later. It's like sketching with a pencil, you can always erase and try again.
Once you've made your first cut, release that back section and let it hang naturally. It's time to get a feel for how it looks. It might feel a little uneven right now, and that's okay, we're not done yet! Take a step back and look at it in the mirror. Do you like the length? Do you want it shorter? This is your chance to adjust before moving on to the sides. Remember, we're going for a bob, not a bowl cut, so take your time and be precise. And if you mess up, it is just hair, it will grow back.
Shaping the Sides
Now, onto the sides. Unclip one of your side sections. You can use your hair razor to start to shape the sides. Start at the bottom, and using a downward, angled motion, begin to shape and texturize the ends. If you don't have a razor, you can use scissors, but make sure you are pointing them down and in, to get a good, soft cut. The goal here is to make sure the sides blend smoothly with the back section. You don't want any harsh lines. It's like blending colors in a painting – you want a seamless transition. Take your time with this, and keep checking in the mirror to see how it's coming along. Remember, it's all about balance and symmetry.
Repeat the same process on the other side, making sure both sides match. This is where those two mirrors come in handy, so you can see all angles. Take a step back every few cuts to make sure everything looks even. This is where the art of hairdressing comes in, and it's okay if it takes a few tries. It's like learning to ride a bike, you might wobble a bit at first, but eventually, you'll get the hang of it. Don't be afraid to experiment and adjust as you go. This is your bob, after all, make it your own.
Step | Description | Tool |
|---|---|---|
Cut the back section | Cut straight across at desired length. | Scissors or clippers |
Shape the sides | Blend sides with back section. | Hair Razor or scissors |
Adding Volume and Texture
So, you've got the basic bob shape, but maybe you want to add a little something extra? This is where we can add some layers and texture. If you want volume, grab your scissors and trim the ends of your hair by pointing the scissors down and in. This will add some layers and movement to your bob. You can also use your thinning shears to remove bulk from the ends of your hair. Just be careful not to go overboard, you can always take more off, but you can't put it back on. This is like adding seasoning to a dish, a little bit can go a long way.
Finally, blend everything together. Run your hair razor through the bottom part of your hair, in a downward, angled motion. This will soften any harsh lines and create a more natural, effortless look. It's like giving your bob a final polish. And there you have it, a DIY bob! Now, you can style it as you want. You can wear it sleek and straight, or add some waves for a more casual look. The choice is yours. Isn't it amazing, you did that all by yourself? I'm so proud of you!
Finishing Touches for Your DIY Bob Haircut
Finishing Touches for Your DIY Bob Haircut
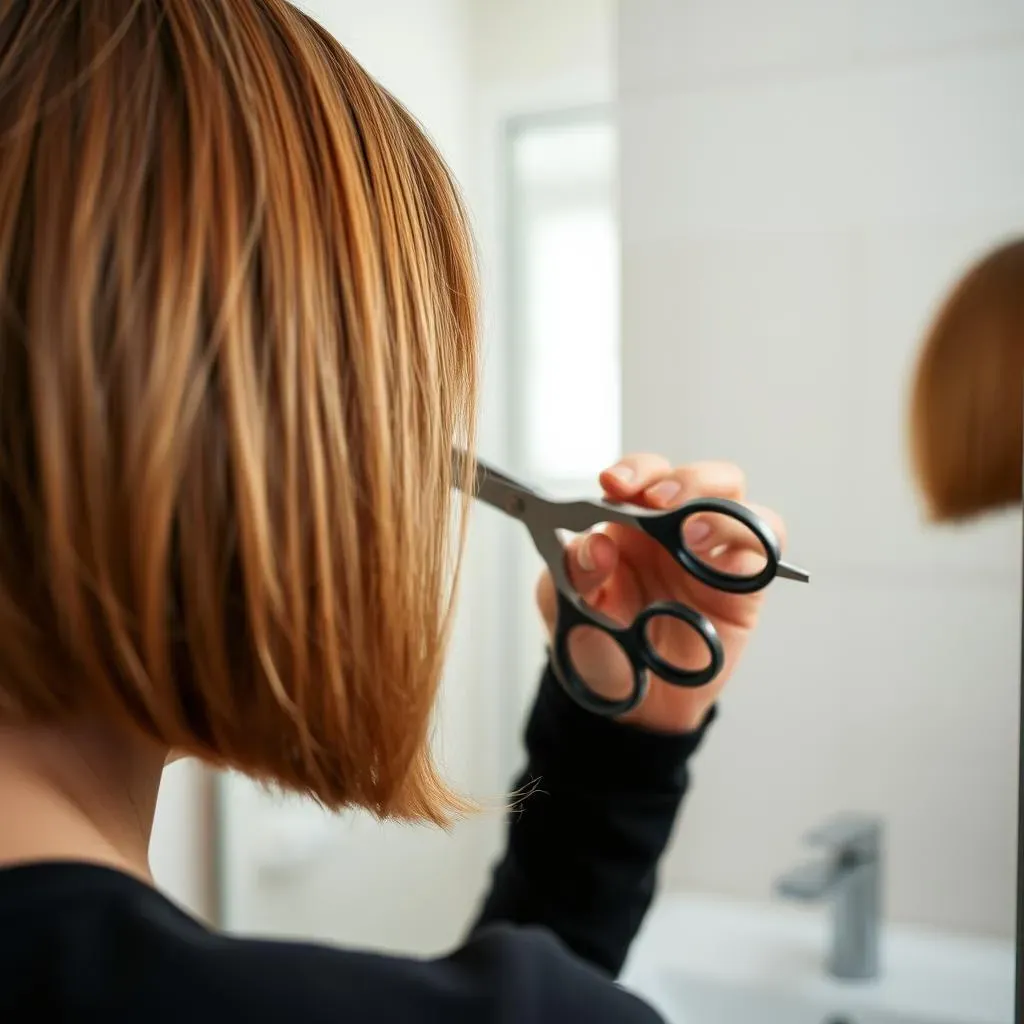
The Final Check: Smoothing and Shaping
so you've got your bob cut, but we're not quite done yet. Now, it's time for the final check. Stand in front of your mirror and take a good look at your hair from all angles. Are there any uneven bits? Any strands sticking out? This is where you grab those scissors or your hair razor again and do some fine-tuning. Remember, small snips are the way to go. It's like editing a piece of writing – you want to make sure everything flows smoothly and there are no awkward bits. This is the moment to really sculpt your bob into the shape you envisioned. You've come this far, so don't rush this final step. A little attention to detail can make a huge difference.
Pay special attention to the edges of your bob. Are they nice and clean? If not, use your scissors to trim any stray hairs. If you have a textured bob, use your hair razor to add some more soft edges. This will give your bob a more natural, effortless look. Remember, the goal here is to make it look like you just stepped out of a salon, not like you did it yourself in your bathroom. You're aiming for a polished, professional finish. You've got this!
Styling Your New Bob
Now that your bob is perfectly cut, let's talk styling. The beauty of a bob is that it's so versatile. You can wear it sleek and straight, add some waves for a more casual look, or even curl it for a night out. Experiment with different products like mousse, hairspray, or texturizing sprays to see what works best for your hair type and the look you're going for. Don't be afraid to play around and have fun with it. It's like getting a new toy – you want to try all the different ways you can play with it. A good styling routine can make a world of difference.
Style | How to Achieve It | Best For |
|---|---|---|
Sleek and Straight | Use a flat iron and smoothing serum. | Professional, polished looks |
Wavy | Use a curling wand or texturizing spray. | Casual, effortless styles |
Curled | Use a curling iron and hairspray. | Glamorous, evening styles |
Maintaining Your Bob: Trimming and Care
So, you've got your gorgeous DIY bob, but how do you keep it looking fresh? The key is regular trims. A short bob needs to be trimmed every 4-6 weeks to maintain its shape and prevent it from looking overgrown. If you're feeling confident, you can try trimming it yourself. Just follow the same steps we talked about earlier, but only take off a little bit at a time. If you're not comfortable trimming it yourself, it's always a good idea to visit a professional to get it done. It's like taking your car for regular check-ups; it keeps it running smoothly.
Also, be sure to use the right products for your hair type. A good shampoo and conditioner can make a big difference in how your bob looks and feels. And don't forget to protect your hair from heat when using styling tools. It's like taking care of a plant, you want to make sure it's healthy and thriving. With a little bit of care and maintenance, your DIY bob will look great for weeks to come. You should be so proud of yourself for learning how to cut your own hair into a bob.
Wrapping Up Your DIY Bob
So, there you have it! Cutting your own hair into a bob might seem a little daunting at first, but with a little patience and the right steps, you can totally nail it. Remember, it's all about taking it slow, checking your work, and not being afraid to make tiny adjustments. If you're nervous, start with a longer length, you can always go shorter! Now you've got a fresh bob, and you've saved some cash too. Go ahead and rock that new look with confidence! Keep practicing, and you'll become a pro at maintaining your bob at home. Just remember, regular trims are key to keeping your bob looking sharp. You got this!