Table of Contents
Ready to unleash the full potential of your gorgeous curls? This layered curly hair cut guide is your ultimate resource for achieving the perfect look. Whether you're a seasoned curl enthusiast or a complete beginner, we'll walk you through everything you need to know. First, we'll help you understand your unique curl type and face shape – this is crucial for choosing a style that truly flatters you. Next, we'll explore a range of stunning layered cuts, from classic to trendy, showing you what works best with different curl patterns and hair lengths. Feeling adventurous? We'll even share some safe and effective DIY techniques for trimming your own layers at home (but remember, a professional stylist is always the safest bet!). Finally, we'll cover the essential maintenance tips and products to keep your layered curls looking bouncy, healthy, and vibrant. So, get ready to discover the transformative power of a well-layered cut and embrace your naturally beautiful curls! Let's dive in and find the perfect layered curly hair cut for you.
Understanding Your Curl Type and Face Shape

Understanding Your Curl Type and Face Shape
Decoding Your Curls
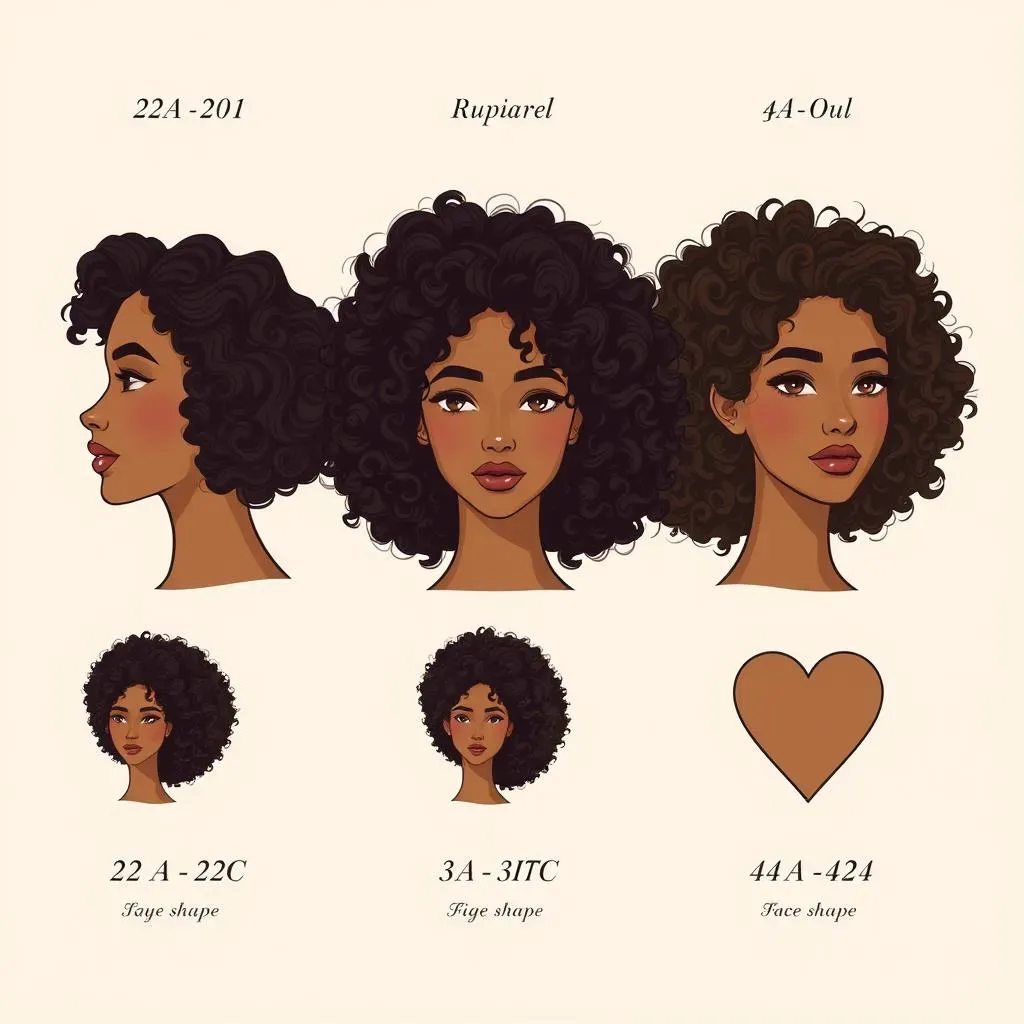
Before you even think about scissors, you need to know your curl type! Think of it like choosing the right tool for the job – you wouldn't use a hammer to screw in a screw, right? Similarly, different curl types react differently to layers. There are tons of systems out there, but a simple way to categorize them is loose waves (2A-2C), tighter curls (3A-3C), and super tight coils (4A-4C). Knowing your curl type helps you predict how your hair will behave with layers. For example, loose waves might need less layering than tighter curls to avoid looking too flat. Check out our guide on best haircuts for curly hair for more info!
Once you've figured out your curl type, it's time to look at your face shape. This is all about finding a layered cut that complements your features. Think of it as framing a beautiful picture; you want the frame to enhance, not detract, from the art. Round faces often look great with layers that add height and length, while square faces might benefit from softening layers around the jawline. A heart-shaped face might suit layers that add volume at the bottom. Finding the right style can really make a difference!
Curl Type | Description | Layering Considerations |
|---|---|---|
2A-2C (Waves) | Loose, wavy hair | Subtle layers to add movement |
3A-3C (Curls) | Defined ringlets and curls | More pronounced layers for definition and volume |
4A-4C (Coils) | Tightly coiled hair | Careful layering to avoid shrinkage and maintain shape |
Finding Your Perfect Match
Let's talk about face shapes! Round faces often benefit from layers that add height on top and length around the sides, creating a more elongated look. Think of it like adding a vertical element to a circle. Square faces, on the other hand, might want layers that soften the jawline and add volume around the crown. This helps to balance out strong angles. Oval faces are versatile; they can carry off almost any layered style. For heart-shaped faces, layers that add volume at the bottom help balance the wider forehead. Consider these tips when choosing your layered cut. If you have a round face, you might want to look at our post on curly hair cuts for round faces for more ideas.
Remember, this is just a starting point. There are so many variations and combinations possible! Don't be afraid to experiment and find what makes you feel confident and beautiful. You can always consult a stylist for personalized advice. The key is to find a layered style that enhances your natural curl pattern and complements your face shape. It’s all about bringing out your best features!
- Round Face: Layers for height and length
- Square Face: Softening layers around the jawline
- Oval Face: Versatile, can handle most styles
- Heart Face: Volume at the bottom
Choosing the Right Layered Cut for Your Hair

Choosing the Right Layered Cut for Your Hair
Long Layers for Volume and Movement
Long layers are your best friend if you're aiming for a look that's both voluminous and dynamic. Imagine a waterfall – the layers create that cascading effect, adding movement and bounce to your curls. This style works particularly well for those with medium to long hair, adding definition without sacrificing length. Think of it as a gentle way to enhance your natural texture, letting your curls shine. It's a classic choice for a reason! Long layers also give you the option to easily style your hair up or down, offering versatility for any occasion. For more inspiration, check out our guide to medium-length curly hair cuts.
One thing to keep in mind with long layers is that they might require a bit more styling to keep them looking their best. A good leave-in conditioner and a curl-enhancing product can work wonders! Also, consider the placement of your layers – strategically placed layers can help to balance out your face shape, adding height where needed and minimizing any areas you want to downplay. Think of it as sculpting your curls to perfection.
- Adds volume and movement
- Works well with medium to long hair
- Versatile styling options
Short Layers for Defined Curls
If you're rocking shorter curls and want to add definition and shape, short layers are the way to go. Think of them as tiny spotlights, highlighting the beauty of each individual curl. This style is great for adding texture and preventing your hair from looking too flat or heavy. Short layers can be particularly flattering on those with tighter curl patterns, creating a bouncy, voluminous look. This style is lower maintenance than long layers, meaning less time styling and more time enjoying your fabulous curls! For more ideas on short curly cuts, take a peek at our article on best curly haircuts for thin hair.
However, short layers can sometimes require more frequent trims to maintain their shape and prevent them from looking uneven. It's a small price to pay for perfectly defined curls, though! Also, remember that the length of your layers will significantly impact the overall look. Shorter layers will create a more textured, choppy look, while slightly longer layers will offer a softer, more blended appearance. Choose wisely!
Layer Length | Effect | Best for |
|---|---|---|
Short | Textured, choppy | Tighter curl patterns |
Slightly Longer | Softer, blended | Looser curl patterns |
Layered Lob: The Best of Both Worlds
The layered lob (long bob) is a fantastic compromise between long and short layers, offering the best of both worlds. It allows for volume and movement, similar to long layers, but with a more manageable length. It's incredibly versatile, working well with a variety of curl types and face shapes. Imagine the perfect blend of chic and playful – that's the layered lob in a nutshell. It’s a stylish choice that’s easy to manage and maintain, making it a popular choice among curly-haired individuals. For more tips on maintaining your curls, check out our guide on curly hair cut maintenance.
The key to a successful layered lob is finding the right length to complement your face shape and curl pattern. A stylist can help you determine the ideal length and layering technique to create a flattering and stylish look. Remember, the goal is to enhance your natural curls, not to fight against them. A well-executed layered lob will accentuate your curls’ natural bounce and movement, creating a look that’s both effortlessly chic and undeniably you. Embrace the versatility of this timeless cut!
DIY Layered Cuts: Tips and Techniques for Home Haircuts

DIY Layered Cuts: Tips and Techniques for Home Haircuts
Taking the Plunge: DIY or Pro?
So, you're thinking about tackling those layers yourself? Brave soul! While I wouldn't recommend this for a complete hair overhaul, some simple layering techniques are totally doable at home, especially if you're just aiming for a little more movement or to trim split ends. Remember, though, a professional stylist is always your safest bet for a truly transformative cut. If you’re feeling unsure, maybe check out our guide on cutting curly hair at home for some beginner-friendly tips. But if you're ready to give it a go, let's get started!
Before you grab those scissors, gather your tools: a spray bottle, a wide-tooth comb, sharp hair-cutting shears (not your regular scissors!), and some clips. Work in sections, starting with the bottom layer. Remember, you can always take more off, but you can't put it back! Start with small snips, and take your time. It’s better to err on the side of caution. Remember, patience is key! For those with longer hair, consider looking at our guide on medium length curly haircuts for some inspiration.
- Spray bottle
- Wide-tooth comb
- Sharp hair-cutting shears
- Hair clips
Sectioning and Point Cutting
Sectioning is your best friend when it comes to DIY layering. Divide your hair into manageable sections, using clips to keep them separate. This ensures even layering and prevents accidental mishaps. Think of it as creating a roadmap for your haircut. Once you've sectioned your hair, point cutting is a great technique for adding texture and movement without taking off too much length. Instead of cutting straight across, hold your scissors vertically and snip into the ends of your hair at an angle. This creates soft, feathery layers that enhance your curls’ natural bounce. Point cutting is particularly effective for adding dimension to your curls without drastically altering their length. For a more detailed guide on maintaining your curls, check out our curly hair maintenance tips.
Remember, less is more when it comes to DIY layering. Start with small snips and gradually work your way to the desired length. It's always better to take off less than you intended and go back for more than to end up with a haircut you regret. Always work on dry hair, as wet hair shrinks when it dries, potentially leaving you with an uneven cut. Dry hair allows you to see exactly how your curls will fall after a trim. If you're unsure about certain techniques, consider checking out our article on curly vs straight hair cuts to learn more about the differences.
Technique | Description | Benefits |
|---|---|---|
Sectioning | Dividing hair into manageable sections | Even layering, prevents mistakes |
Point Cutting | Snipping into ends at an angle | Adds texture, movement, and dimension |
Maintaining Your Layered Curly Hair: Products and Styling

Maintaining Your Layered Curly Hair: Products and Styling
The Power of Products
Let's be real, the right products are game-changers for layered curly hair. Think of them as the secret weapons in your styling arsenal. A good leave-in conditioner is essential for hydration and detangling, preventing breakage and frizz. It's like giving your curls a big, refreshing drink of water. Follow that up with a curl cream or gel to define your curls and enhance their natural bounce. This adds structure and helps your layers fall beautifully. A lightweight oil can add shine and further combat frizz, but use sparingly to avoid weighing down your curls. Experiment to find the perfect combination for your hair type. For more advice on choosing the right products, check out our guide on curly hair maintenance tips.
Remember, applying products correctly is key. Use the "praying hands" method to distribute the product evenly throughout your hair, ensuring each curl is coated. Avoid over-applying products, as this can lead to build-up and weigh down your hair. Start with a small amount and add more as needed. Consider your curl type when choosing products – those with tighter curls might need heavier products to define their curls, while those with looser curls might prefer lighter products to avoid weighing them down. Experiment to find what works best for you!
- Leave-in conditioner
- Curl cream or gel
- Lightweight oil
Styling Techniques for Layered Perfection
Styling your layered curls is all about embracing your natural texture and enhancing your layers’ unique movement. Avoid harsh brushing, which can cause frizz and breakage. Instead, use your fingers or a wide-tooth comb to gently detangle your hair. Consider techniques like diffusing (using a hair dryer with a diffuser attachment) or air drying to enhance your curls’ definition. Diffusing helps to create volume and lift at the roots, while air drying allows your curls to fall naturally. Different techniques will give you different results. For more ideas on styling your curly hair, you might want to check out our page on best curly haircuts.
Experiment with different styling techniques to find what works best for your hair type and desired look. Consider using a curl-enhancing mousse or foam for added volume and hold. You can also try creating braids or twists to enhance your curls' definition and create interesting textures. Remember, the goal is to create a look that’s both stylish and effortless. Don't be afraid to experiment and find what makes you feel confident and beautiful! Regular trims are also important to maintain your layered cut and prevent split ends. This will help your curls stay healthy and bouncy.
Styling Technique | Description | Benefits |
|---|---|---|
Diffusing | Using a diffuser attachment on a hairdryer | Adds volume and lift |
Air Drying | Letting hair dry naturally | Enhances natural curl pattern |